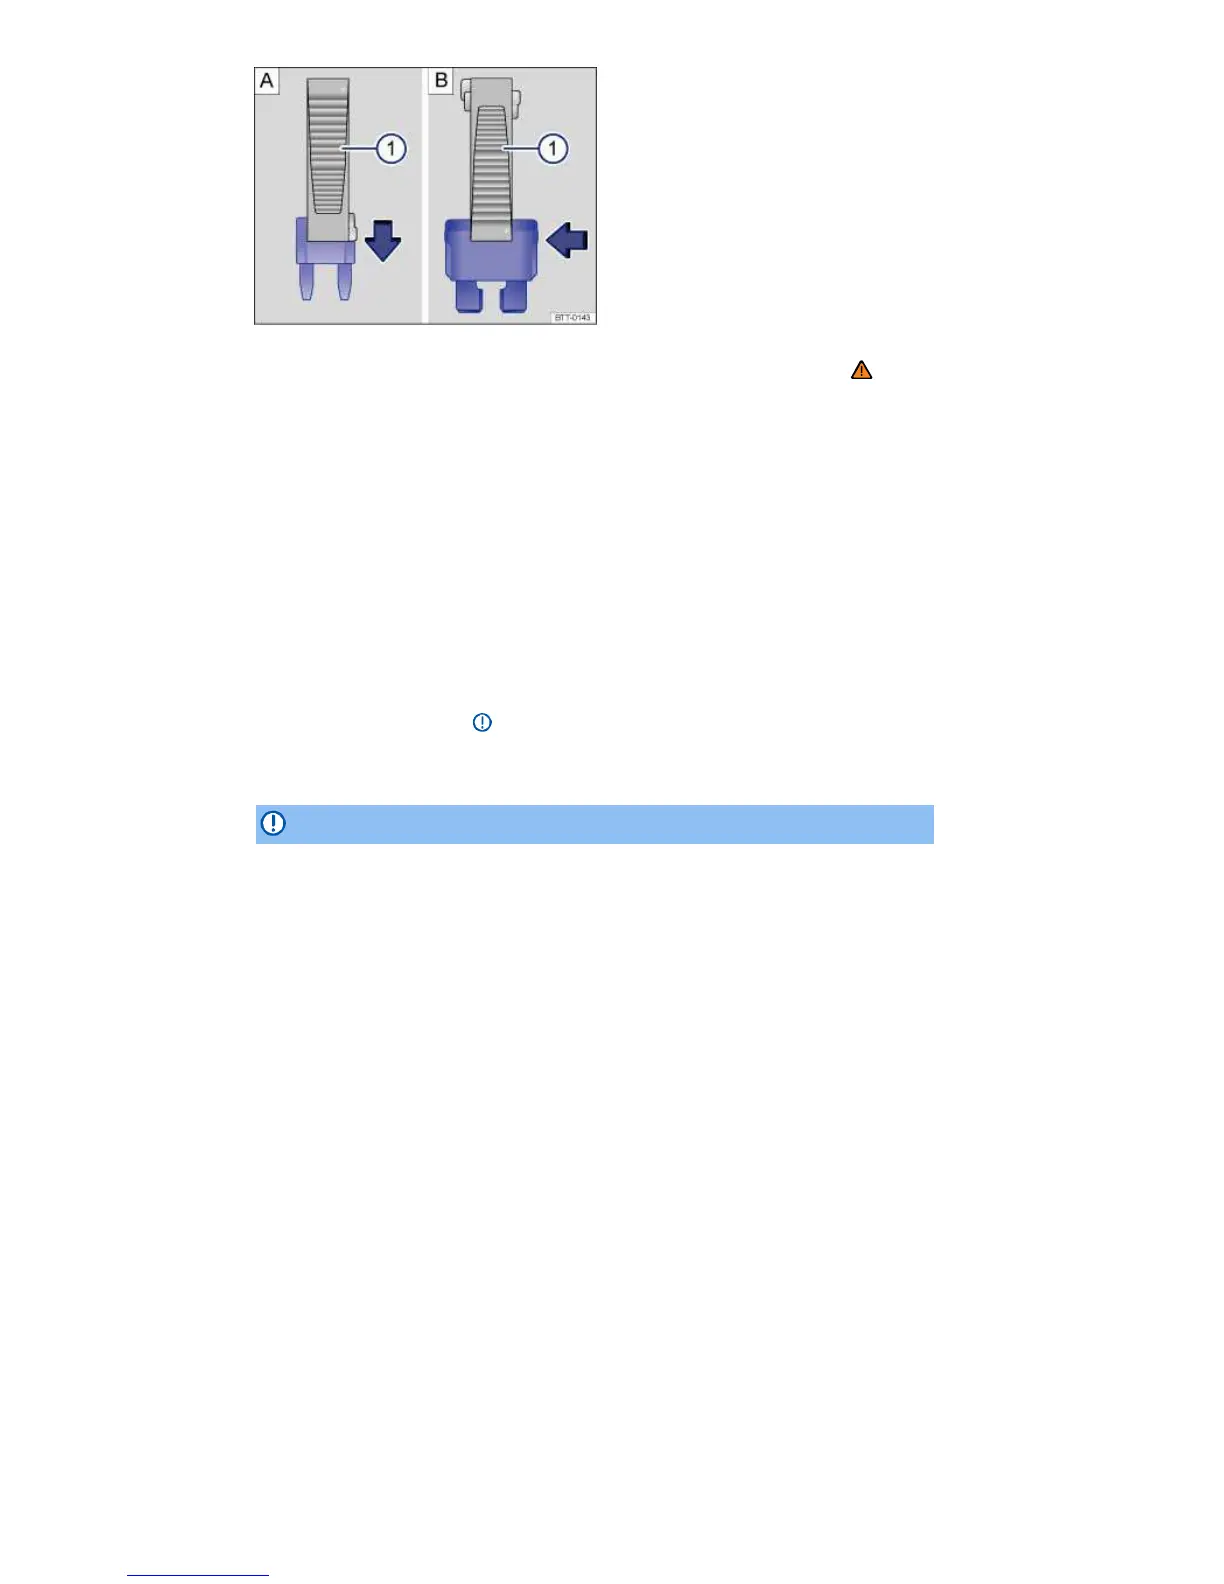
Fig. 191 Removing or inserting a fuse using the plastic tweezers 1.
¤ Please first read and note the introductory information and heed the WARNINGS
Preparations
x Switch off the headlights, the ignition, and all electrical consumers.
x Open the appropriate fuse box, Fuses in the vehicle.
Identifying blown fuses
A blown fuse can be recognized by the burned metal strip ⇒
fig. 190.
Shine a flashlight on the fuse. This makes it easier to tell if the fuse has blown.
Replacing the fuse
x If needed, remove the plastic tweezers ⇒
fig. 188 (1) from the fuse box cover.
x For small fuses, slide the tweezers ⇒ fig. 191 (1) onto the fuse from the top A.
x For larger fuses, slide the tweezers
(1) onto the fuse from the side B.
x Pull out the blown fuse.
x If the fuse is blown, replace the fuse with a new fuse of the same amperage (same color and same
imprint) and same overall size ⇒ .
x If necessary, replace the plastic tweezers in the fuse box cover.
x Replace the cover.
NOTICE
If a fuse is replaced with a fuse with higher amperage, then damage can occur at various
places in the electrical system.

 Loading...