– Remove upper part of steering column trim ⇒ General body
repairs, interior; Rep. gr. 68 .
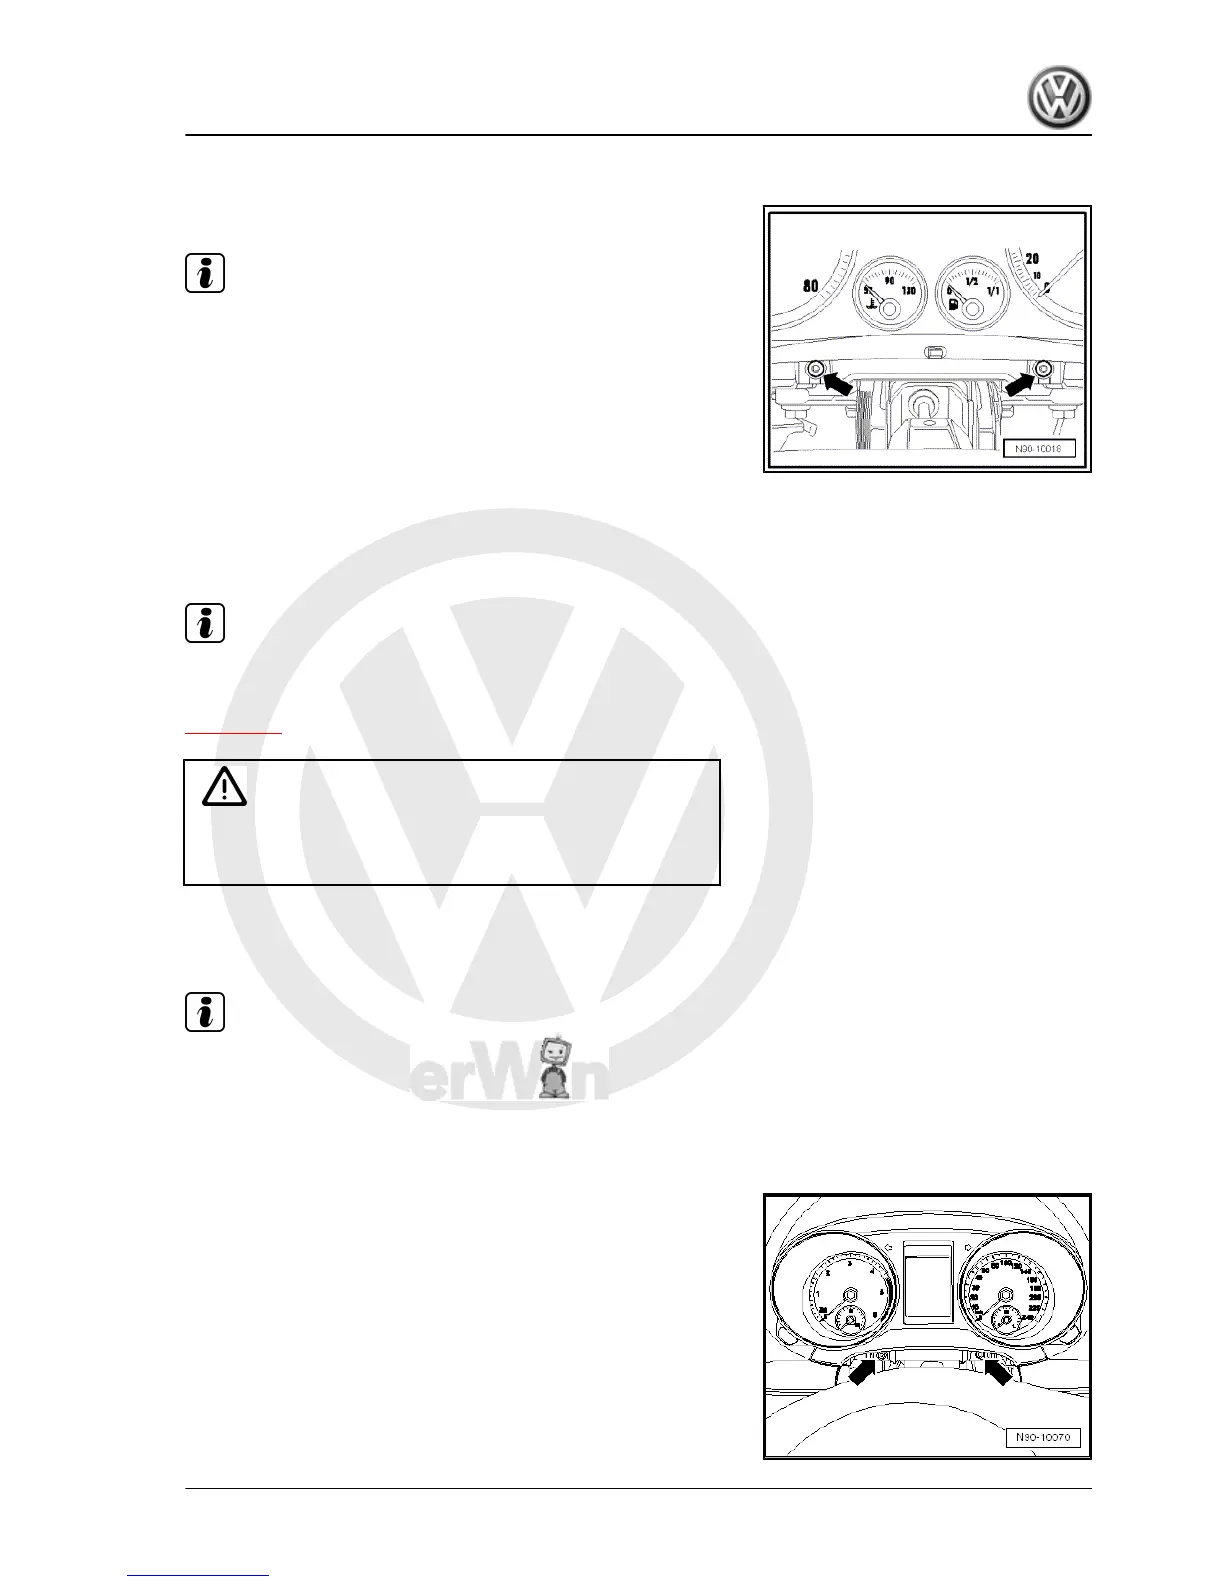
– Remove bolts -arrows- from dash panel insert.
Note
When pulling out dash panel insert, there is no need to separate
the connectors. The connections comprise of one part that is fixed
to the vehicle and are thus separated automatically when the
dash panel insert is pulled out.
– Pull dash panel insert out of dash panel.
Installing
Installation is carried out in reverse order of removal.
1.3 Removing and installing dash panel in‐
sert (from MY2010)
Note
Before removing the dash panel insert, the work procedure „Re‐
newing dash panel insert“ must always be performed to read out
the data stored in the control unit in dash panel insert -J285-
⇒ page 173 .
Caution
♦ Switch off ignition and all electrical consumers.
♦ Remove the ignition key.
Carry out following procedures:
Removing
Note
There is no need to remove the steering wheel.
– Pull out steering wheel fully and engage steering wheel in low‐
est position.
– Remove upper part of steering column trim ⇒ General body
repairs, interior; Rep. gr. 68 .
– Remove bolts -arrows- from dash panel insert.
– Pull dash panel insert backwards straight out of dash panel,
taking connected wiring length into consideration.
Golf Variant 2007 ➤ , Golf Variant 2010 ➤ , Jetta 2005 ➤
Electrical system - Edition 07.2010
1. Dash panel insert 175

 Loading...