Connecting pipe -1- and filler neck -2- should be pressed together
so that the guides -arrows- engage in each other.
2.2.2 Removing and installing washer fluid
reservoir
Caution
♦ Switch off ignition and all electrical consumers.
♦ Remove the ignition key.
Removing
– Remove filler neck for washer fluid reservoir ⇒ page 195 .
– Remove front bumper cover ⇒ General body repairs, exterior;
Rep. gr. 63 .
Note
The connections to the windscreen and rear window washer
pump -V59- and hose lines are colour-coded in order to prevent
the washer fluid lines being incorrectly connected to the wind‐
screen and rear window washer pump -V59- . The hose fittings
must be connected to the correct colour-coded pump connections
during installation.
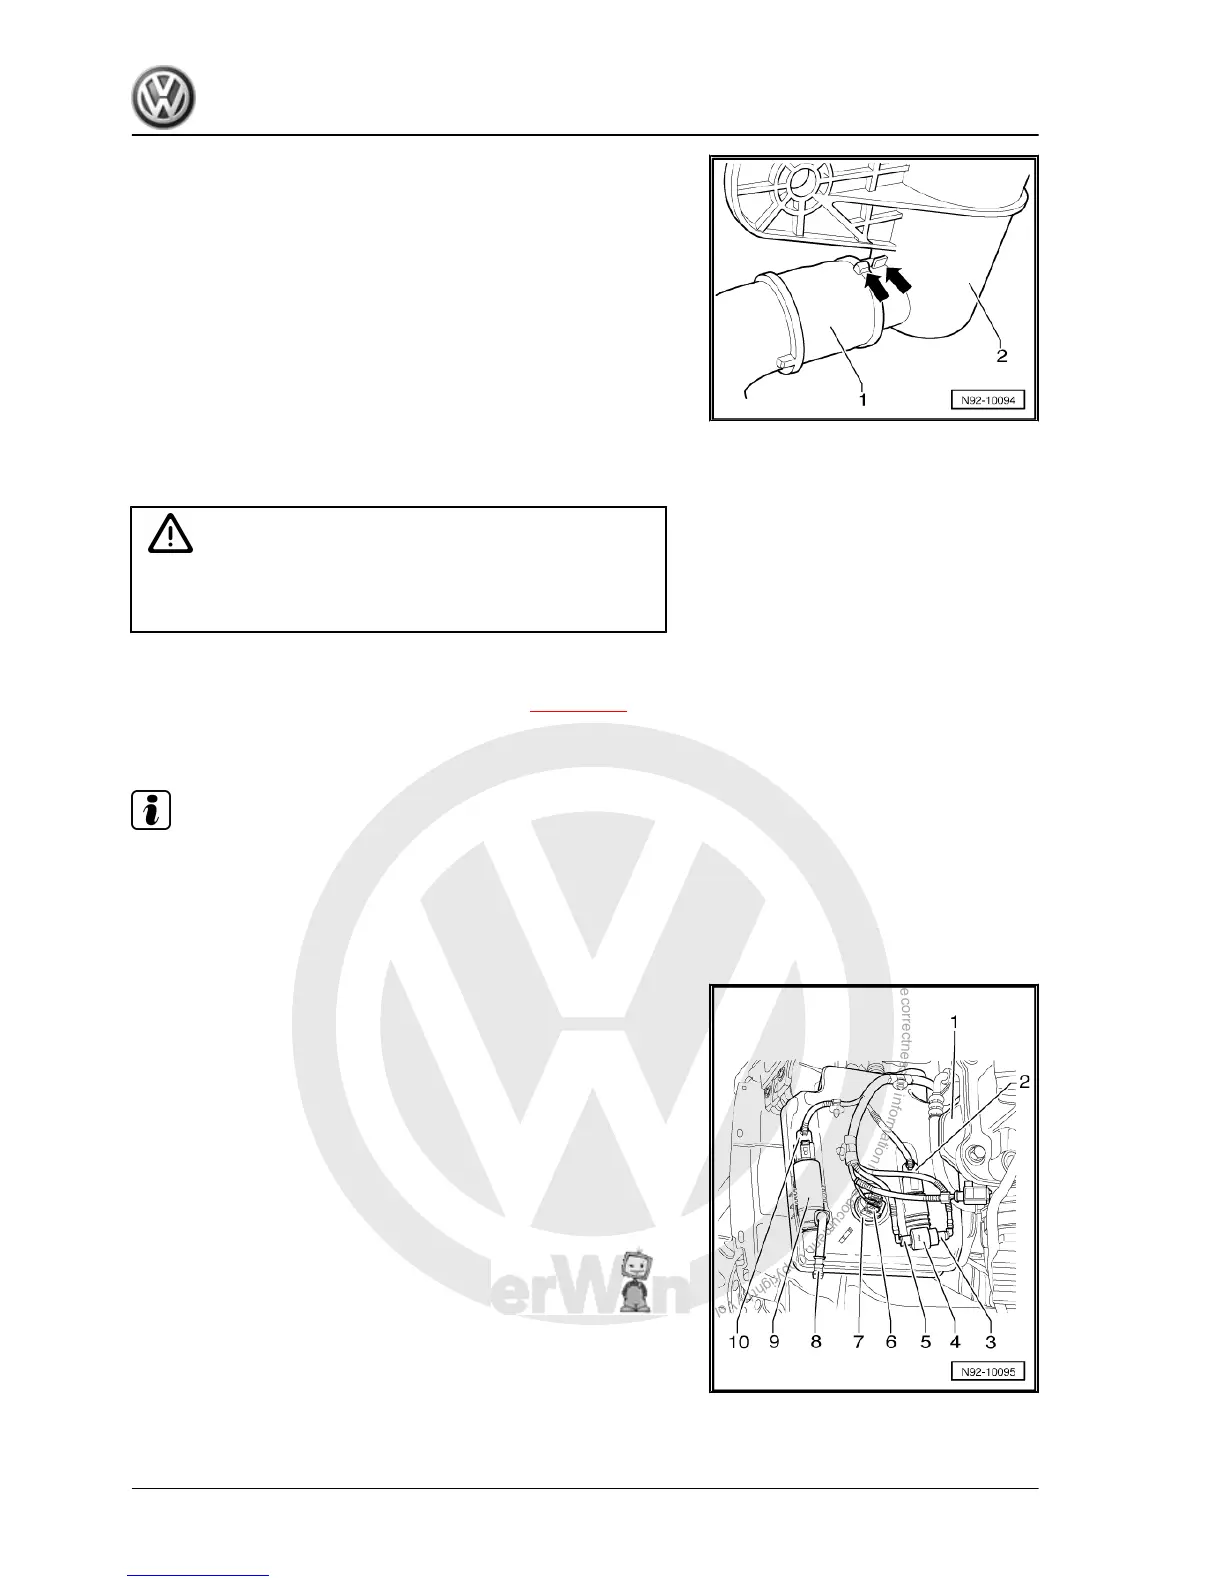
– To release, turn securing clips at hose connections -3- and
-5- and pull these off windscreen and rear window washer
pump -V59- -4-.
– Drain any escaping fluid in a suitable container.
– Disconnect connector -6- for windscreen washer fluid level
sender -G33- -7-.
– Pull windscreen and rear window washer pump -V59- -4- up‐
wards out of reservoir and disconnect connector -2-.
– Pull headlight washer pump -V11- -9- upwards out of reservoir
and disconnect connector -10-.
Golf Variant 2007 ➤ , Golf Variant 2010 ➤ , Jetta 2005 ➤
Electrical system - Edition 07.2010
196 Rep. gr.92 - Windscreen wash/wipe system

 Loading...