DBW 2010 / 2016 9Repair
902
9.1.1 Works on components when dismantled
IMPORTANT
All sealing elements between the dismantled components
must always be removed and replaced.
9.1.1.1 General visual inspection
• Check all components for damage (cracks, deformation,
wear, etc.) and fit new ones if necessary.
• Inspect the plugs and cables for corrosion, loose
contacts, crimping faults, etc. and repair them if
necessary.
• Inspect connector contacts for corrosion and check
contacts for firm seating; repair if necessary.
9.1.1.2 Visual inspection of combustion chamber
– Check swirl chamber for firm seating.
– Inspect the combustion chamber for scaling and remove
coke deposits if necessary.
– Check welding seam for cracks.
NOTE
Cracks on the welding seam of up to approx. 80 mm in the
longitudinal direction are permissible.
9.1.1.3 Visual inspection on heat exchanger
– Check exhaust-gas routing in heat exchanger for sooting,
deposits, damage and corrosion.
NOTE
Remove deposits with a water jet and a brush.
– Examine heat exchanger for external damage, deforma-
tions, etc.
NOTE
Heavy deformations can impair the coolant flow.
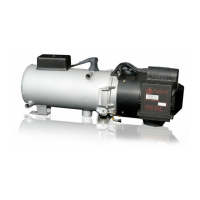
9.1.1.4 Visual inspection on combustion-air rotor
– Inspect combustion-air rotor for soiling and cracks.
– Check cover plate for firm seating.
– Check gate valve for proper seating.
– Adjust gap between fan impeller and fan housing (can be
measured with a feeler gauge) at the narrowest point to
0.15 ± 0.05 mm.
For tools, see spare parts lists and accessories catalogue.
9.1.2 Carrying out modifications
NOTE
The constant development of our heaters is aimed at optimis-
ing them so as to prevent failures and malfunctions.
Generally it is possible to modify heaters that are already in
use. We can supply the appropriate modification kits for this
purpose.
The modifications which can be carried out as part of the
repair work are listed in the following:
• Installation of nozzle holder pre-heating unit for DBW
2010 / 2016 with 1553 control unit (see 9.1.2.1).
• Installation of nozzle holder pre-heating unit for DBW
2010 with 1563/1564 control unit (see 9.1.2.2).
Fig. 901 Visual inspection on combustion-air rotor
 Loading...


