DBW 2010 / 2016 9Repair
918
9.2.19 Replacing heat exchanger
9.2.19.1 Removal
1. If necessary, remove nut (6, Fig. 915) from cover (5) and
take off cover and remove.
2. Remove temperature limiter or thermal fuse (see 9.2.1.1
or 9.2.3.1).
3. Remove temperature sensor (see 9.2.2.1).
4. Remove thermal fusible link if necessary (see 9.2.6.1).
5. Remove control thermostat if necessary (see 9.2.4.1).
6. Remove fan thermostat if necessary (see 9.2.5.1).
NOTE
Work steps 7 to 8 only apply to the devices DBW 2010 / DBW
2016 without sensor technology.
7. Remove screw (4) and take off bracket (3) with electrical
connections and remove.
8. Remove screw plug (7) and take off with angle bracket
(8) and remove.
9. Remove burner head (see 9.2.8.1).
10. Pull combustion chamber (1) out of the heat exchanger
(2) and remove.
11. Remove heat exchanger (2).
12. Carry out works on stripped down components (see
9.1.1).
9.2.19.2 Installation
1. Slide combustion chamber (1, Fig. 915) into heat
exchanger (2) up to stop.
2. Fit burner head (see 9.2.8.2).
NOTE
Work steps 3 to 6 only apply to the devices DBW 2010 / DBW
2016 without sensor technology.
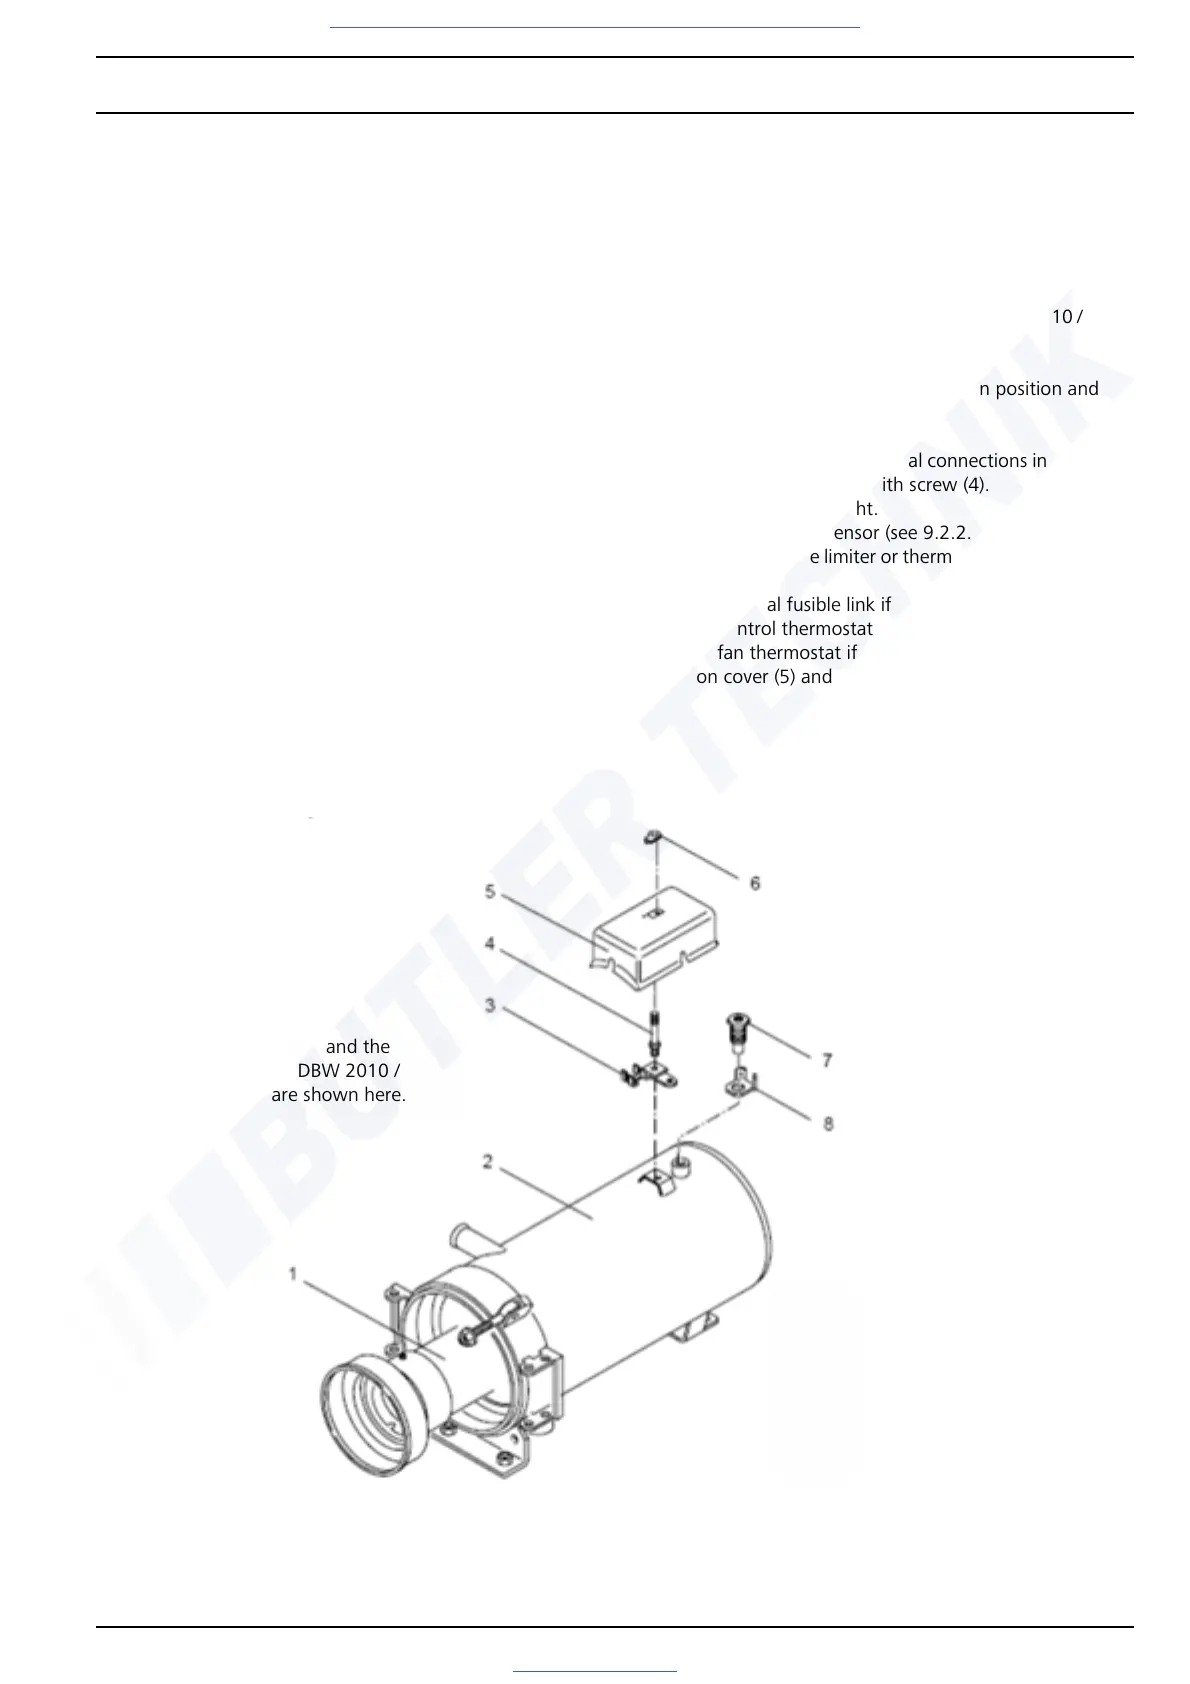
3. Move angle bracket (8) into installation position and
screw in screw plug (7).
4. Tighten screw hand-tight.
5. Move bracket (3) with electrical connections into installa-
tion position and fasten with screw (4).
6. Tighten screw hand-tight.
7. Install temperature sensor (see 9.2.2.2).
8. Install temperature limiter or thermal fuse (see 9.2.1.2 or
9.2.3.2).
9. Install thermal fusible link if necessary (see 9.2.6.2).
10. Install control thermostat if necessary (see 9.2.4.2).
11. Install fan thermostat if necessary (see 9.2.5.2).
12. Lay on cover (5) and fasten with nut (6) if necessary.
Fig. 915 Replacing combustion chamber and heat exchanger
1 Combustion chamber
2Heat exchanger
3Bracket
4Screw
5Cover
6Nut
7Screw plug
8Angle bracket
NOTE
The combustion chamber and the
heat exchanger of the DBW 2010 /
DBW 2016 heaters are shown here.
Visit www.butlertechnik.com for more technical information and downloads.
 Loading...


