DBW 2010 / 2016 9Repair
904
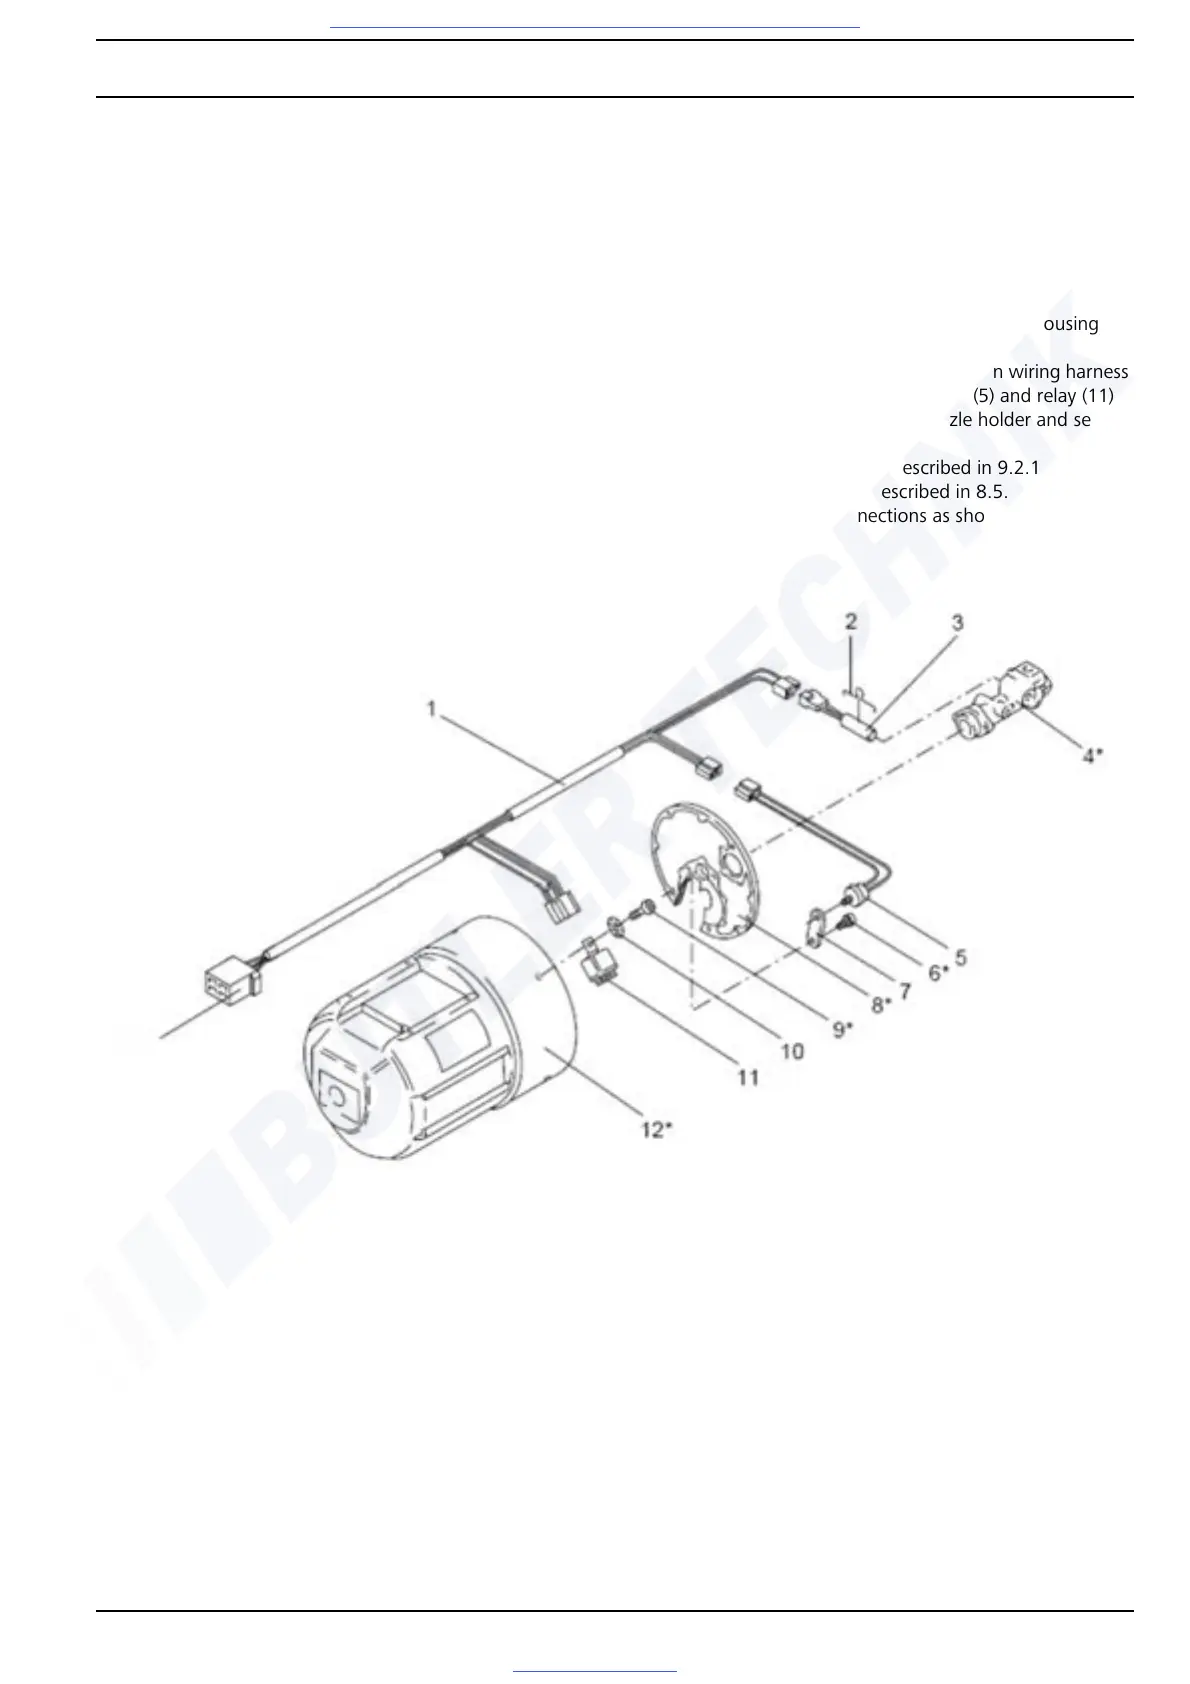
Retrofitting works DBW 2010 / DBW 2016
NOTE
On DBW 2010 / DBW 2016 heaters, the washer and the nut
in the retrofit kit are not required.
1. Swing away burner head as described in 8.5.1.
2. Remove ignition electrodes as described in 9.2.14.1.
3. Remove snap ring and pull disc with flame monitor off
nozzle holder.
4. Fasten thermostat (5) with lug (7) and screw (6) on nozzle
holder plate.
5. Insert heating cartridge (3) in nozzle holder (4) and fasten
with clamping yoke (2).
6. Fasten relay (11) with self-tapping screw (9) and serrated
lock washer (10) on protective cap of burner head (12).
NOTE
The polarity is irrelevant in the following work step.
7. Engage tab receptacle for heating cartridge connection
in 2-pin socket housing accordingly.
NOTE
Route wiring harness (1) behind solenoid valve and guide to
outside via a rubber grommet with 2-pin socket housing.
8. Make the electrical connections between wiring harness
(1), heating cartridge (3), thermostat (5) and relay (11).
9. Fit disc with flame monitor on nozzle holder and secure
with snap ring.
10. Install ignition electrode as described in 9.2.14.2.
11. Swing in burner head as described in 8.5.1.
12. Make the electrical connections as shown in Fig. 904.
Fig. 903 Retrofitting DBW 2010 / DBW 2016
 Loading...


