9Repair DBW 2010 / 2016
913
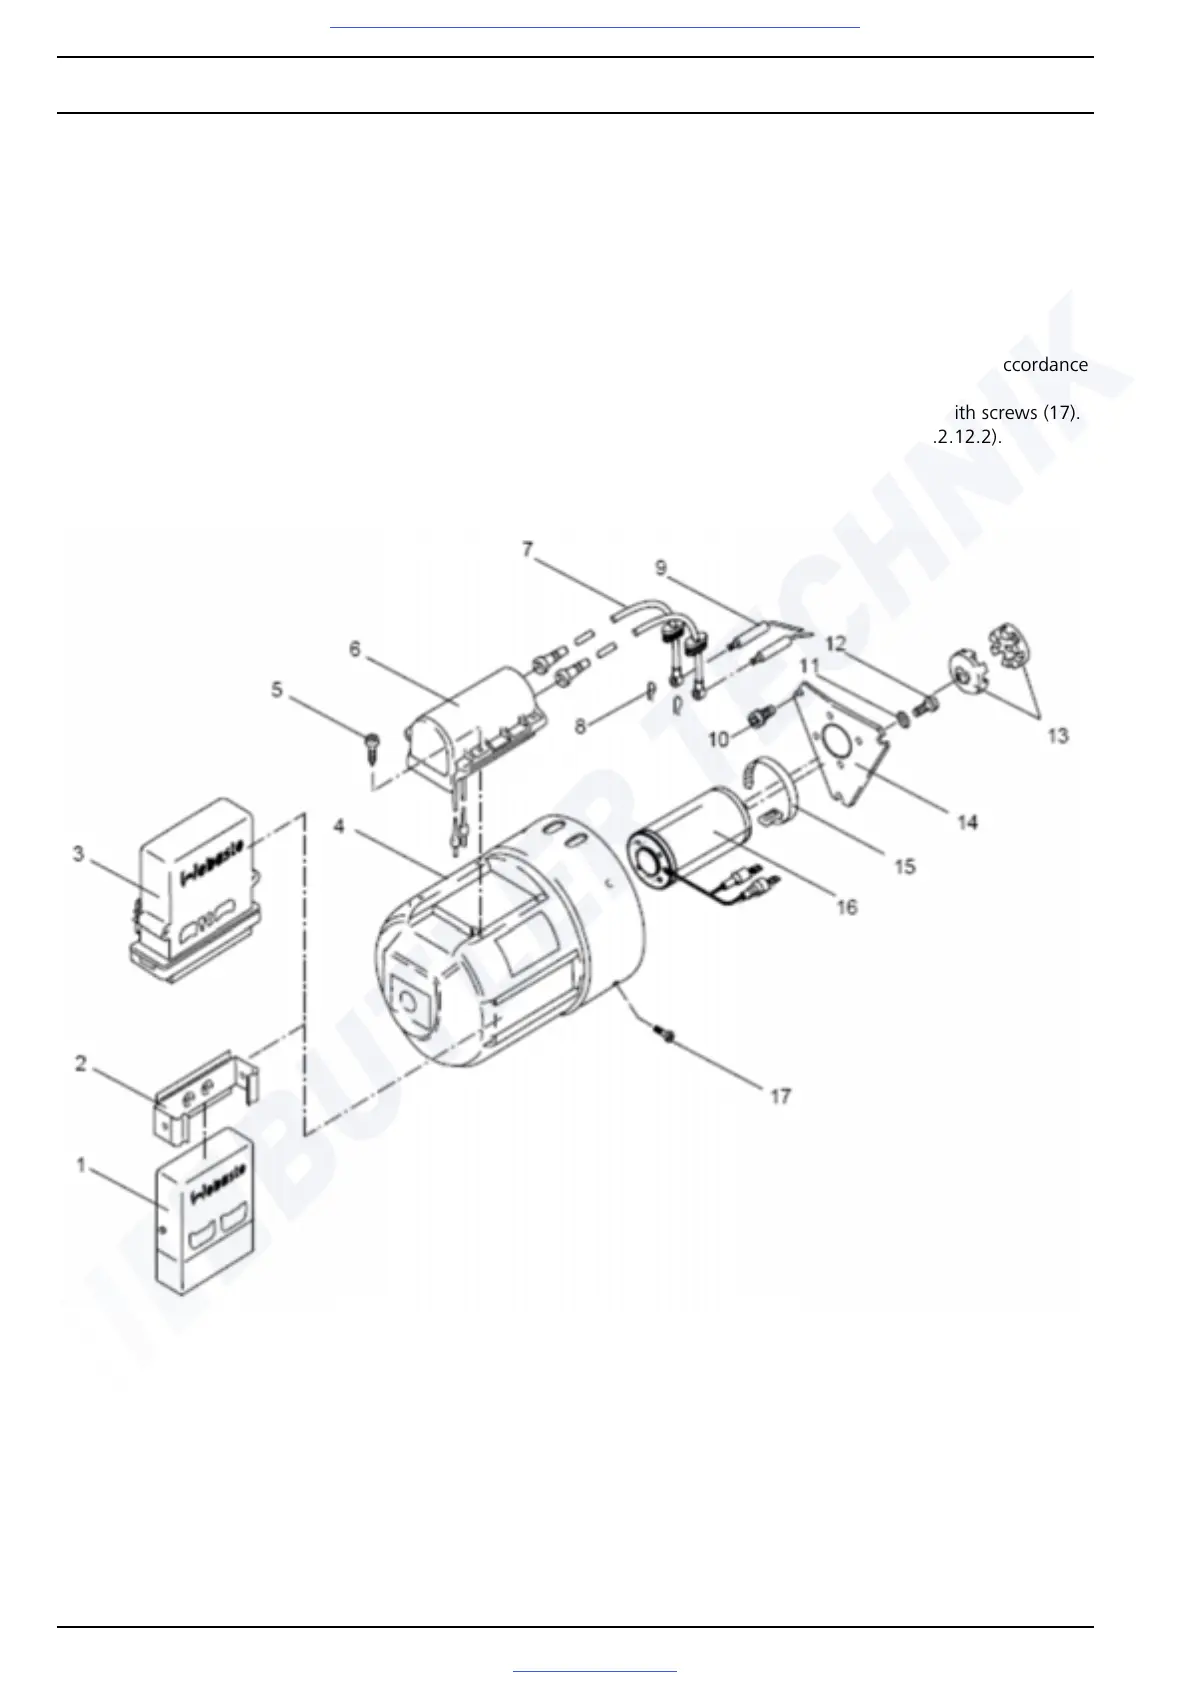
9.2.9 Replacing motor
9.2.9.1 Removal
1. Remove ignition spark generator (see 9.2.12.1).
2. Remove screws (17, Fig. 911) from protective cap (4) and
pull off protective cap towards front.
3. Disconnect electrical connection to motor (16).
4. Remove screws (10) and take off motor (16) with flange
(14).
5. Pull coupling (13) off motor shaft and remove.
6. Remove screws (12) with toothed washers (11), take off
motor (16) and remove.
7. Carry out works on stripped down components (see
9.1.1).
9.2.9.2 Installation
1. Move motor (16, Fig. 911) into installation position and
fasten with toothed washers (11) and screws (12) on
flange (14).
2. Tighten screws to 5 + 1 Nm.
3. Mount coupling (13) on motor shaft.
4. Fasten flange (14) with screws (10).
5. Tighten screws to 5 + 1 Nm.
6. Make the electrical connections to motor in accordance
with colour coding.
7. Slide on protective cap (4) and fasten with screws (17).
8. Install ignition spark generator (see 9.2.12.2).
Fig. 911 Replacing motor
1 1553 control unit
2 Holding clamp for 1553 con-
trol unit
3 1563/1564 control unit
4Protective cap
5Screw (4)
6 Ignition spark generator
7 Ignition cable (2)
8 Retaining clip (2)
9 Ignition electrode (2)
10 Screw (3)
11 Toothed washer (2)
12 Screw (2)
13 Coupling
14 Flange
15 Cable tie
16 Motor
17 Screw (4)
NOTE
The motor of the DBW 2010 / DBW 2016 heaters is shown here.
Visit www.butlertechnik.com for more technical information and downloads.
 Loading...


