Service Manual Calibration 27
Voltage calibration
1. Follow the steps in “Connections”.
2. Adjust the power supply to 5.6 Vdc ±0.1 Vdc (+0.3/-0.0 Vdc).
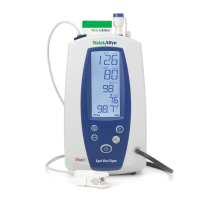
3. Hold down the Blood Pressure Start/Stop button while powering up to enter the
"configuration test mode". After the software versions are displayed, press the Mode
button until the Spot Vital Signs displays "BAT" in the LCD window.
4. Select Calibrate > Voltage in the repair software. The Spot Vital Signs display
window goes blank.
5. Read the voltage on the digital multi-meter (DMM) connected to the power supply.
6. Type the voltage reading in the Calibrated Voltage box and select Update.
7. Enter your initials in the Calibration Signature field to complete the voltage calibration.
and select OK. The voltage on the LCD display matches that of the DMM.
Blood pressure calibration
1. Follow the steps in “Connections” on page 25.
2. Adjust the power supply to 6.5 Vdc (+0/- 0.25 Vdc).
3. Hold down the Blood Pressure Start/Stop button while powering up to enter the
"configuration test mode". After the software versions are displayed, press the Mode
button until the Spot Vital Signs displays "CAL" in the LCD window.
4. Select the Calibrate > Manometer on the computer.
5. Verify the valve is “open” and select Calibrate 0.
6. Press the Blood Pressure Start/Stop button to close the valve and verify the 500 cc
cylinder is the only volume in the system.
7. Increase the pressure to 250 mmHg ±5 mmHg using the bulb and valve.
8. Use the bulb and the calibrated digital pressure meter to manually inflate the device
to 200 mmHg and enter the pressure meter reading from Spot Vital Signs in the
Calibration Gain text field.
9. Place the cursor into the box below the Calibrate 0 button and type in the value of the
pressure reading seen on the pressure meter. Select Calibrate 250.
 Loading...
