Service Manual Troubleshooting 35
3. Connect to the 500 cc cylinder.
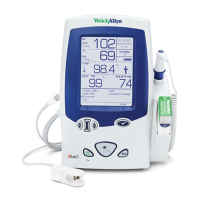
4. Select Test > Calibration in the repair software. The dialog box displays the Spot Vital
signs manometer reading, battery reading, and valve and pump status.
5. Push the Blood Pressure Start/Stop button to close the valve.
6. Use the hand bulb to verify Spot Vital Signs is within calibration specification at the
target pressures of 250±5 mmHg, 150 ±5 mmHg, 50 ±5 mmHg, and 0 mmHg with
each reading within ±3 mmHg of the target pressure except for the 0 mmHg reading
which is within ±1.0 mmHg.
7. Press the Mode button until the LCD window displays bat.
8. Set the power supply to 5.6 Vdc (+0.3/-0.0 Vdc). Verify the voltage reading meets the
specification (see “Voltage calibration” on page 74).
After completing this test, return the power suppy to 6.5 Vdc (+0/-0.25 Vdc).
9. Select OK in the Test Calibration dialog box.
Current test
1. Follow the steps in “Connections” on page 25.
2. Power off Spot Vital signs and then power on in normal mode.
3. Select Test > Current Levels in the Spot Vital Signs Repair Software. Use the reading
from the current meter and check the following current levels:
a. Blank
b. Back Light (Idle)
c. Valve/Pump
d. SpO
2
Mode
The test result is a pass or fail result.
4. Select Ok to exit the dialog box.
Noise levels
1. Follow the steps in “Connections” on page 25.
2. Select Test > Noise Levels in the Spot Vital Signs Repair Software and press the Test
button to retrieve Spot Vital Signs internal pressure channel noise level. The test
result is a pass or fail result (page 73).
3. Select Ok to exit the dialog box.
Button test
1. Follow the steps in “Connections” on page 25.

 Loading...