Service Manual Troubleshooting 33
Battery voltage check
1. Follow the steps in “Connections” on page 25.
2. Set the power supply to 6.5 Vdc (+0/-0.25 Vdc).
3. Use a DMM to check the battery voltage. If the voltage is less than 6.0 Vdc, charge
the battery.
If an E38 error is present on Version 1, the battery does not charge correctly. Clear the
error and then proceed.
To charge the battery, place the battery back into the Spot Vital Signs and connect the
charger for 8 hours. Let the device sit idle for one day and recheck the battery voltage.
If the voltage is below 6.0 Vdc, replace the battery (see “Battery removal and
replacement” on page 70).
4. Power on Spot Vital Signs. If the device does not power on:
a. Verify the power supply is connected to the device and turned on.
b. Change the main PCB (see “Main printed circuit board assembly” on page 44).
c. Change the display PCB (see “LCD disassembly” on page 42).
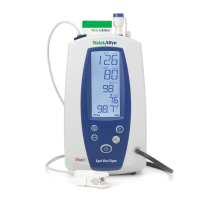
Window display check
1. Press the Power button to start the Spot Vital Signs.
2. Observe the Spot Vital Signs window display and verify the LED segments light up for
one to two seconds before the device enters the normal operating mode.
If there any segments that do not light, change the window display (see “LCD
disassembly” on page 42).
Blood pressure calibration check
Perform two or three blood pressure cycles to verify proper cuff inflation/deflation and the
readings. If Spot Vital Signs does not inflate or deflate properly perform the following
procedure.
1. Open the Spot Vital Signs housing (see “Front housing and key pad disassembly” on
page 42).
2. Check Spot Vital Signs for pinched tubing and reroute if necessary. Re-run the blood
pressure cycle to confirm the problem is fixed.
If there are no pinched tubes, change the valve (page 48).
Small leak in pneumatic
system
Check blood pressure cuff tubing and pressure hose for leaks.
Table 16. Blood Pressure Cuff Deflating Too Slowly
Possible Cause Explanation and Corrective Action
 Loading...
