20 1 Printer Environment Settings
Setting the Network
Environment
This section explains how to install your printer in
a TCP/IP environment.
When installing the printer in a different
environment, refer to the ‘CD-ROM
Documentation (HTML)’ on the CD-ROM of the
Driver CD Kit.
Setting the IP Address
To use TCP/IP protocol, you must configure an IP
address for the printer.
By default, the printer is set to obtain its IP
address (via the [Get IP Address] setting on the
control panel) using [DHCP/Autonet]. Thus, when
the printer is connected to a network that has a
DHCP server, the printer automatically obtains its
IP address from the server.
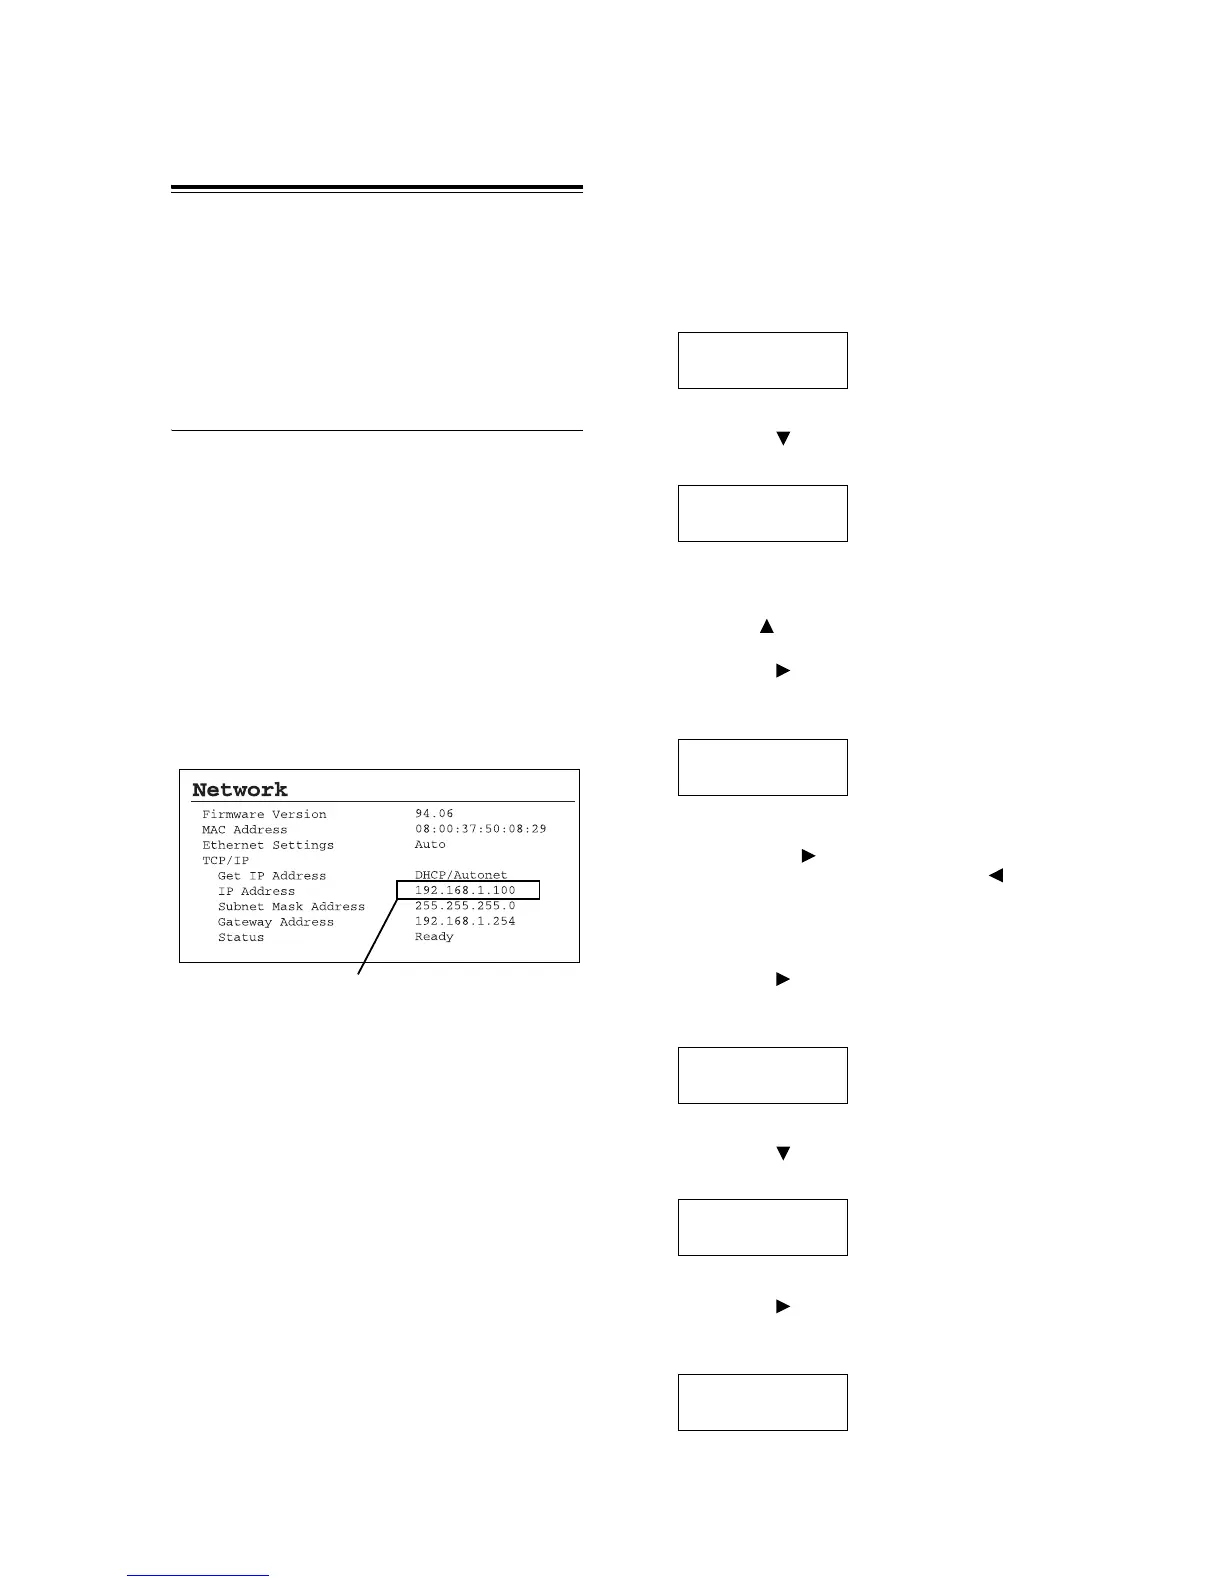
Print the [Printer Settings] list to see if the printer
already has an IP address.
If the printer does not have an IP address, set [Get
IP Address] to [Panel] and configure the address.
Note
• For information on how to print the [Printer Settings] list,
refer to “ Printing a Report/List” (P. 31).
• The printer can obtain its IP address also by using a
BOOTP or RARP server. If using a BOOTP or RARP
server, set [Get IP Address] to [BOOTP] or [RARP].
• If using a DHCP server, the printer’s IP address may
change without notice. Make sure to check the address
periodically.
• To use DHCP in a WINS (Windows Internet Name
Service) environment, the network expansion card
(optional) must be installed.
Use the following procedure to configure the
printer’s IP address on the control panel.
Depending on your network environment, your
printer also needs a subnet mask and gateway
address. Consult your network administrator for
the settings required for your printer.
To Set the IP Address
1. Press the <Menu> button on the control
panel to display the menu screen.
2. Press the < > button until [Admin Menu] is
displayed.
Note
• If you went past the desired item, return to the item by
pressing the < > button.
3. Press the < > button to accept the
selection.
[Network/Port] is displayed.
Note
• If you pressed the < > button on the wrong item,
return to the previous screen by pressing the < >
button.
• To start over from the beginning, press the <Menu>
button.
4. Press the < > button to accept the
selection.
[Parallel] is displayed.
5. Press the < > button until [TCP/IP] is
displayed.
6. Press the < > button to accept the
selection.
[Get IP Address] is displayed.
If an IP address is listed, skip the
following procedure.
If an IP address is not listed, or if
you want to change the current IP
address, configure the setting using
the following procedure.
Menu
Print Language
Menu
Admin Menu
Admin Menu
Network / Port
Network / Port
Parallel
Network / Port
TCP/IP
TCP/IP
Get IP Address
 Loading...


