Loading Paper 43
IE
IE
Setting the Paper Sizes of the
Trays
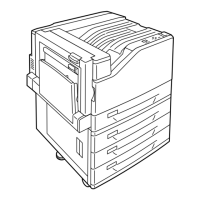
Use the following procedure when setting non-
standard paper sizes for the bypass tray or trays
1 - 4. If you loaded non-standard-size paper into
the tray 1, 2, 3 or 4, set the paper size dial to [
*
].
Note
• If you changed the paper loaded in the tray 1, 2, 3 or 4
from non-standard-size paper to standard-size paper,
set the size of the paper with the paper size dial and not
on the control panel.
1. Press the <Menu> button on the control
panel to display the menu screen.
2. Press the < > button until [Admin Menu] is
displayed.
3. Press the < > button to accept the
selection.
[Network/Port] is displayed.
4. Press the < > button until [Printer Settings]
is displayed.
5. Press the < > button to accept the
selection.
[Substitute Tray] is displayed.
6. Press the < > button until [Paper Size] is
displayed.
7. Press the < > button to accept the
selection.
[Tray 1] is displayed.
8. Press the < > button until the desired tray is
displayed. Press the < > button to move to
the right field and then press the < > button.
[Tray 1 Custom] is displayed.
9. Press the <Eject/Set> button to confirm your
selection.
[Portrait (Y)] is displayed.
10. Press the < > button to select [Portrait (Y)].
The current setting is displayed.
11. Enter the length using the < > or < >
button and press the <Eject/Set> button to
confirm your entry.
(Example: 431 mm)
12. After entering the length, proceed to enter
the width.
Return to [Portrait (Y)] by pressing the < >
button.
13. Press the < > button.
[Landscape (X)] is displayed.
Menu
Print Language
Menu
Admin Menu
Admin Menu
Network / Port
AdminMenu
Printer Settings
Printer Settings
Substitute Tray
Printer Settings
Paper Size
Paper Size
Tray 1 8.5x11*
Paper Size
Tray 1 Custom
Tray 1 Custom
Portrait (Y)
Portrait (Y)
148mm*
Portrait (Y)
431mm
Tray 1 Custom
Portrait (Y)
Tray 1 Custom
Landscape (X)
 Loading...

