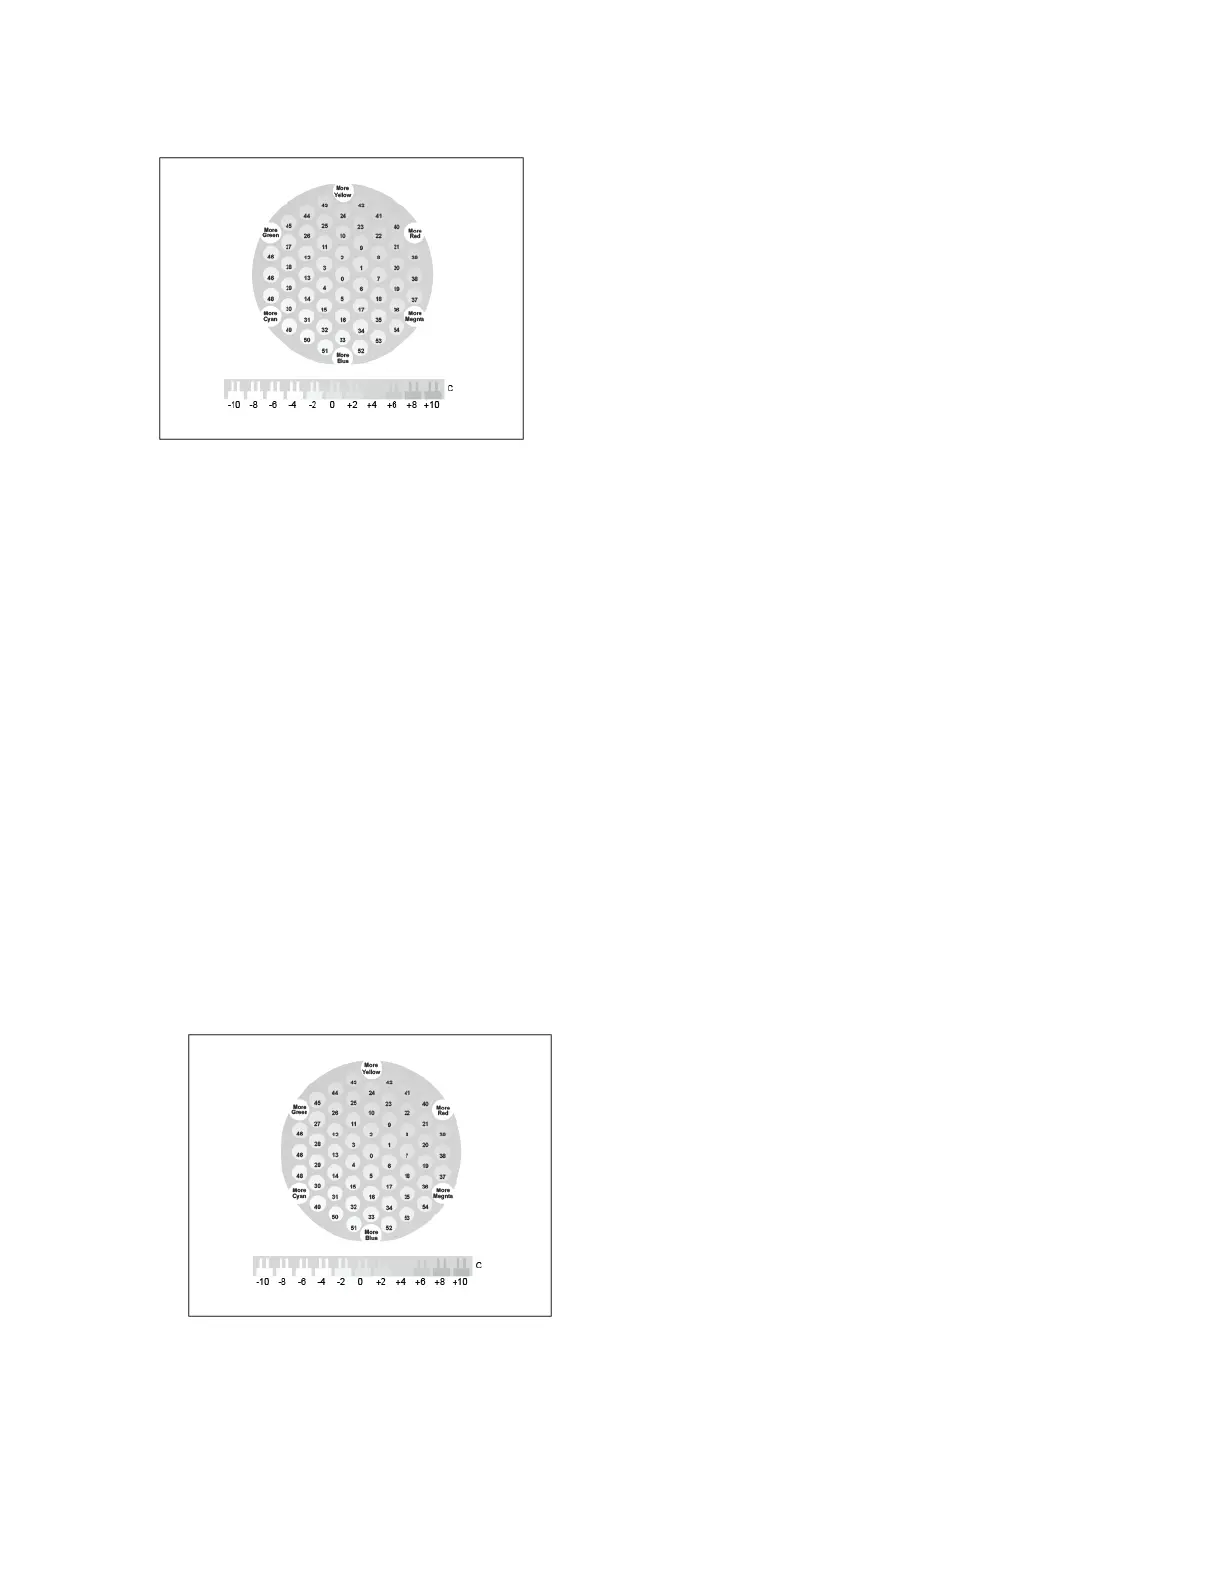
The third page printed at the start of a gray balance cali-
bration, is the Light Gray Calibration Page. This page uses
circles, or hexagons, of color to demonstrate the available
gray balance settings. The current gray balance setting is
the circle in the center, numbered zero. Each available set-
ting is printed against a background representing the de-
sired gray balance setting. To demonstrate the available
lightness/darkness calibration settings, the row at the bot-
tom of the page contains comb patterns. The comb pat-
tern labeled zero is the current setting. Together, the gray
balance circles and lightness/darkness combs allow for an
accurate gray balance setting.
Starting a Gray Balance Adjustment
To begin your calibration and print the calibration pages:
1. At the printer control panel, press the Home button.
2. Log in as administrator. For details, refer to the System Administrator Guide at www.xerox.com/
support/VLC8000docs or www.xerox.com/support/VLC9000docs.
3. Touch Device→Support→Color Calibration.
4. To select the type of lighting you use to view calibration pages, touch Lighting Type, then touch
a selection.
5. To select the Gray Balance adjustment, touch Gray Balance Only.
6. To begin your calibration and print the calibration pages, touch Next.
7. To run the calibration procedure, follow the onscreen instructions, or refer to Performing a Gray
Balance Calibration.
Performing a Gray Balance Calibration
To perform a Gray Balance Adjustment:
1. To evaluate the gray balance settings, hold the light-gray calibration page at an arm length
away.
2. To determine the best light-gray balance match, evaluate the circles. Mark the circle that appears
to be the most neutral gray. The center circle, zero, is the current gray-balance setting.
150
Xerox
®
VersaLink
®
C8000/C9000 Color Printer
User Guide
Maintenance
 Loading...