How do I configure the Device ID on a HHD?
Setting the Device ID on a HHD allows you to configure the HHD to the desired device
number. For example, if the HHD is a loaner or if it was recently received from the repair
department, then the Device ID number will probably need to be configured.
1. Place the HHD in the charging stand. To eliminate any possible complications, it's best
to place the HHD in the first charging stand.
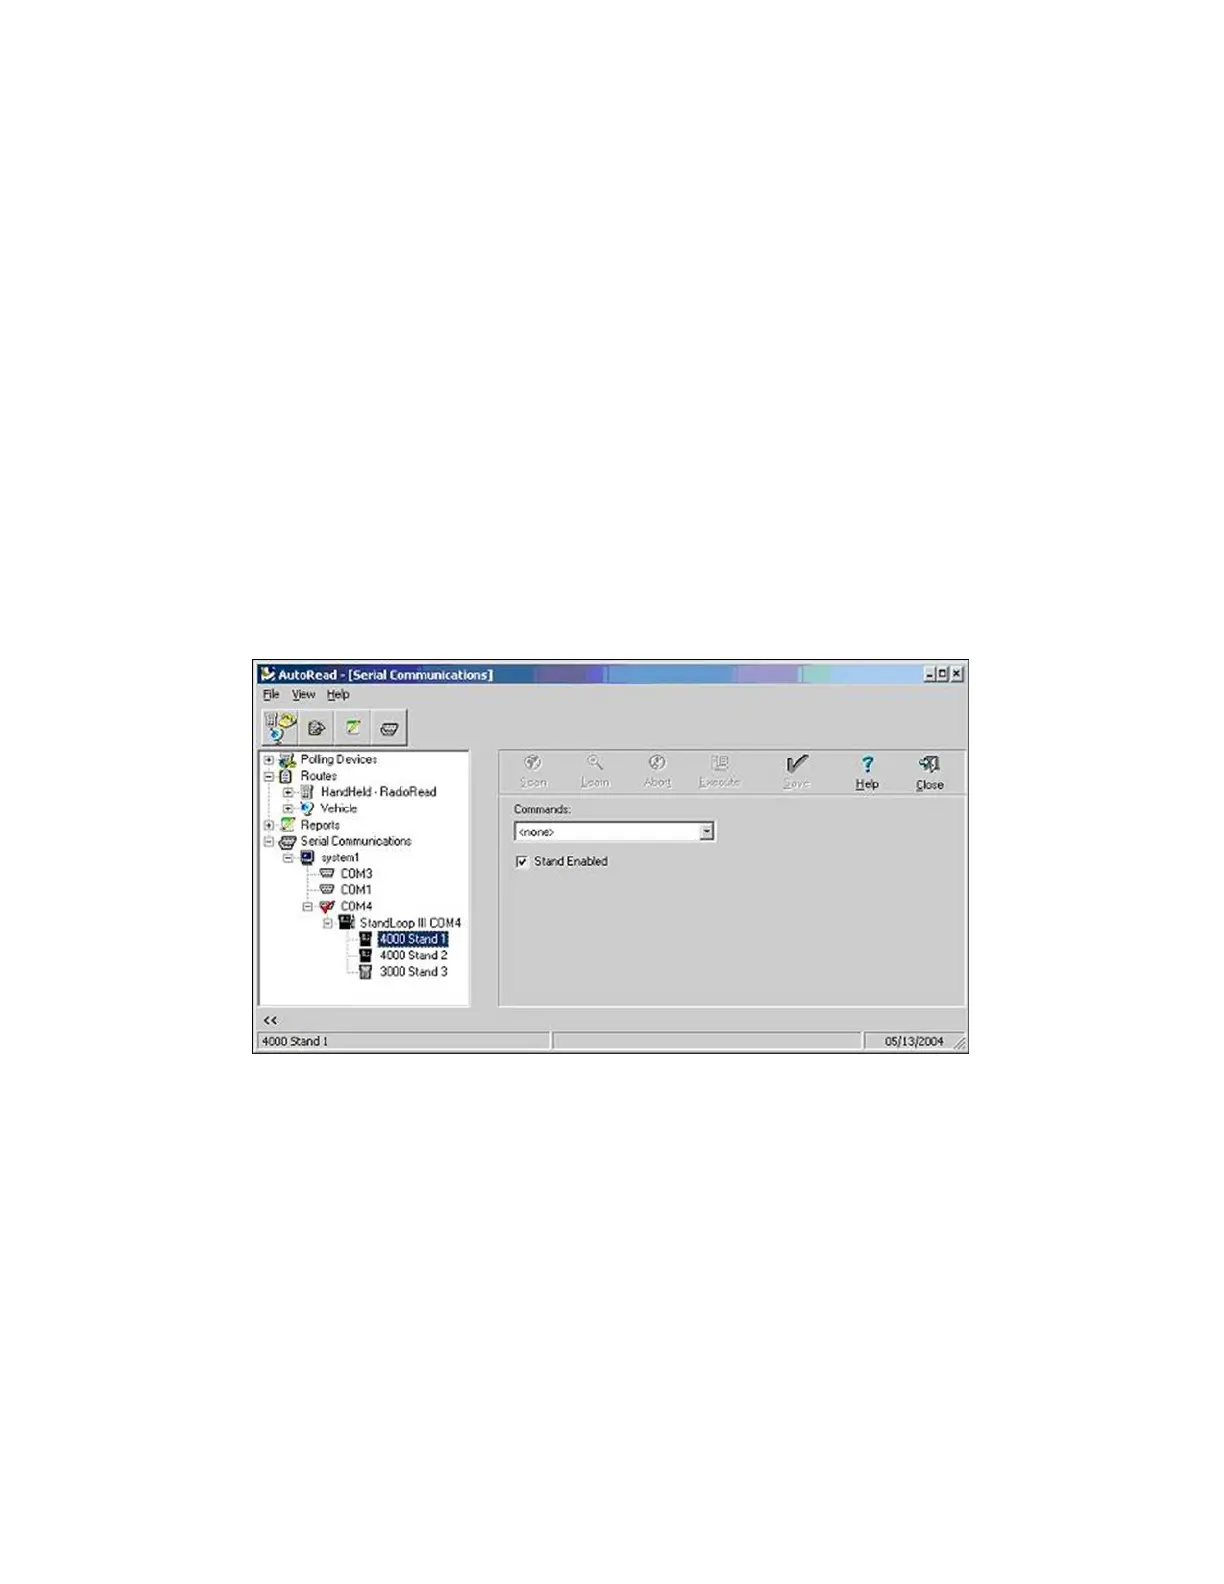
2. Enter the AutoRead program
3. Go to the tree view on the left side of the screen, and click once on the plus sign (+) to
the left of Serial Communications.
4. Below Serial Communications will be your PC name or it will say Local PC. Once
again, perform one click the plus sign (+) which will show the communication ports. One
of the communication ports should have a red check mark and a plus sign to the left.
5. Click the plus sign (+) to the left of the communication port to show the next layer. This
will either say Standloop II or Standloop III, depending on the model of charging
stands you are using.
6. Perform one click the plus sign (+) to the left of Standloop to show the next layer. This
layer should show all of your currently configured charging stands.
7. Click the charging stand that has the HHD to be configured.
8. Go to the right side of the screen and perform one click the Down arrow to the right of
the Commands Box.
9. Click the Set Device ID option and then click the Execute button above the
commands window.
10. A warning message should appear indicating the data on this HHD will be overwritten
and ask if you would like to continue. Answer Yes if it is OK to clear all of the data from
the HHD.
Note: If you have data on the HHD that has not been downloaded to AutoRead, please stop and
call AMR Technical Services for assistance.
Appendix A: Frequently Asked Questions | 143
 Loading...