8-16
Drive shaft and lower case
0
1
2
3
4
5
6
7
8
9
10
A
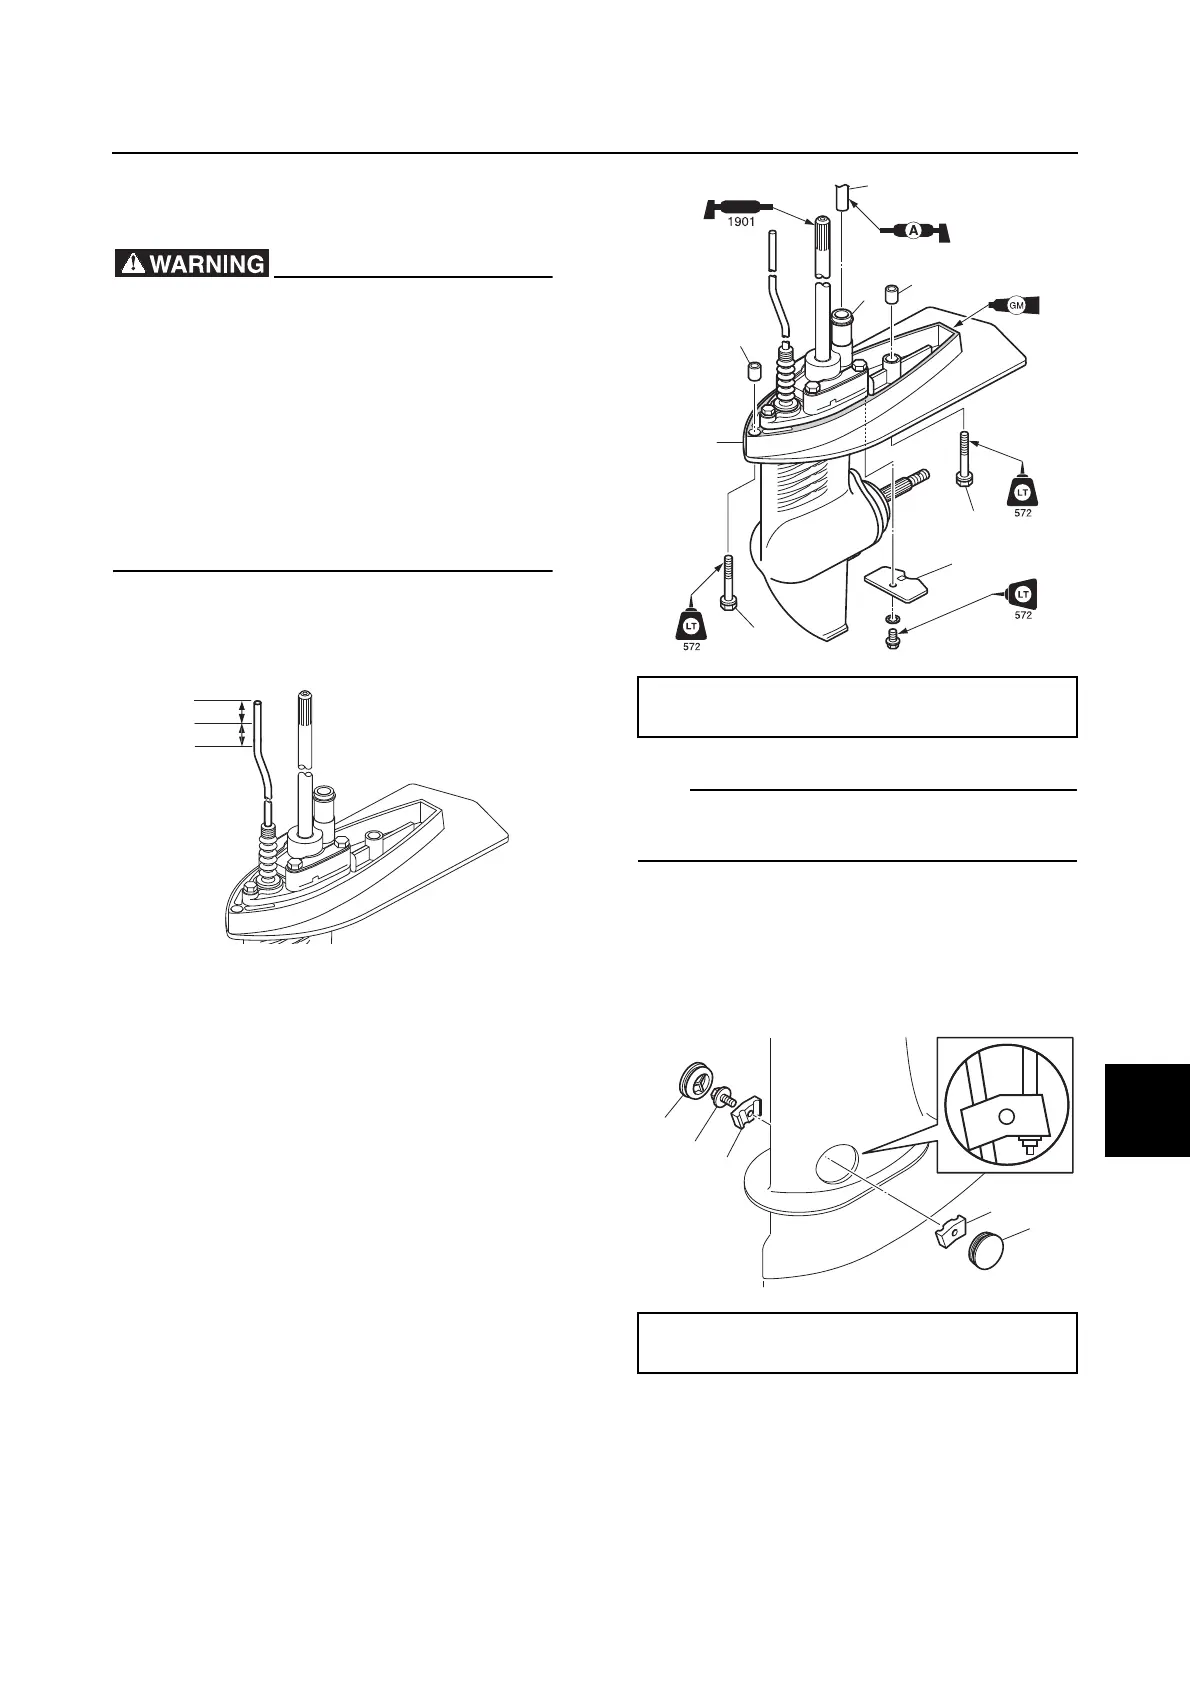
Installing the lower unit (S-transom
model)
• Make sure to remove the clip from the
engine shut-off switch.
• Do not hold the propeller with your
hands when loosening or tightening the
propeller nut.
• When installing the lower unit with the
power unit installed, make sure to sus-
pend the outboard motor. If the outboard
motor is not suspended, it can fall sud-
denly and result in severe injuries.
1. Move the shift lever to the R position.
2. Set the gear shift to the R position.
3. Install the dowels a.
4. Install the lower unit b to the upper case,
and then tighten the lower case mounting
bolts c to the specified torque.
5. Install the anode d.
Make sure that the cooling water pipe e is
inserted securely into the rubber seal f.
6. Install the joints g and h, and then
tighten the shift joint bolt i to the
specified torque.
7. Install the covers j.
8. Move the shift lever to the N position.
9. Install the spacer k, propeller l, washer
m, and propeller nut n.
N
F
R
Lower case mounting bolt c:
11 N·m (1.1 kgf·m, 8.1 ft·lb)
Shift joint bolt i:
16 N·m (1.6 kgf·m, 11.8 ft·lb)
j
j
h
g
i
 Loading...