INSTALLATION
ENCLOSURE CLASSIFICATION
3 - 2
5. If the positioner is suitable for the application and appears
undamaged, install the cover and proceed with the installation
instructions.
6. If storing the positioner prior to installation, leave it in the origi-
nal carton, if possible. Store in an area free from corrosive vapors
and extremes in temperature and humidity.
7. Do not store the positioner in an area that would take it out of
the specifications listed in Tables 1-3, 1-4 and 1-5.
ENCLOSURE CLASSIFICATION
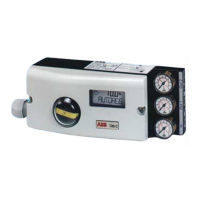
The standard enclosure for the Type AV1 and Type AV2 position-
ers conform to NEMA 3R when a ½-14 NPT street elbow (Fig. 3-1)
is installed into the vent hole on the housing. The elbow prevents
water or other liquid from entering the enclosure. The position of
the elbow is related to the mounting plane of the positioner in its
service location. The elbow must be positioned to face downward.
The NEMA 3R version meets the extended corrosion resistance
requirements of NEMA 250.
A NEMA 4X version is available as an option (Type AV______N
positioners). To maintain the NEMA 4X classification, the posi-
tioner shall be installed per drawing C258567 and suitable piping
shall be attached to the vent opening and vented in a manner to
preclude the entrance of water under pressure, as from a hose.
Additionally, the conduit connections shall be suitable for a NEMA
4X rating.
MOUNTING CONSIDERATIONS
Choose a location for the positioner based on the following fac-
tors:
• Access to the internal positioner adjustments — the mounting
location should provide enough room to remove the cover in
order to perform calibration and repair and replacement proce-
dures inside the positioner. Refer to Figure 3-1 for positioner
dimensions. Figure 3-2 shows the electrical connections, Fig-
ure 3-3 shows the dimensions of the drive arm connections
and Figure 3-4 shows the drive shaft variations.
• Allow room for linkage to the actuator — the mounting position
should be such that a practical linkage arrangement can be
made between the positioner and the actuator for full range
travel.
 Loading...