18 | RMC-100 | 2105551MNAD
5.1.1 Super capacitor
The RMC design includes a super capacitor (Super CAP) that serves as a short-term power reservoir. The
first time that the unit is powered up, or if the RMC is left powered off for several hours or longer, the
boot time is approximately 2 minutes to allow for charging of the super capacitor. Once the capacitor is
fully charged, the boot time is considerably less.
In the event of a loss of power or reset, the charged super capacitor
prevents the supply voltage from falling to zero for a short period of time (2.5 seconds).
This delay allows the system time to save all persistent data such as
trending, restart
5.2 Power with battery and charger
This powering mode requires a 12 volt (SLA) battery and a charger to recharge the battery. The following
instructions describe the typical installation of a battery and solar panel system as the charger. These
instructions should be adapted for alternate installations.
Make sure the battery and charger meet the specifications
given in section 2.2.
5.2.1 Connect the battery (dc power)
The hardware required for a battery installation is a 12 volt sealed lead acid (SLA) battery and the
battery cable. Before installation, inspect the battery cable and connectors for breakage where they
terminate on the battery. To install and connect the battery:
1. Install and secure the battery where it will be used.
– Bodily injury and property damage. Do not allow the battery terminals or
, if attached, to come in contact with any metal surface. When the positive and
negative battery terminals contact a conductive material, this creates a short circuit and
could result in sparks, property damage, and possible explosion.
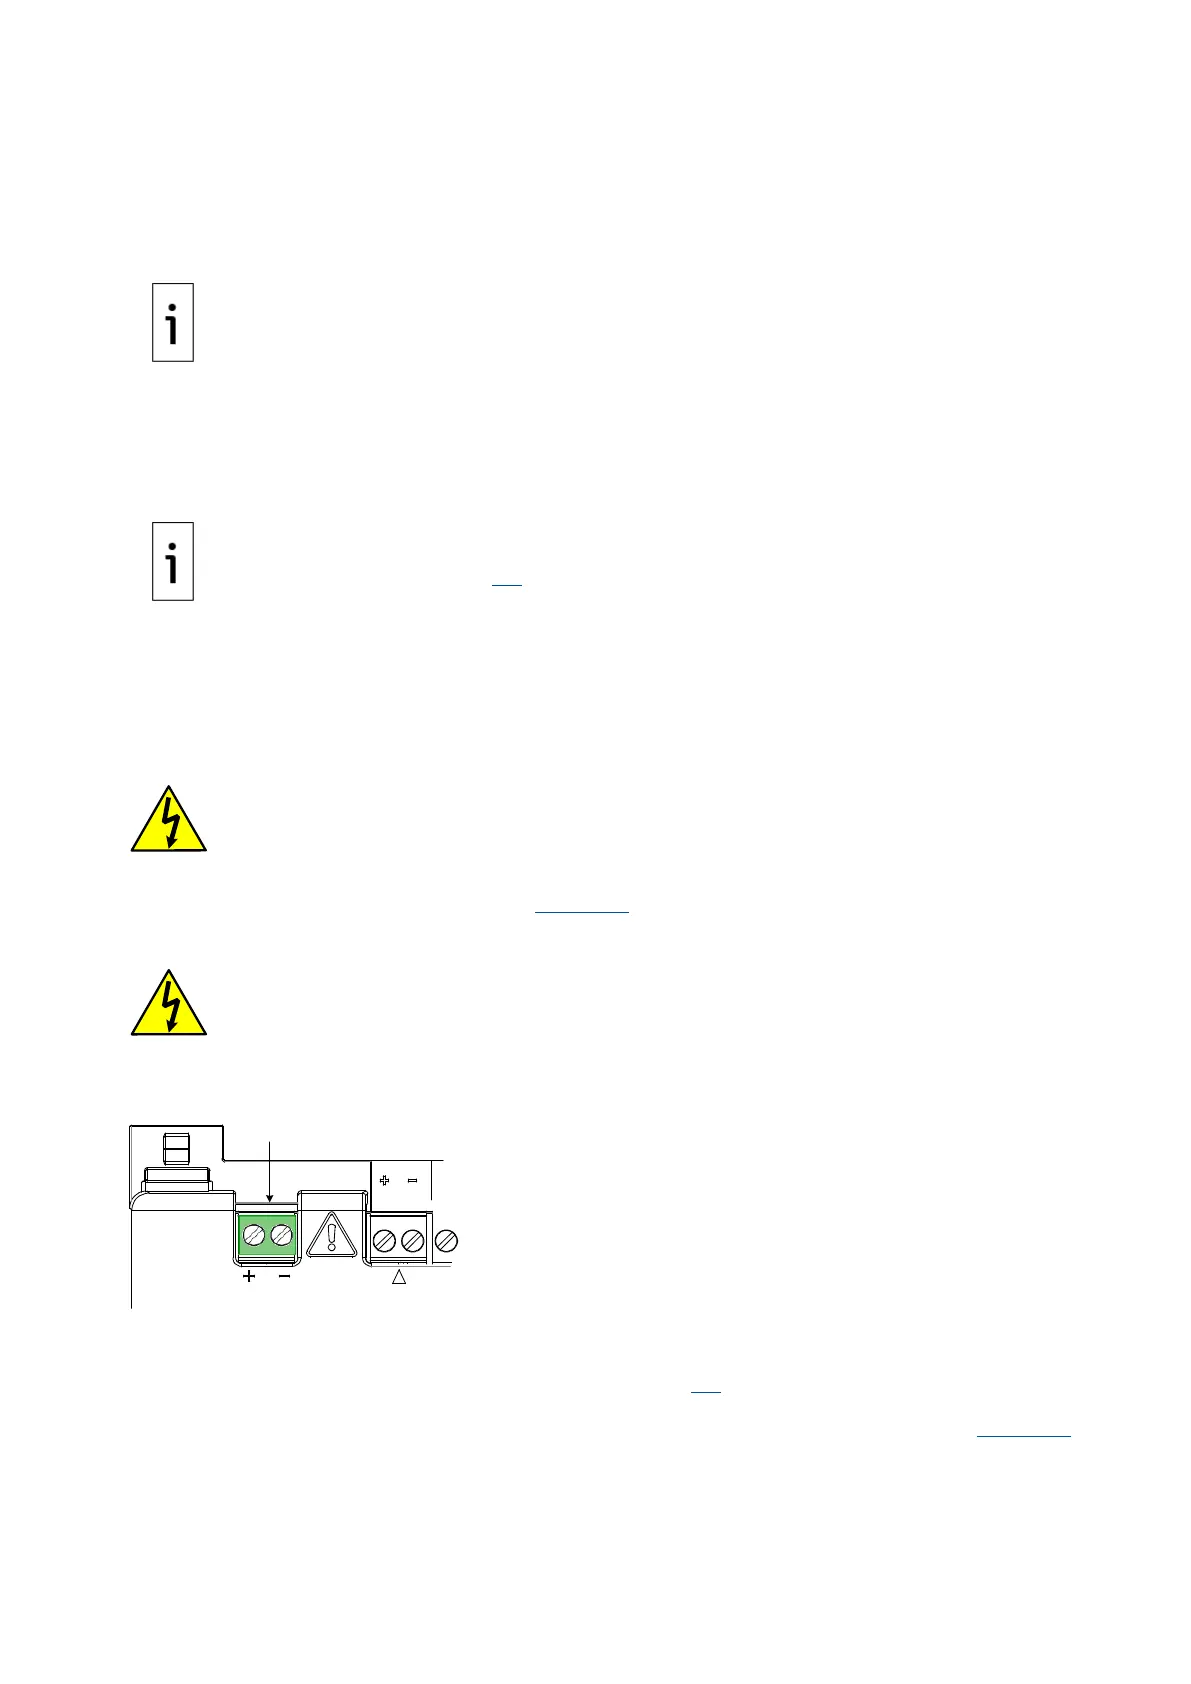
2. Connect the battery to the terminals (Figure 5-1). The power terminal block is green. Observe the
polarity (+ and -).
– Bodily injury and property damage. All wiring of peripheral or external
devices to the controller should be com
pleted prior to applying power (connecting the
Connect the battery before connecting the charger cable.
Figure 5-1: Battery port
3. Confirm that the battery is supplying power to the RMC by observing the power on sequence
information scrolling on the LCD (see details in section 5.1). When the DATE/TIME display, the
sequence is complete.
4. If the power on sequence fails to initiate or complete, press the reset button shown in Figure 5-4.
5.2.2 Connect the charger
The RMC may use a solar panel (20 Watt or less) with Nominal 12 Vdc output voltage. The solar panel
may be mounted on a 2 inch pipe or the top or side of a meter house. Call the ABB main office number
BAT
CHARGER/EXT PWR
Battery port
 Loading...