2105551MNAD | RMC-100 | 21
To set up local communication using the USB port:
1. Power on the RMC and laptop.
2. Connect the USB cable. An annunciator in the RMC LCD displays a lower case “u” for local USB
connection.
3. On the laptop start PCCU.
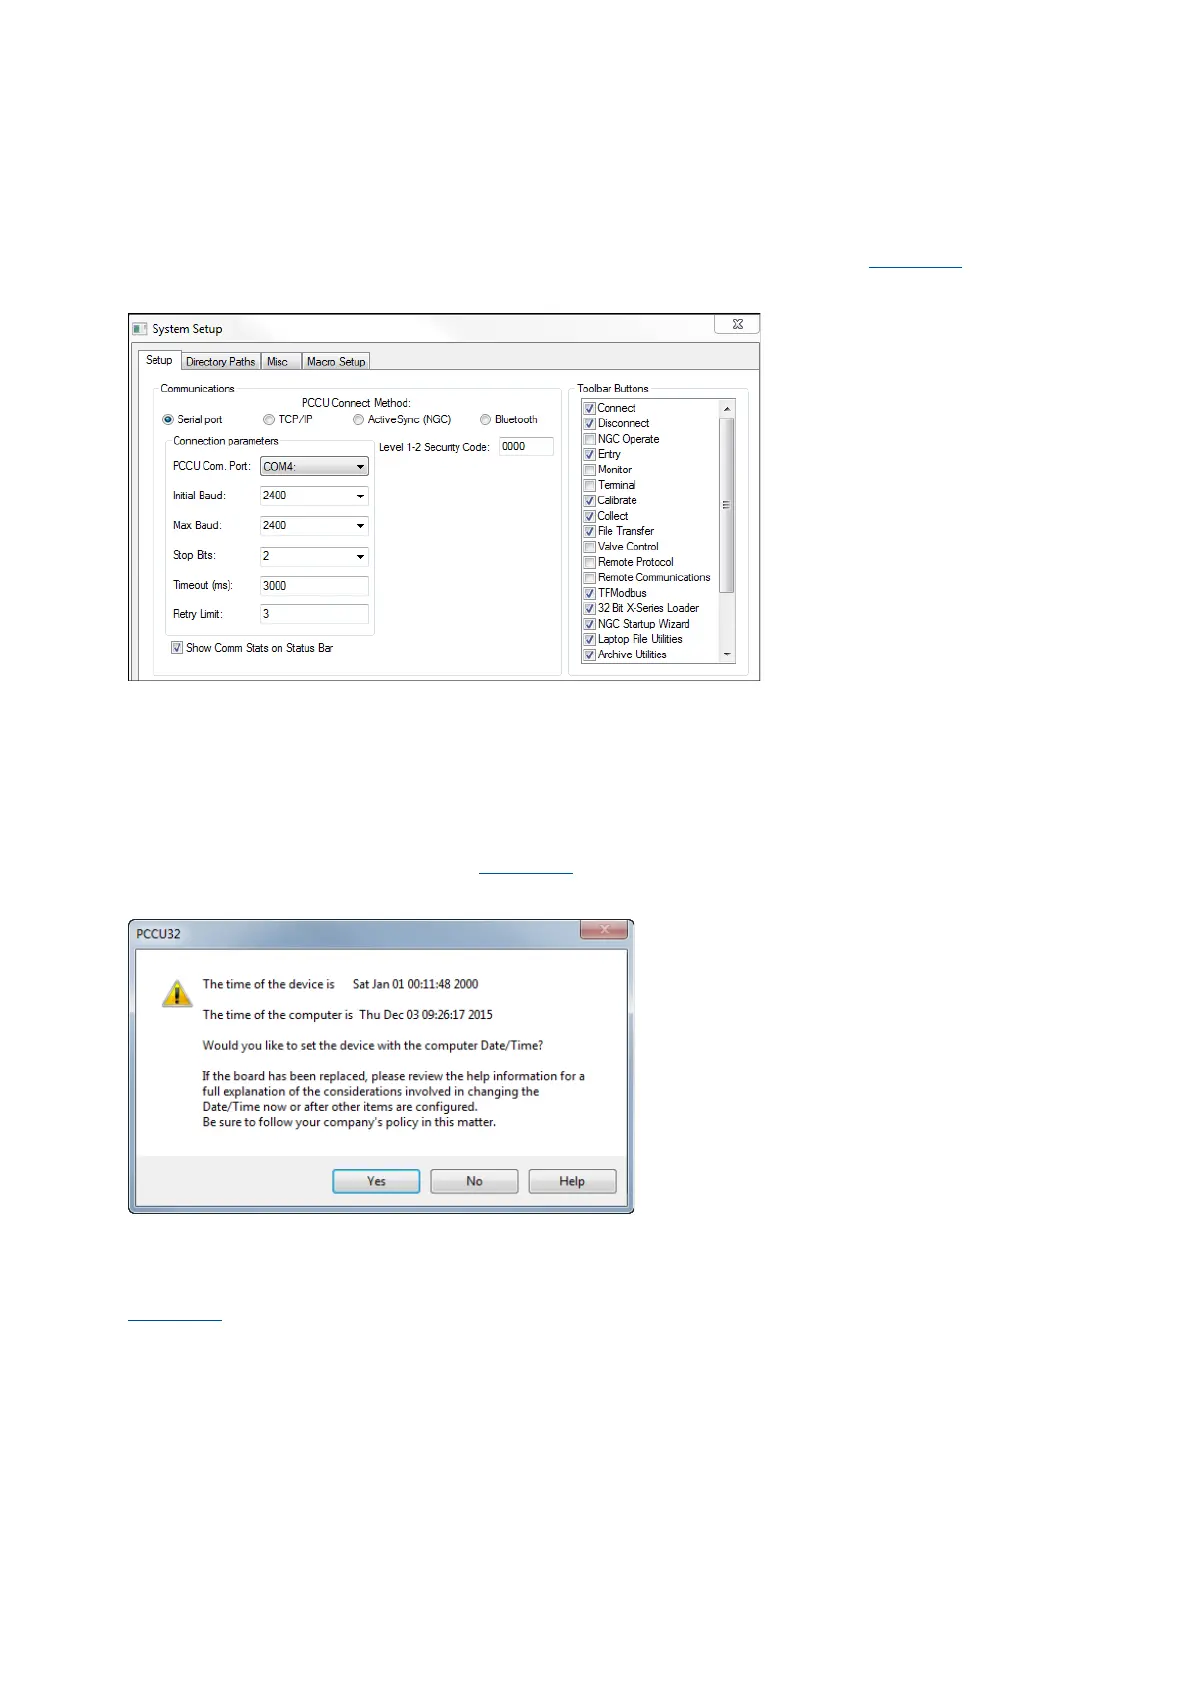
4. On the PCCU32 tool bar, click Setup. The System Setup window displays (Figure 6-1
).
Figure 6-1: System setup
5. Under Communications, in the Setup tab, select the Serial port radio button.
6. Select the PCCU Com. Port from the drop-down list (the computer USB port that the cable is
connected to).
7. Click Close.
8. On the PCCU32 tool bar, click Entry to connect to the device. When the connection is successful,
the PCCU32 Entry screen displays.
9. If the RMC calendar clock is different from the laptop’s date and time, a message box displays to
synchronize the date and time (Figure 6-2
).
Figure 6-2: Synchronize date and time
10. Click Yes. The RMC calendar clock is synchronized with the laptop date and time.
6.2 Local connection on Ethernet
Figure 6-3 shows the default Ethernet configuration of the RMC. The RMC is configured as a 2-port
Ethernet switch from the factory. Ethernet is configured in 1 Network mode, therefore devices connected
to either port communicate on the same subnet. A single default IP address (169.254.0.11) is ready for
initial local communication using either of the 2 ports. Both ports are enabled by default.
 Loading...