Installation
EN
84 bora.com
Checking the scope of delivery
u
Make sure the delivery is complete and check it for
damage.
u
Immediately inform the BORA Service TeamTeam if
parts are missing or damaged.
u
Do not under any circumstances install parts which
are damaged.
u
Dispose of transport packaging in the proper manner
(see"9Decommissioning, disassembly and
disposal").
8.3
Tools and aids
The following tools are required to correctly install the
appliance, among others:
T
Spirit level
T
4 mm Allen key
T
Slotted screwdriver
T
Water pump pliers
All installation work must be carried out using
hand tools. If machine tools are used, there is a
risk of exceeding the tightening torque.
8.4
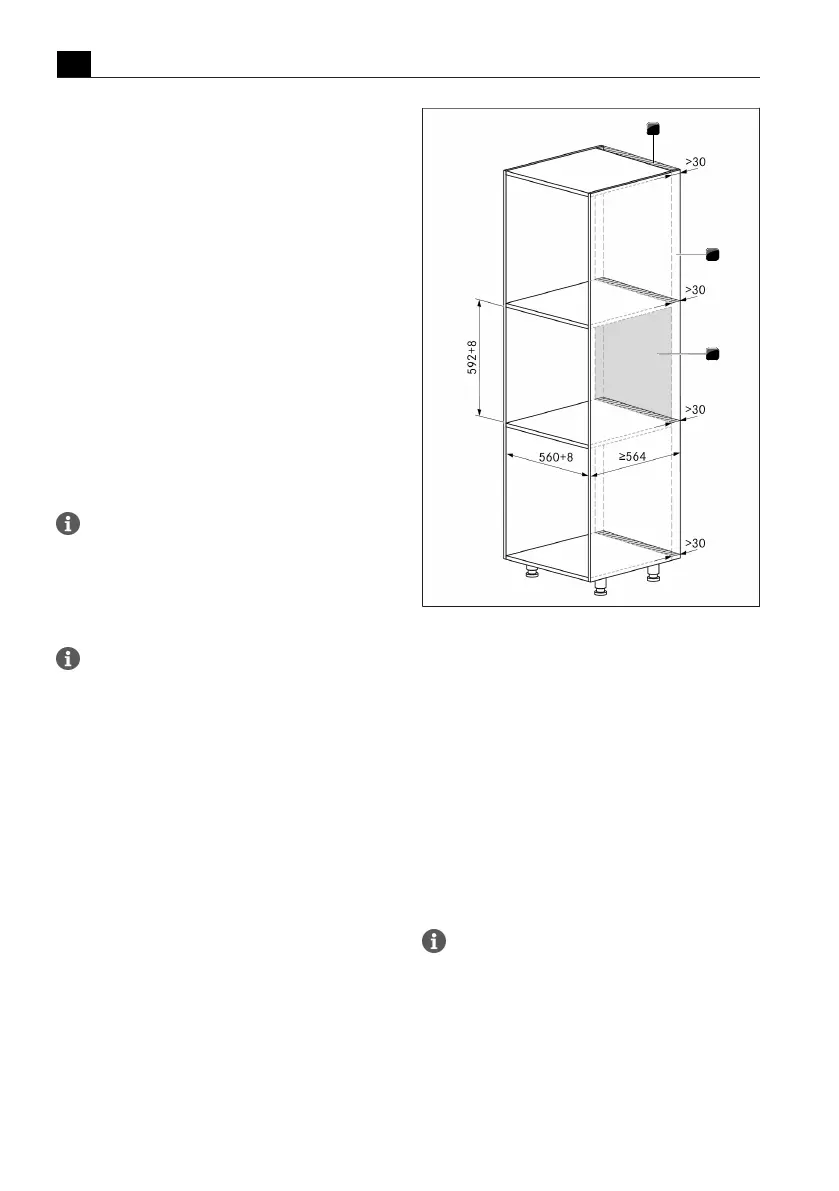
Installation dimensions
The minimum appliance installation depth is
564 mm. When using a 560 mm deep standard
unit, you should allow for clearance from the
wall. This generally depends on the specific
installation and/or the number of X BO frame
spacers used.
u
Prepare the fitted unit taking into account the
dimensions specified.
u
Remove the back panel of the unit to the rear of the
appliance.
u
Maintain a minimum distance of 30mm from the
back of the appliance, the back panel of the unit and
the shelves to the adjacent elements (unobstructed
ventilation cross-section). Shorten the shelves if
necessary.
u
So that the fill level is detected correctly, use a spirit
level to precisely adjust the shelf on which the
appliance is to sit.
Fig.8.1
Fitted unit
[1]
Minimum distance of 30mm
[2]
Unobstructed ventilation cross-section of at least
160cm²
[3]
Back panel of unit
8.5
BORA X BO frame spacer
The frame spacers can be used to vary the appliance
installation depth. The appliance is fitted with a single
frame spacer. Depending on where it is installed, the
4-piece frame spacer can be removed or an additional
one can be fitted (available as accessory X BO frame
spacer XBORS).
For greater accessibility, the frame spacer
should be fitted or removed before installing the
appliance.
 Loading...