EasyManua.ls Logo

Canon PowerShot G7 User Guide Advanced User Manual

Canon PowerShot G7 User Guide Advanced
171 pages
To Next Page IconTo Next Page
To Previous Page IconTo Previous Page
Page #72 background image
70
To Release the FE Lock: Operate a button other than the control
dial.
In this mode, the camera automatically changes the exposure
within a set range to take three shots as the same interval as
continuous shooting (p. 44) after you press the shutter button once.
The images are shot in the following order: Standard exposure,
underexposure and overexposure.
2
Press the button and set it to (flash on).
z If you are using an externally mounted flash, please refer to
its manual for setting instructions.
3
Focus the camera on the subject on which
you wish to lock the exposure setting.
4
Press the shutter button halfway.
5
Press the button.
z The flash fires a pre-flash and the exposure is fixed.
6
Re-aim the camera to compose the shot as
desired and press the shutter button fully.
The FE lock function is not available when [Flash Adjust] is
set to [Manual] (p. 72).
Auto Exposure Bracketing (AEB Mode)
Shooting Mode
1
FUNC. Menu *(BKT-Off) (AEB) .
See Menus and Settings (p. 24).
* Default setting.

Table of Contents

Question and Answer IconNeed help?

Do you have a question about the Canon PowerShot G7 User Guide Advanced and is the answer not in the manual?
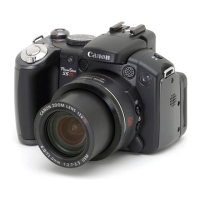
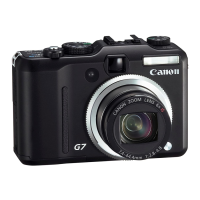
Canon PowerShot G7 User Guide Advanced Specifications

General IconGeneral
CategoryDigital Camera
Effective Pixels10.0 Megapixels
Optical Zoom6x
Digital Zoom4x
Shutter Speed15 - 1/2500 sec
Aperture Rangef/2.8 - f/4.8
ModelCanon PowerShot G7
Image Sensor1/1.8-inch CCD
LCD Screen Size2.5 inches
LCD Screen Resolution207, 000 pixels
Video Resolution640x480 at 30fps
Storage MediaSD Card, SDHC Card, MMC Card
BatteryNB-2LH
Weight320 g (without battery)
Flash Range1.6 - 13 ft./50cm - 4.0m (W), 1.6 - 8.2 ft./50cm - 2.5m (T)

Summary

Before Using the Camera

Formatting Memory Cards

Steps and considerations for formatting memory cards.

Shooting

Setting the Image Stabilizer Function

How to use the image stabilizer to reduce camera shake.

Adjusting the ISO Speed

Setting camera sensitivity to light for better low-light performance.

Adjusting the Exposure Compensation

Fine-tuning exposure levels for brighter or darker images.

Adjusting the Tone (White Balance)

Setting white balance to ensure accurate color rendition under different lighting.

Continuous Shooting

Capturing multiple shots rapidly by holding the shutter button.

Using the Mode Dial

Setting the Shutter Speed

Adjusting shutter speed for motion blur control or low-light shooting.

Setting the Aperture

Adjusting aperture for depth of field control.

Manually Setting the Shutter Speed and Aperture

Full manual control over exposure settings.

Movie Shooting

Recording video with various resolution and frame rate options.

Saving Custom Settings

Storing frequently used shooting settings for quick recall.

Advanced Shooting Functions

Shooting Hard-to-Focus Subjects (Focus Lock, AF Lock, Manual Focus)

Techniques for focusing on difficult subjects.

Locking the Exposure Setting (AE Lock)

Freezing exposure settings for consistent results.

Locking the Flash Exposure Setting (FE Lock)

Freezing flash exposure settings.

Playback/Erasing

Troubleshooting

Camera

Solutions for camera operation issues and error messages.

Shooting

Resolving problems related to shooting and recording.

Image is blurred or out of focus

Addressing issues with image focus and camera movement.

Subject in recorded image is too dark

Solutions for underexposed images due to lighting conditions.

Subject in recorded image is too bright, or image flashes white

Troubleshooting overexposed images and flash issues.

Appendix

Specifications

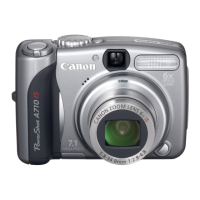
Technical details and specifications of the camera.

Shooting Modes

Overview of available shooting modes and their characteristics.

Related product manuals