49
ENG
c.pCO sistema +0300057EN rel. 1.2 - 29.05.2017
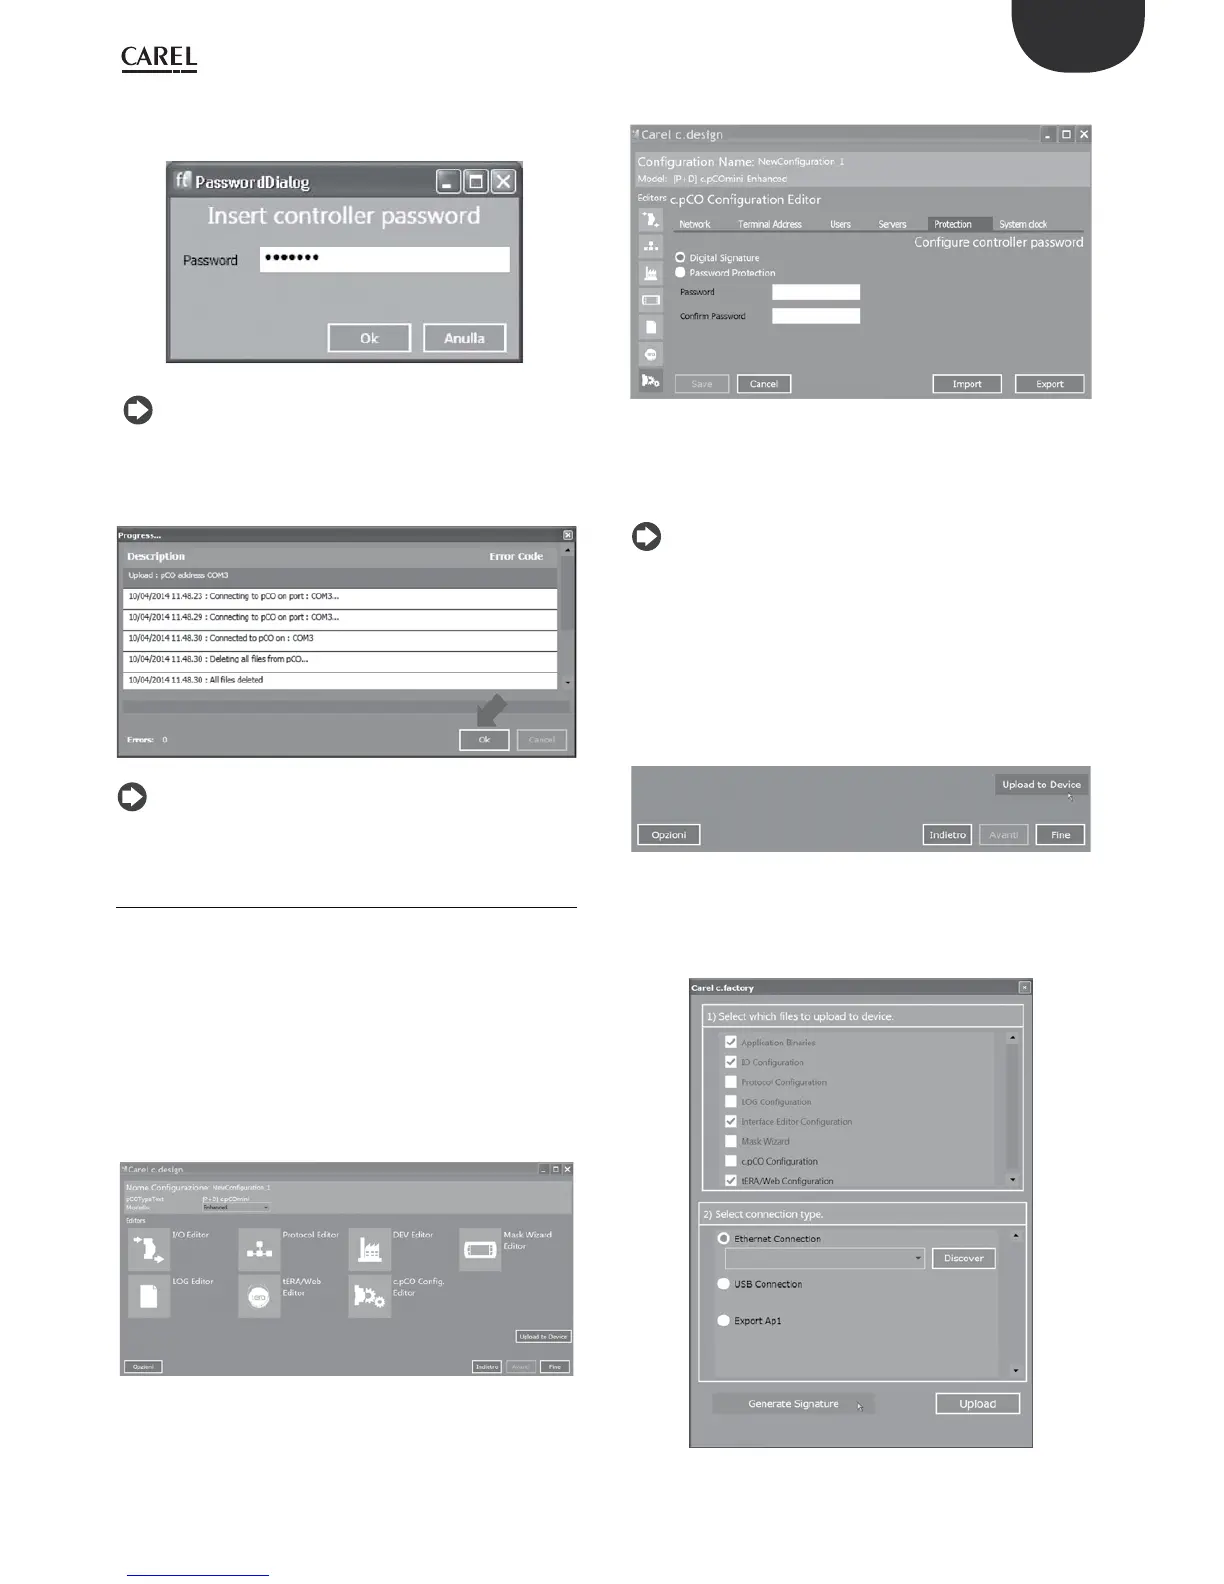
6. Upload the signed application. If performing the operation on a
controller that already contains a protected application, the previous
protection password needs to be entered (see the gure below).
Fig. 8.e
Note: if loading an application program signed with the same
password, the password does not need to be entered again.
7. A status screen shows the progress of the upload; at the end, click OK
and “Close” to close “C.factory”
Fig. 8.f
Note: to complete activation of the protection password, power
the controller o and on again.
8.3 Digital signature generation
Protection system by digital signature, if enabled by optional license,
prevents the programmable controller from being overwritten with
unauthorised software.
The controller is indelibly signed, with the password dened in c.design
tool. After a controller has been signed with a specic digital signature, it
can only be used with applications signed with the same digital signature
(see paragraph 8.4), and the digital signature applied cannot be erased
or modied.
To sign a c.pCO with a digital signature, proceed as follows:
1. Open c.design and select or create a new conguration. Click
“c.pCO Cong Editor”:
Fig. 8.g
2. Select the "Protection" tab:
Fig. 8.h
3. Flag "Digital Signature", and insert password corresponding to the
new digital signature to be generated (8 alphanumeric characters).
Then click save.
Notes:
• Digital signature option is shown only if "Digital Signature" license has
been activated.
• To modify the password of a digital signature, ll the "Previous
Password" eld and enter a new password in the "Password" eld.
• To remove the digital signature from a conguration, ll the "Previous
Password" eld and leave the "Password" eld empty.
4. Click “Save”. The Upload page will be displayed. Open c.factory by
clicking "Upload to Device".
Fig. 8.i
5. Click “Generate Signature”: a screen is shown for selecting the path where
to save the digital signature le. Name and save the .ap1 le in a
directory called “UPGRADE” on a USB ash drive.
Fig. 8.j
 Loading...