52
ENG
c.pCO sistema +0300057EN rel. 1.2 - 29.05.2017
Authorization
file present
in directory ?
Is the user
present in the
access file ?
Deny
access
Access request
for user to directory
YES
NO
YES
YES
NO
NO
NO
Is the user
present in the
system-level
user database?
Password
correct?
Grant
access
YES
Fig. 9.c
9.2 Computer - c.pCO connection
There are two ways to connect the c.pCO controller to a computer via
Ethernet:
1. computer-c.pCO direct connection;
2. network LAN connection with DHCP server
Computer-c.pCO direct connection
Connect one end of the network cable to the Ethernet port on the
computer and the other end to a any of the Ethernet ports on the
c.pCO; LEDs blinking indicate correct connection. The Ethernet ports on
the c.pCO are auto-crossing (Auto MDI-X), therefore no crossover cable
is needed. After connection through Ethernet cable, computer and
controller IP addresses must be properly congure in order to belong to
the same IP subnetwork.
Conguration example:
Computer:
IP address: 192.168.0.2
Subnet mask: 255.255.255.0
c.pCO controller:
1. press Alarm and Enter together for 3 seconds to access the system
menu;
2. Select Settings -->TCP/IP settings: DHCP = OFF and enter an address
in the same subnet set on the PC, for example:
IP: 192.168.0.1
MASK: 255.255.255.0
3. Select update conguration --> Yes
INFORMATION
SETTINGS
APPLICATION
UPGRADE
LOGGER
INFORMATION
SETTINGS
APPLICATION
UPGRADE
LOGGER
DIAGNOSTICS
PASSWORD
USB SETTINGS
PLAN SETTINGS
DATE/TIME
TCP/IP SETTINGS
INFORMATION
SETTINGS
APPLICATION
UPGRADE
LOGGER
DIAGNOSTICS
DHCP: Off
IP: 192. 168. 0. 1
MASK: 255. 255. 255. 0
GW: 0. 0. 0. 0
DNS: 0. 0. 0. 0
NAME:
Update config? Yes
Network LAN connection with DHCP server
Before connecting the c.pCO controller to the LAN, access the system
menu and verify that DHCP: On (default setting).
Then connect the c.pCO to the LAN. The IP address is automatically
assigned to the c.pCO by the DHCP server, and it can be displayed in the
system screens (Settings -->TCP/IP settings).
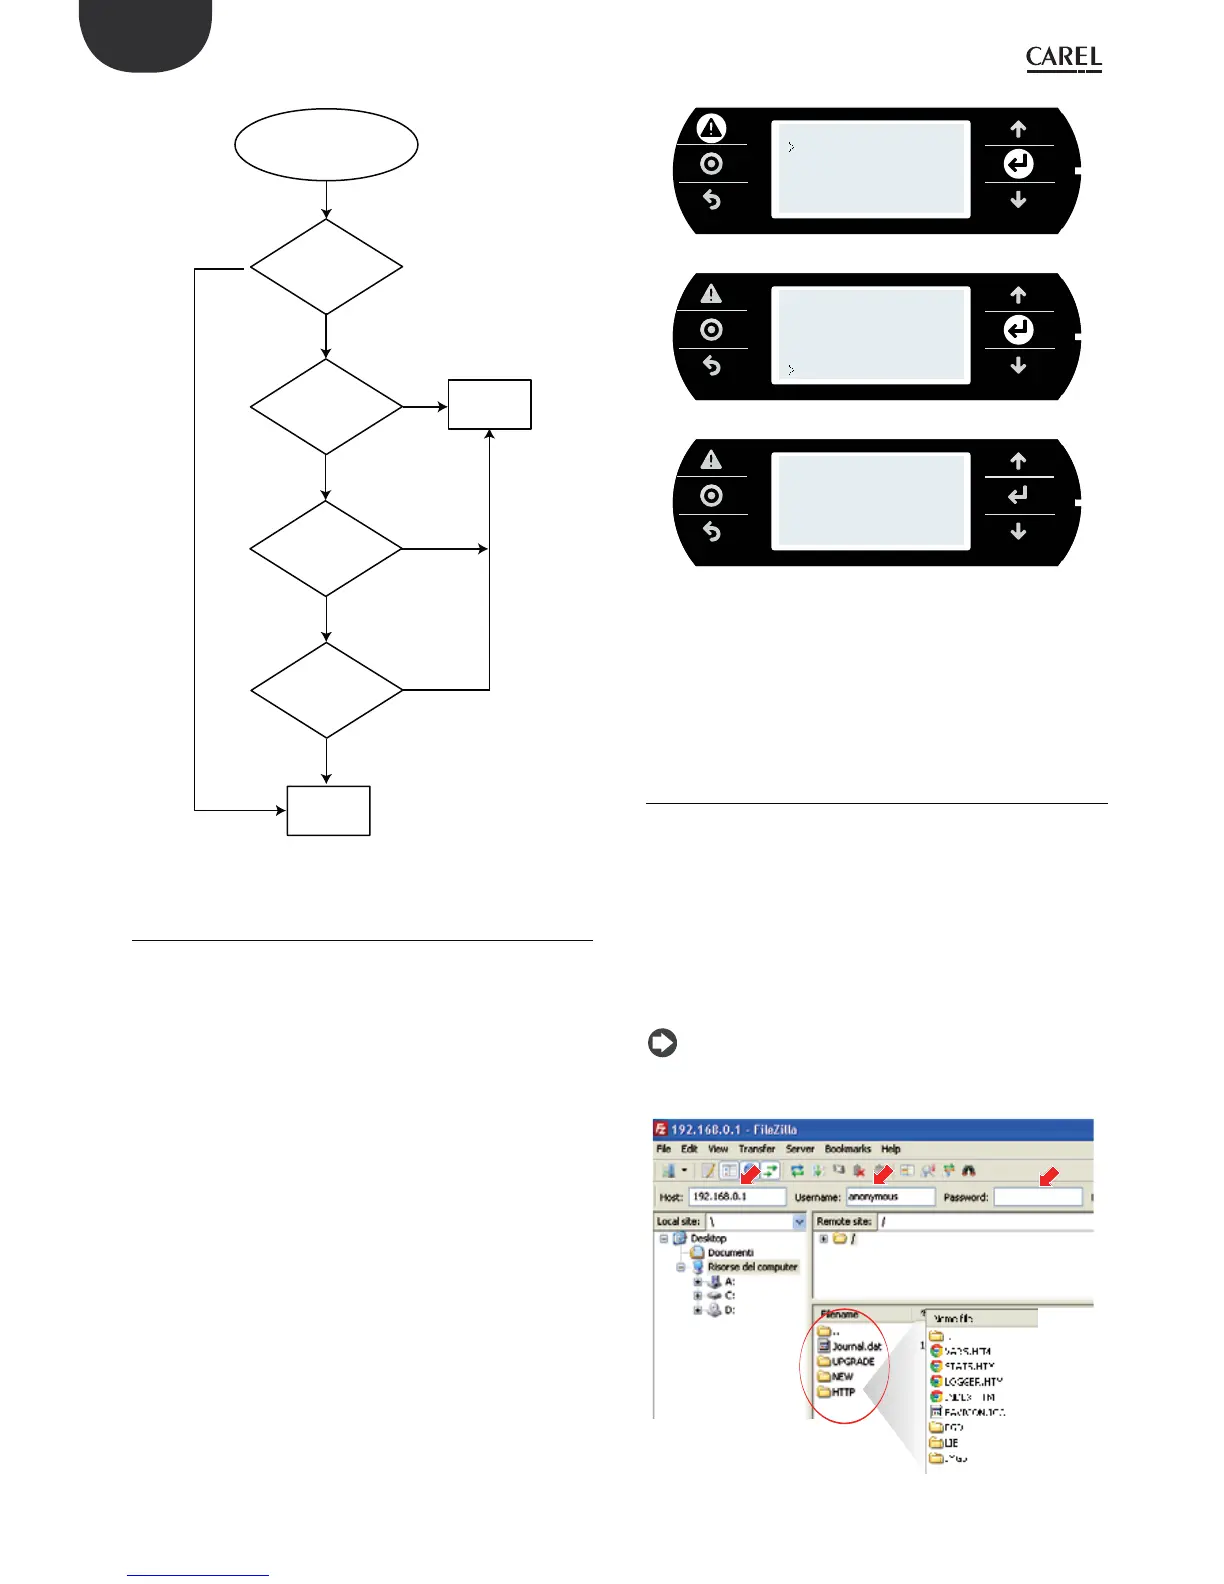
9.3 FTP connection with authentication
Once having connected the computer to the c.pCO via Ethernet, FTP
protocol can be used to transfer les. The program used in this example is
“FileZilla”, downloadable for free from the Internet.
Proceed as follows:
1. open FileZilla: the following screen will be shown;
2. enter the IP address (or hostname) of the c.pCO controller, the user
name --> anonymous and password -->“empty” and select “Quick
Connect”;
3. the user can access all the directories highlighted, as these do not
contain the “ftaccess” le: UPGRADE, HTTP. Access is also available to
the HTTP directory and its sub-directories.
Nota: Please use following settings in Filezilla:
• Edit->Settings->Connection-> set timeout in seconds = 0
• Edit -> Settings -> Transfers -> set maximum simultaneous transfers to 1
Fig. 9.d
 Loading...