EN-33
Recording/Playing Back Performances
■ To delete everything recorded to a track
1.
While the 70 (REC) button is lit white, touch
70 (REC).
This enters record standby, which is indicated by flashing
70 (REC) (red) and 6 a (white) lights.
• At this time, the “L” indicator is flashing. If you want to
delete the contents of the left-hand part track, advance
directly to step 3.
2.
If you want to delete the contents of the right-
hand part track, hold down 70 (REC) until
the “R” indicator starts to flash.
3.
Touch 6 a.
This causes the 70 (REC) light (red) to change from
flashing to lit.
4.
Hold down 70 (REC) until its light flashes.
This deletes the contents of the specified track.
5.
Touch 70 (REC) to exit record standby.
Immediately after finishing a recording, touching 6 a will
play it back. Use the procedure below to play back a recording
if you played a Music Library song or turned off Digital Piano
power after recording it.
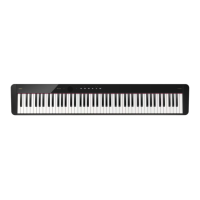
■ To perform playback
1.
While holding down 6 a, press the B}7
keyboard key.
2.
Release 6 a.
3.
To start playback, touch 6 a.
• Playback will stop automatically when the end of the
recording is reached. To stop playback manually,
touch 6 a.
The audio recorder records Digital Piano keyboard play as
audio data. Recordings are stored as WAV files (linear PCM,
16bit, 44.1kHz, stereo) to the USB flash drive in the Digital
Piano’s bl USB Type A port.
• Never remove the USB flash drive while Audio
Recorder recording or playback is in progress. Doing
so can corrupt the data on the USB flash drive and
damage the USB flash drive port.
• For precautions when handling a USB flash drive, see
“USB Flash Drive” (page EN-35).
• For information about the USB flash drive formats
supported by your Digital Piano, see “Supported USB
Flash Drives” (page EN-35).
■ Prepare to use the Audio Recorder
1.
Perform the steps below to put the Digital
Piano into the Audio Mode.*
(1) While holding down 3 FUNCTION, press the E6
keyboard key.
(2) Release 3 FUNCTION.
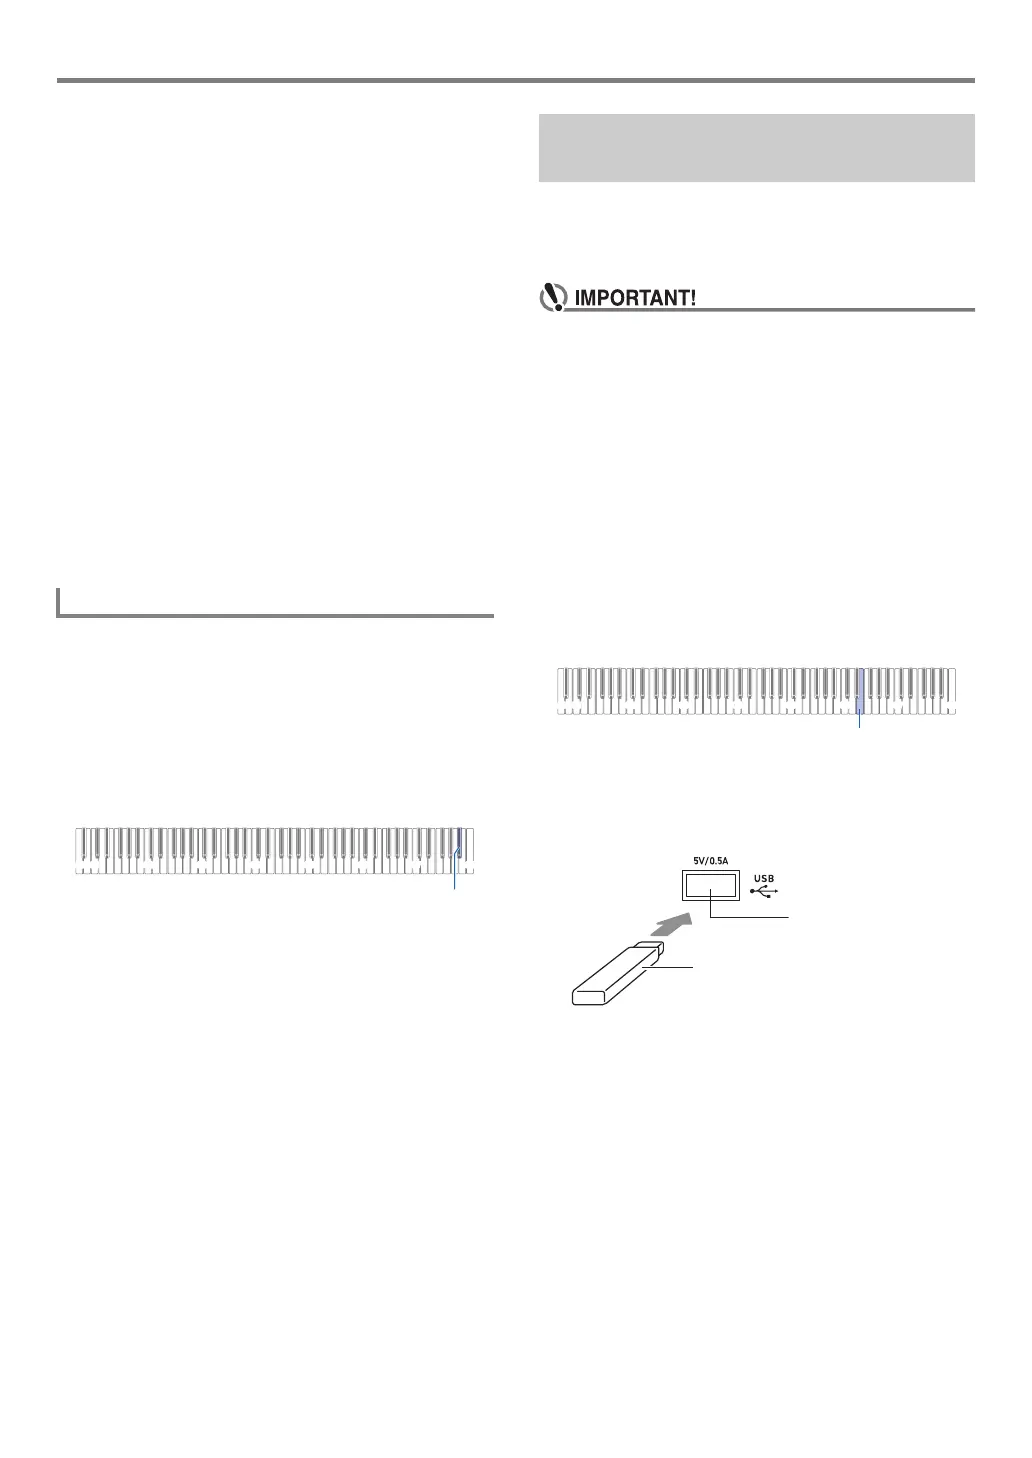
2.
Insert the USB flash drive into the Digital
Piano’s bl USB Type A port.
• Carefully push the USB flash drive in as far as it will
go. Do not use undue force when inserting the USB
flash drive.
• When the Digital Piano recognizes the USB flash
drive, the LEDs above 4 SOUND MODE and
6 a will light sequentially from left to right. Do not
perform any operation while a mounting is in progress.
* Your Digital Piano has two recorders: a MIDI recorder and
an audio recorder. Depending on the type of data you want
to record or play back, you first need to select the MIDI
Mode or Audio Mode.
Playing Back Recorded Content
C1A0 C2 C3 C4 C5 C6 C7 C8
B}7
Using the Audio Recorder to
Record Performances
C1A0 C2 C3 C4 C5 C6 C7 C8
E6
bl USB Type A port
USB flash drive
 Loading...