Tools and Equipment Required
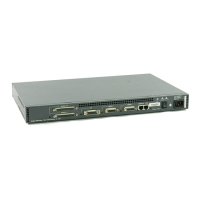
Installation requires some tools and equipment that are not included as standard equipment with the
router. Following are the tools and equipment required to install the router, which are not included:
Flat-blade screwdrivers: small, 3/16-inch (0.476 cm) and medium, 1/4-inch (0.625 cm)
●
ESD-preventive wrist strap●
Screws to secure the rack-mount brackets to the router●
Cables for connection to the WAN and LAN ports:
RJ-45-to-RJ-45 roll-over cables for connection to the asynchronous serial ports.
❍
Ethernet AUI cable or Ethernet transceiver for connection to the Ethernet AUI port.❍
Serial transition cable for connection to the synchronous serial port.❍
●
Note For cable ordering information, see the section "Obtaining Service and Support" in the "Overview
of the Router" chapter.
Ethernet 10BaseT hub or PC with a network interface card for connection to the Ethernet AUI
(LAN) port.
●
Token Ring Media Attachment Unit (MAU) for connection to the Token Ring port.●
CSU/DSU or other DCE device for connection to the synchronous serial interface.●
Console terminal (an ASCII terminal or a PC running terminal emulation software) configured for
9600 baud, 8 data bits, no parity, and 2 stop bits. A terminal is required unless you are using the
AutoInstall procedure. See the section "Connecting the Console Terminal and Modem" later in this
chapter for instructions on connecting a console terminal.
●
Modems for connection to the asynchronous serial ports.●
Setting Up the Chassis
You can set the chassis on a desktop, install it in a rack, or mount it on a wall or other flat surface. Use
the procedure in this section that best meets the needs of your network. The sections are as follows:
Setting the Chassis on a Desktop●
Rack-Mounting the Chassis●
Wall-Mounting the Chassis●
Setting the Chassis on a Desktop
Before setting the chassis on a desktop, shelf, or other flat, secure surface, perform the following steps to
install the rubber feet:
Step 1 Locate the rubber feet on the black adhesive strip that shipped with the chassis. (See Figure 3-1.)
http://www.cisco.com/univercd/cc/td/doc/product/access/acs_fix/cis2500/2520/2520_23/c2520ins.htm (2 of 14) [10/27/2000 3:07:47 PM]
 Loading...


