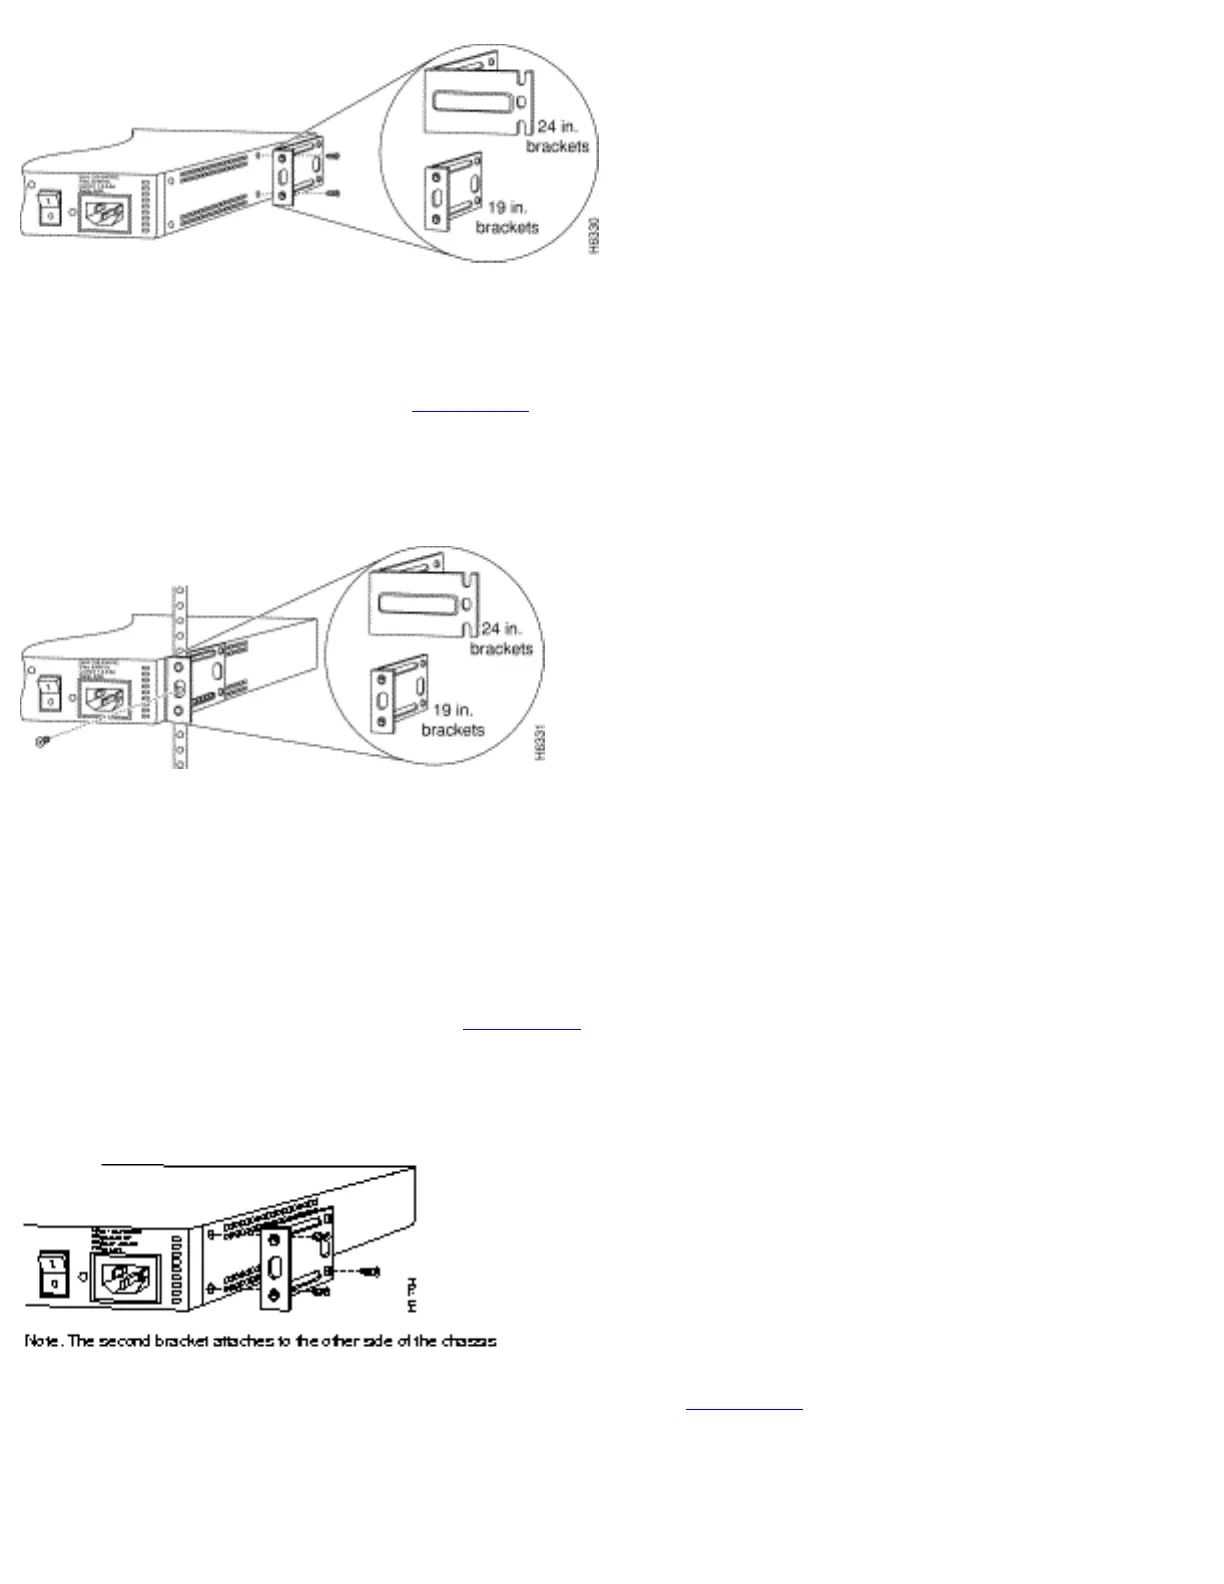
Installing in a Rack
After the brackets are secured to the chassis, you can rack-mount it. Using the screws you provide, attach
the chassis to the rack as shown in Figure 3-7.
Figure 3-7: Attaching the Chassis to a Rack--Rear Panel Forward
Wall-Mounting the Chassis
Use the smaller brackets (for use with a 19-inch rack) to wall-mount the chassis. The smaller brackets
provide the most stable position for the chassis.
Take the following steps to wall-mount the chassis:
Step 1 Attach the brackets as shown in Figure 3-8.
Figure 3-8: Attaching the Wall-Mount Brackets
Step 2 Attach the chassis assembly to the wall as shown in Figure 3-9, using screws and anchors that you
provide. We recommend the following:
For the best support of the chassis and cables, attach the brackets so that the screws align with a
●
http://www.cisco.com/univercd/cc/td/doc/product/access/acs_fix/cis2500/2520/2520_23/c2520ins.htm (5 of 14) [10/27/2000 3:07:47 PM]
 Loading...