Tools Required
You will need the following tools to remove and replace the DRAM SIMM on the router:
Medium-size flat-blade screwdriver (1/4 inch [0.625 cm])
●
ESD-preventive wrist strap●
The DRAM SIMM required for your planned upgrade●
DRAM SIMM Installation
Take the following steps to install the DRAM SIMMs:
Step 1 Power OFF the router.
Step 2 Attach an ESD-preventive wrist strap.
Step 3 Open the cover following the instructions in the section "Opening the Chassis" earlier in this appendix.
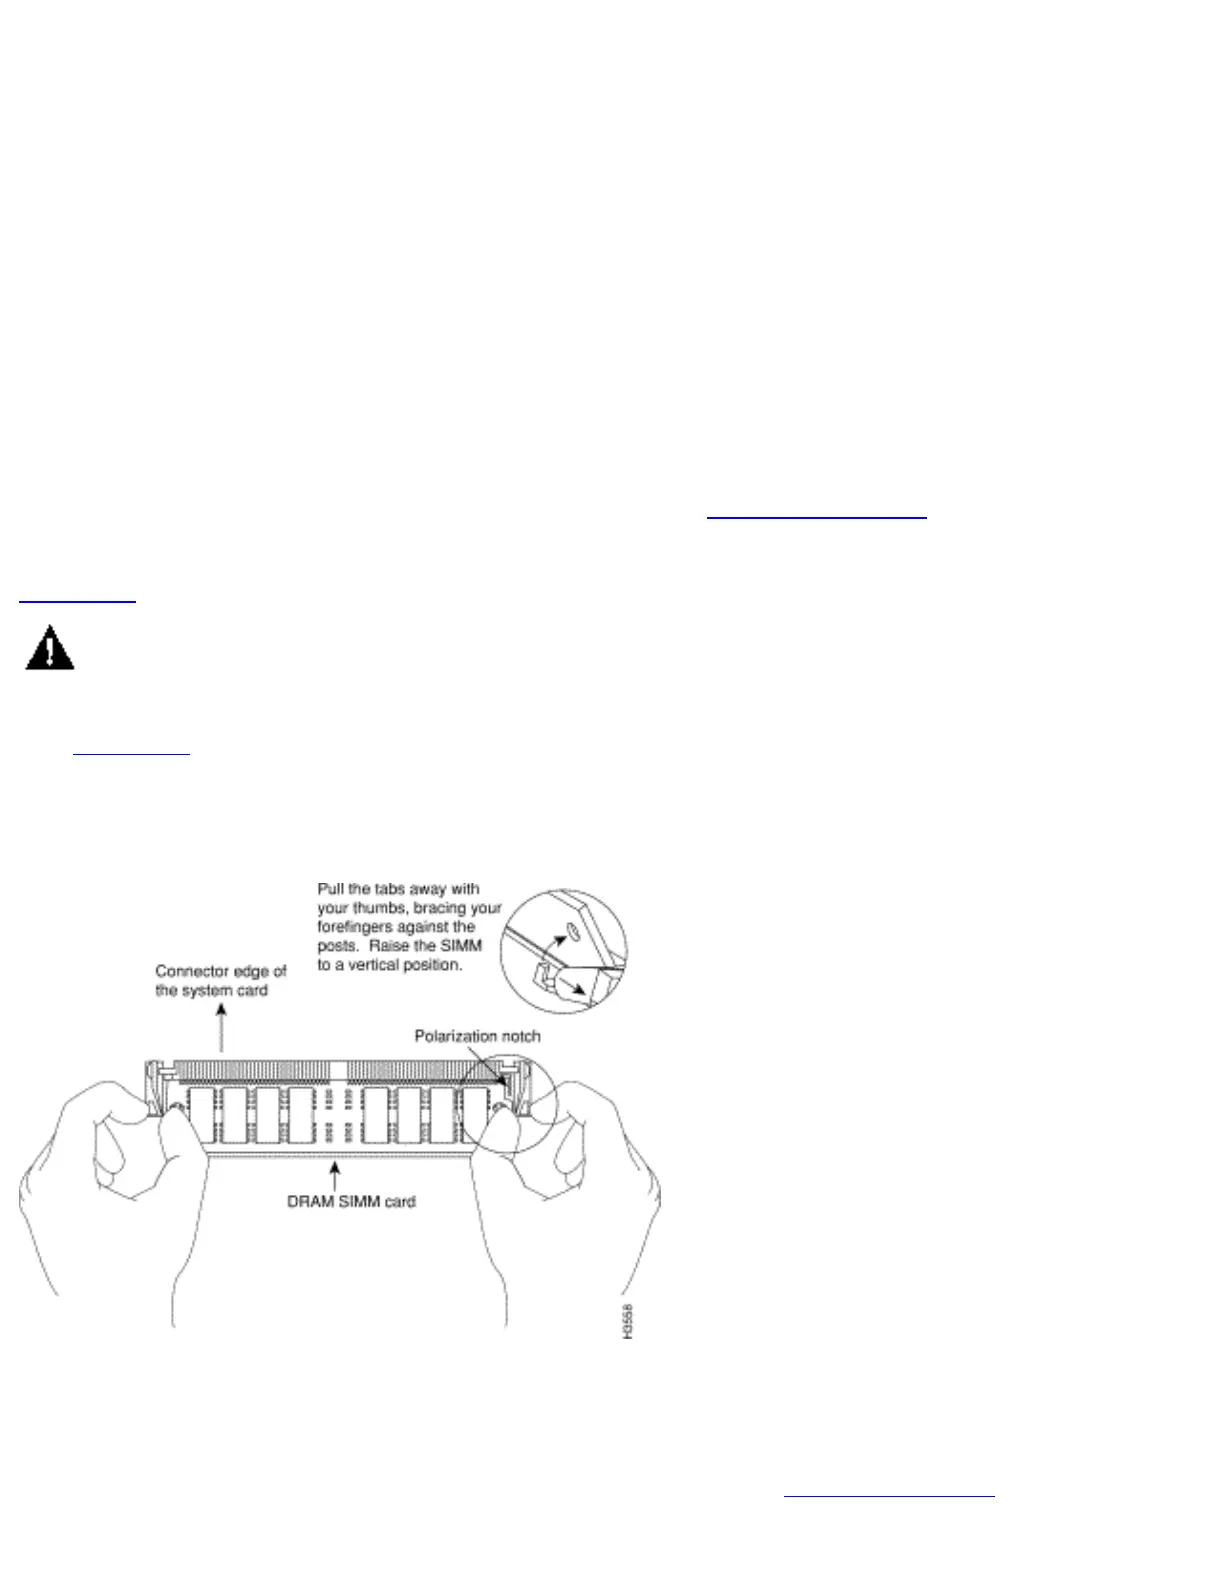
Step 4 Remove the existing DRAM SIMM by pulling outward on the connectors to unlatch them, as shown in
Figure B-3. Be careful not to break the holders on the SIMM connector.
Caution To prevent damage, do not press on the center of the SIMMs. Handle each SIMM carefully.
Step 5 Position the new SIMM so that the polarization notch is located at the left end of the SIMM socket.
(See Figure B-3.)
Figure B-3: Removing and Replacing the DRAM SIMM
Step 6 Insert the new DRAM SIMM by sliding the end with the metal fingers into the SIMM connector socket
at approximately a 45-degree angle to the system card. Gently rock the SIMM back into place until the latch
on either side snaps into place. Do not use excessive force because the connector may break.
Step 7 Replace the router cover. Follow the instructions in the section "Closing the Chassis" later in this
http://www.cisco.com/univercd/cc/td/doc/product/access/acs_fix/cis2500/2520/2520_23/c2520mnt.htm (4 of 7) [10/27/2000 3:08:02 PM]
 Loading...