2-36
Catalyst 3750 Switch Hardware Installation Guide
OL-6336-10
Chapter 2 Switch Installation
Installing and Removing XENPAK Modules (Catalyst 3750G-16TD Switch)
Note The 10-Gigabit Ethernet XENPAK modules are referred to as 10-Gigabit Ethernet module ports in the
switch software documentation.
See the Catalyst 3750 release notes for the list of XENPAK modules that the Catalyst 3750G-16TD
switch supports. Use only Cisco XENPAK modules on the Catalyst 3750G-16TD switch. Each XENPAK
module has an internal serial EEPROM that is encoded with security information. This encoding
provides a way for Cisco to identify and validate that the XENPAK module meets the requirements for
the switch.
See Table B-2 on page B-4 for cable requirements for XENPAK module connections. For detailed
instructions on installing, removing, cabling, and troubleshooting the XENPAK module, see your
XENPAK module documentation.
Installing a XENPAK Module
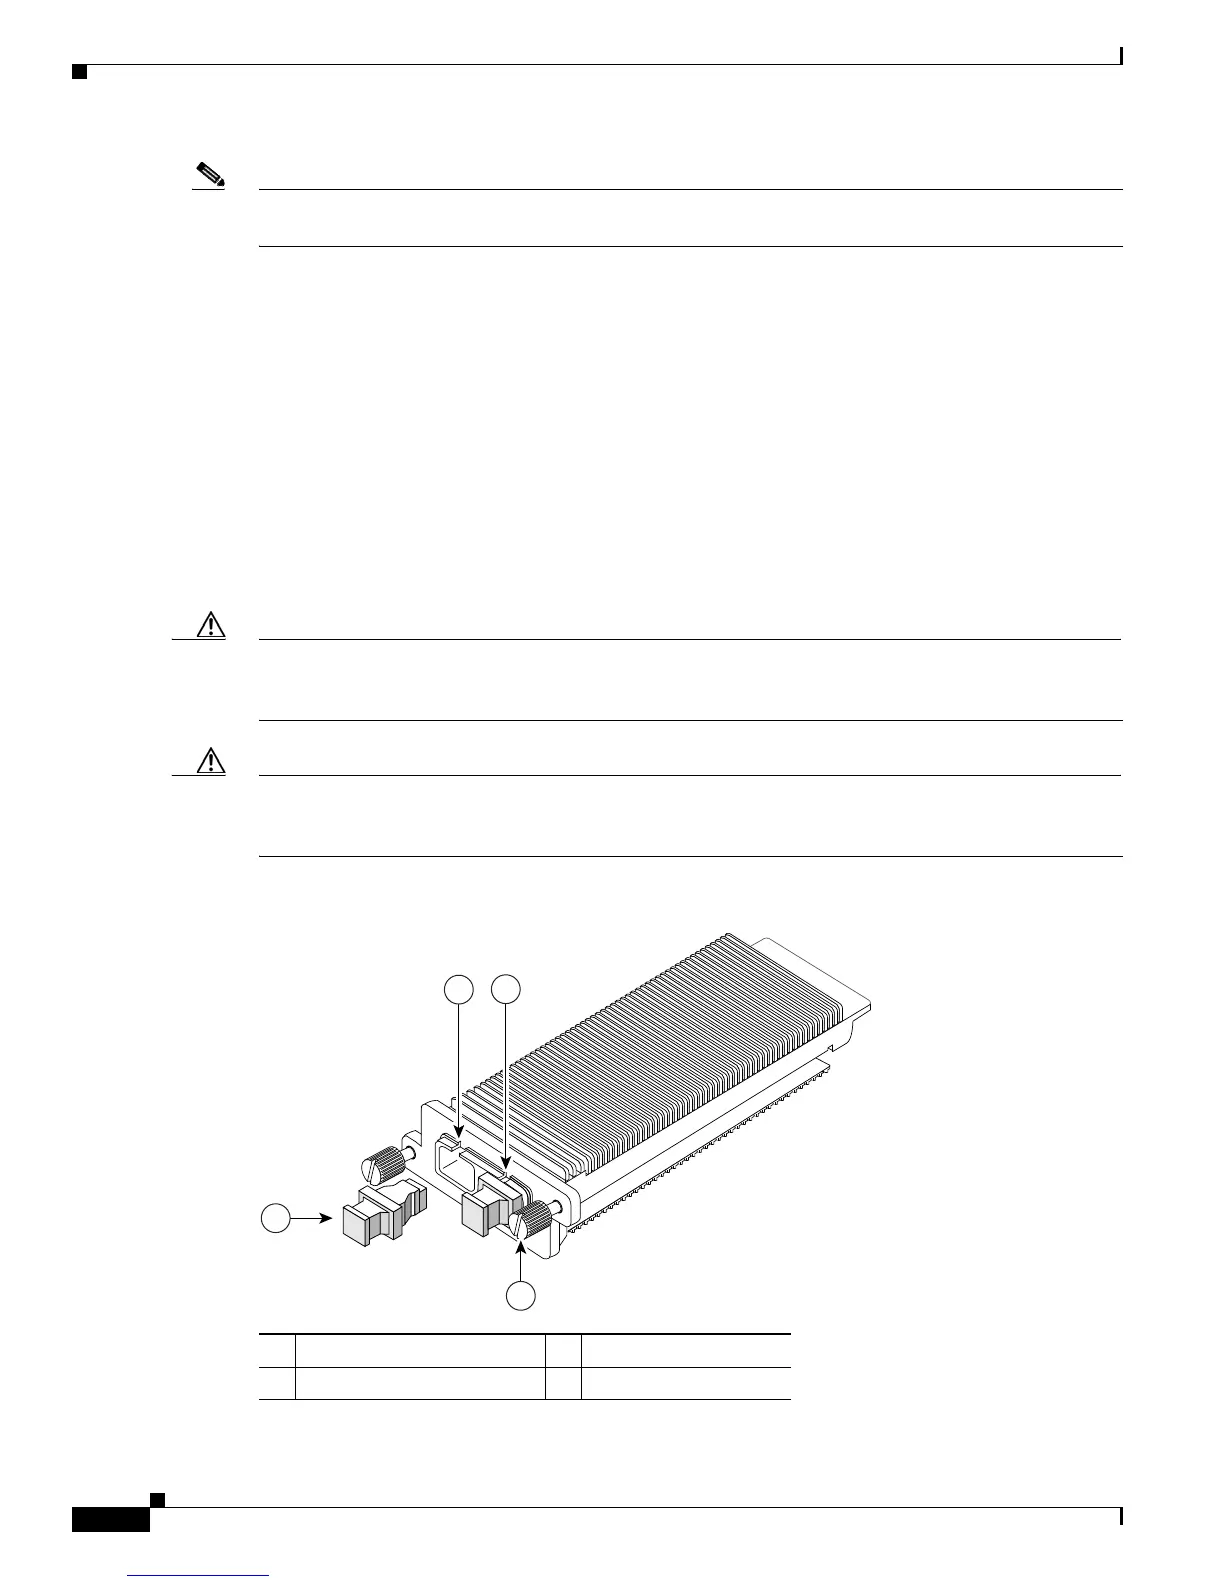
Figure 2-50 shows a XENPAK module.
Caution We strongly recommend that you do not install or remove fiber-optic XENPAK modules with cables
attached because of the potential damage to the cables, the cable connector, or the optical interfaces in
the XENPAK module. Disconnect all cables before removing or installing the XENPAK module.
Caution Do not remove the dust plugs from the fiber-optic XENPAK module or the rubber caps from the
fiber-optic cable until you are ready to connect the cable. The plugs and caps protect the XENPAK
module ports and cables from contamination and ambient light.
Figure 2-50 XENPAK Module
1 Captive installation screw 3 Sending optical bore
2 Optical bore dust plug 4 Receiving optical bore
 Loading...