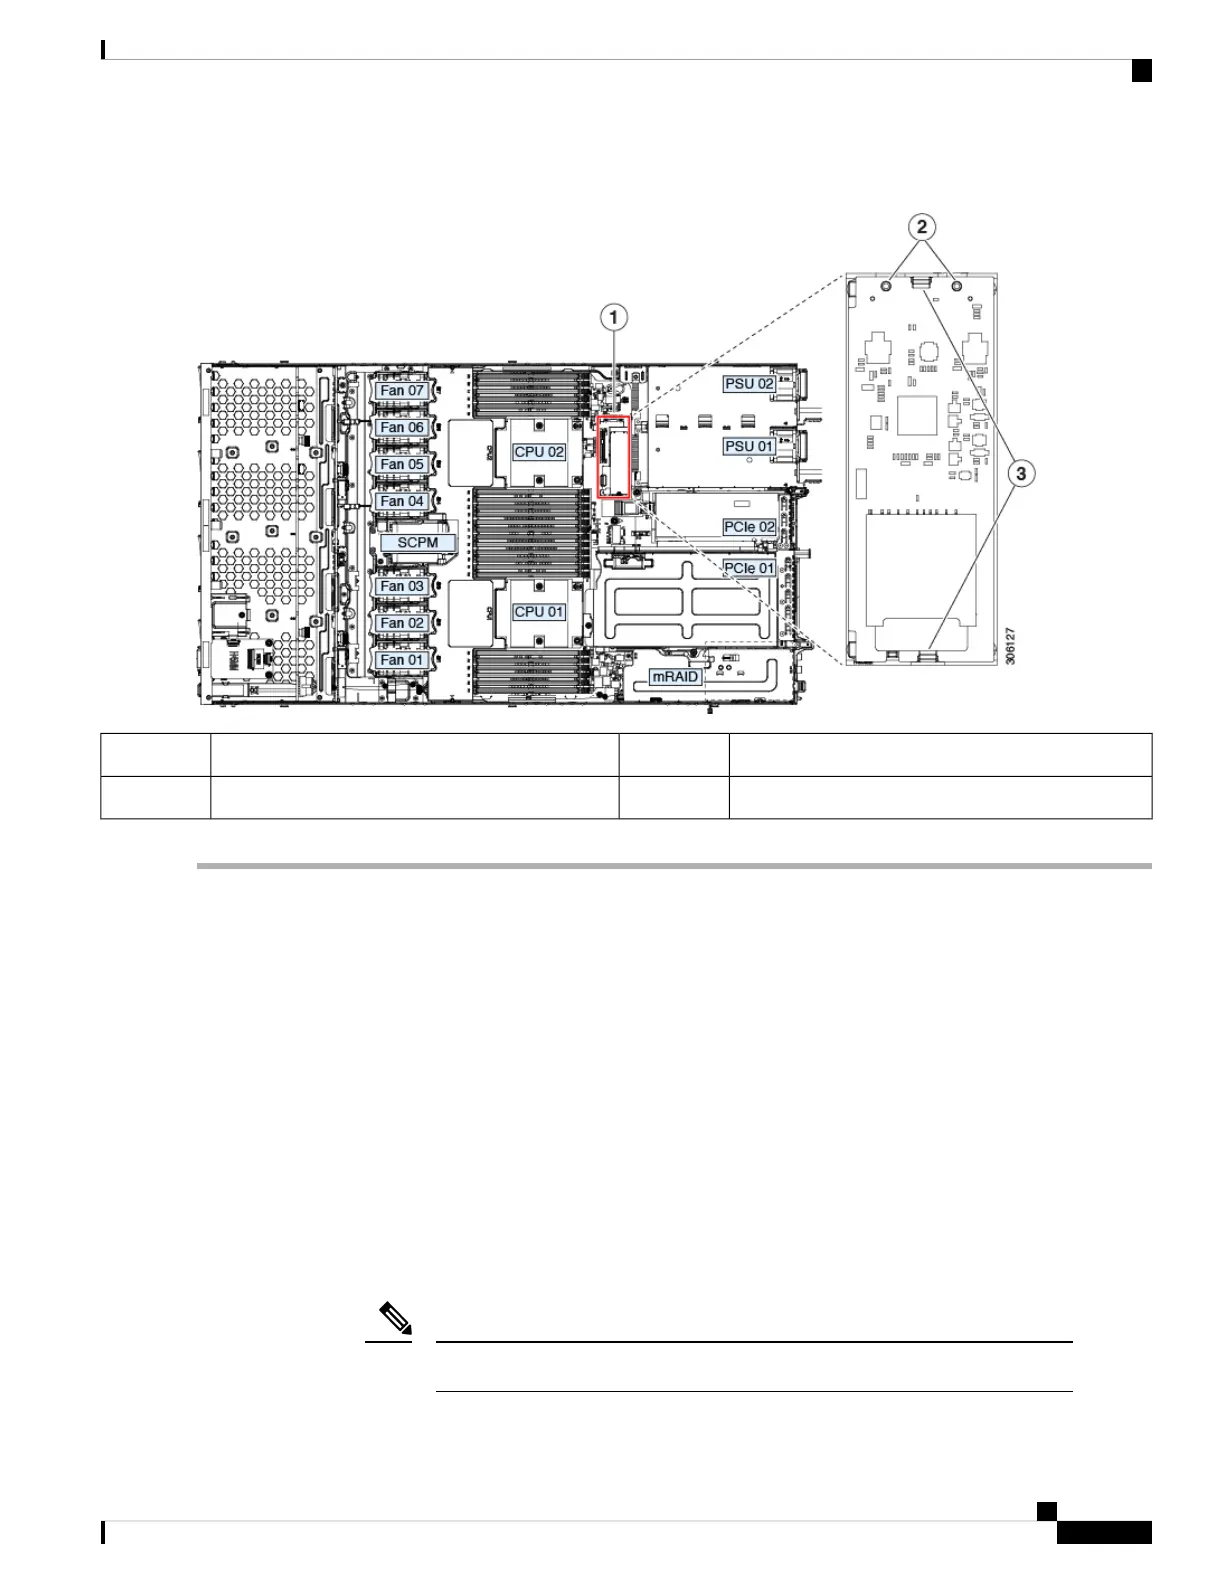
Figure 30: Mini-Storage Module Carrier
Securing clips3Location of socket on motherboard1
-Alignment pegs2
Replacing an M.2 SSD in a Mini-Storage Carrier For M.2
This topic describes how to remove and replace an M.2 SATA or M.2 NVMe SSD in a mini-storage carrier
for M.2 (UCS-MSTOR-M2). The carrier has one M.2 SSD socket on its top and one socket on its underside.
Population Rules For Mini-Storage M.2 SSDs
• Both M.2 SSDs must be either SATA or NVMe; do not mix types in the carrier.
• You can use one or two M.2 SSDs in the carrier.
• M.2 socket 1 is on the top side of the carrier; M.2 socket 2 is on the underside of the carrier (the same
side as the carrier's motherboard connector).
• Dual SATA M.2 SSDs can be configured in a RAID 1 array with the BIOS Setup Utility's built in
embedded SATA RAID utility. See Embedded SATA RAID Controller, on page 96.
If M.2 NVMe SSDs are installed in the M.2 module, the embedded SATA controller is automatically
disabled.
You cannot control M.2 SATA SSDs in the server with a HW RAID controller.
Note
Cisco Application Services Engine Hardware Installation Guide
55
Maintaining the Server
Replacing an M.2 SSD in a Mini-Storage Carrier For M.2
 Loading...