28 PowerScan
®
RF Scanner
Using
Mounting
Flanges
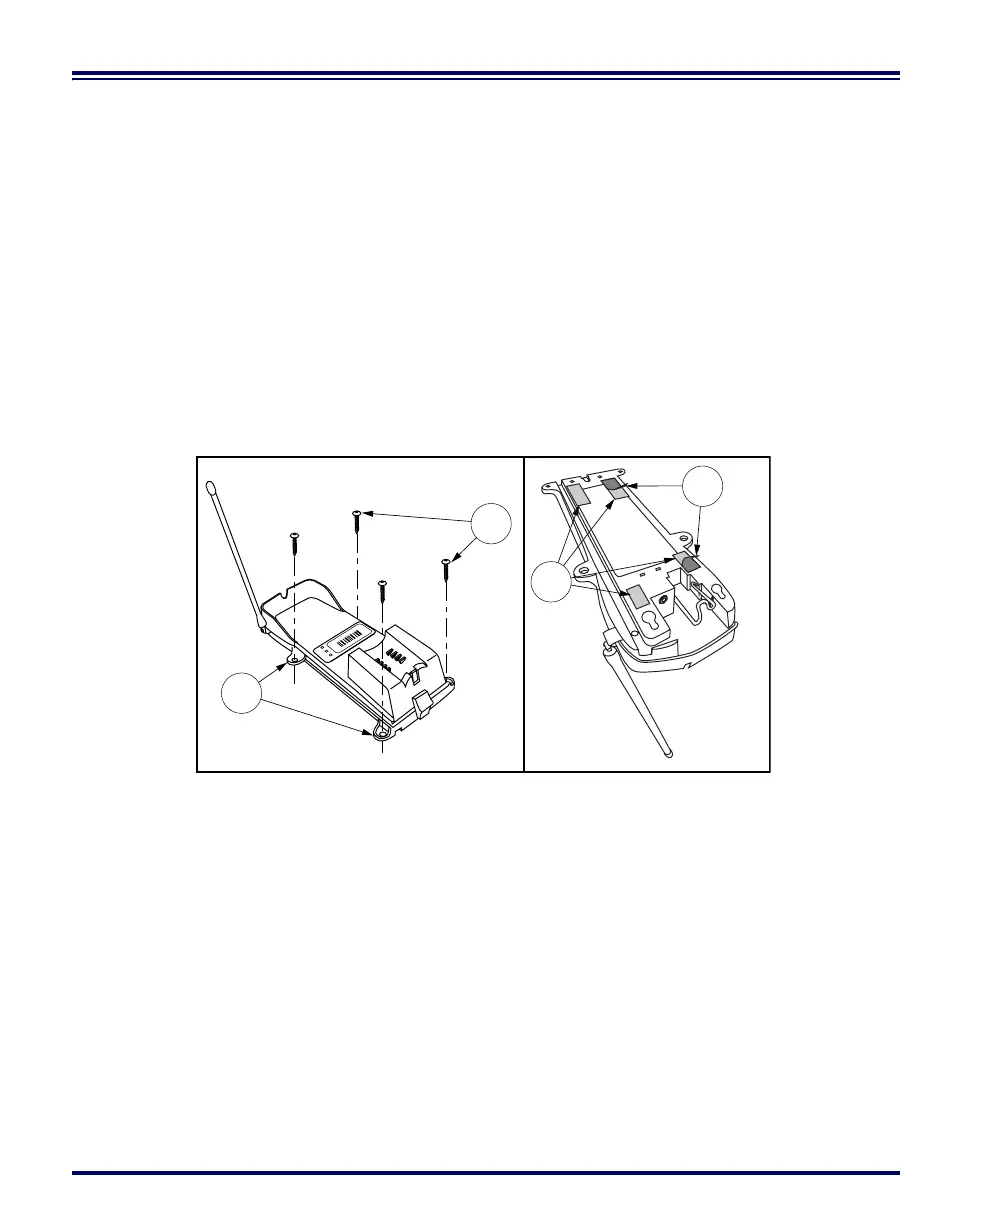
Refer to Figure 15a and follow these steps:
1. Once you have identified the desired area for permanent Base
Station installation, hold the unit in place and mark the posi-
tion of screws using the "mounting flanges."
2. Start and remove four screws (provided) at the marked posi-
tions in the mounting surface.
3. Ensure that power and interface cables are securely connected
and routed in the channels provided in the bottom of the Base
Station.
4. Secure the Base Station to the surface by installing the four
screws into the mounting flanges. Base Station attachment is
now complete.
Figure 15. Mounting Using Flanges or Two-sided Tape
Mounting
Using Two-
Sided Tape
You can also affix the Base Station to a surface using the two-sided tape
strips provided with the unit. Simply remove the backing from one
side of the strips and apply them to the bottom of the Base Station as
shown in Figure 15b. Remove the remaining backing from the tape,
then position and firmly press the unit against a smooth, clean surface
in the orientation desired.
Vertical (Wall)
Mounting
The Base Station can be mounted vertically using the same methods as
horizontal mounting (see previous section):
1. Mounting Flanges (4) 3. Two-sided Tape Strips
2. 4 Screws (provided) 4. Backing
BASE ID
TX/RX
CHARGE
POWER
1
2
3
4
ab

 Loading...