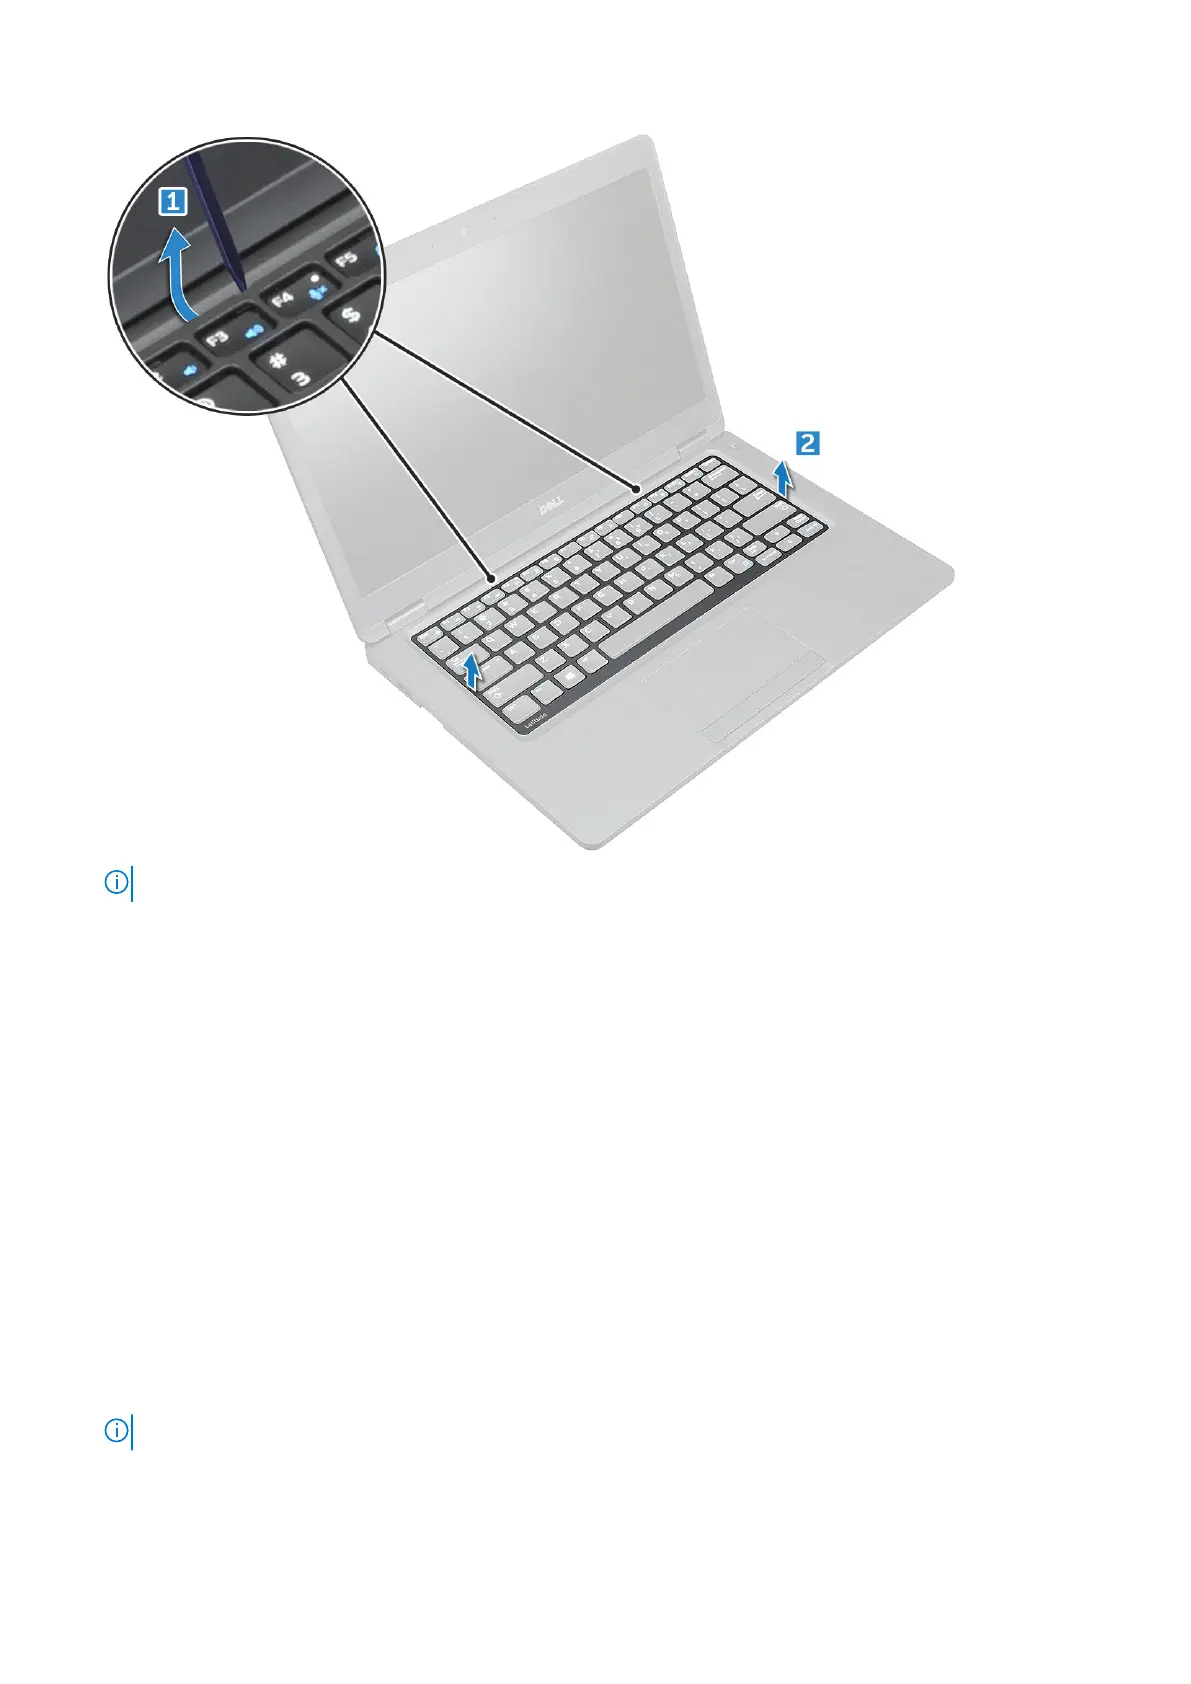
NOTE: Use a plastic scribe to pry the keyboard trim from the edges.
Installing keyboard trim
Steps
1. Place the keyboard trim on the keyboard and press along the edges as well as in between the rows of keys until it clicks in
place.
2. Follow the procedure in After working inside your computer.
Removing keyboard
Steps
1. Follow the procedure in Before working inside your computer.
2. Remove the:
a. base cover
b. battery
c. keyboard trim
3. Lift the latch and disconnect the keyboard cable from the connector.
NOTE: There may be different number of cables to disconnect based on the keyboard type.
Removing and installing components 29
 Loading...