Display assembly
Removing display assembly
Steps
1. Follow the procedure in Before working inside your computer.
2. Remove the:
a. base cover
b. battery
c. WLAN card
d. WWAN card (optional)
e. hard drive assembly(optional)
f. display hinge cover
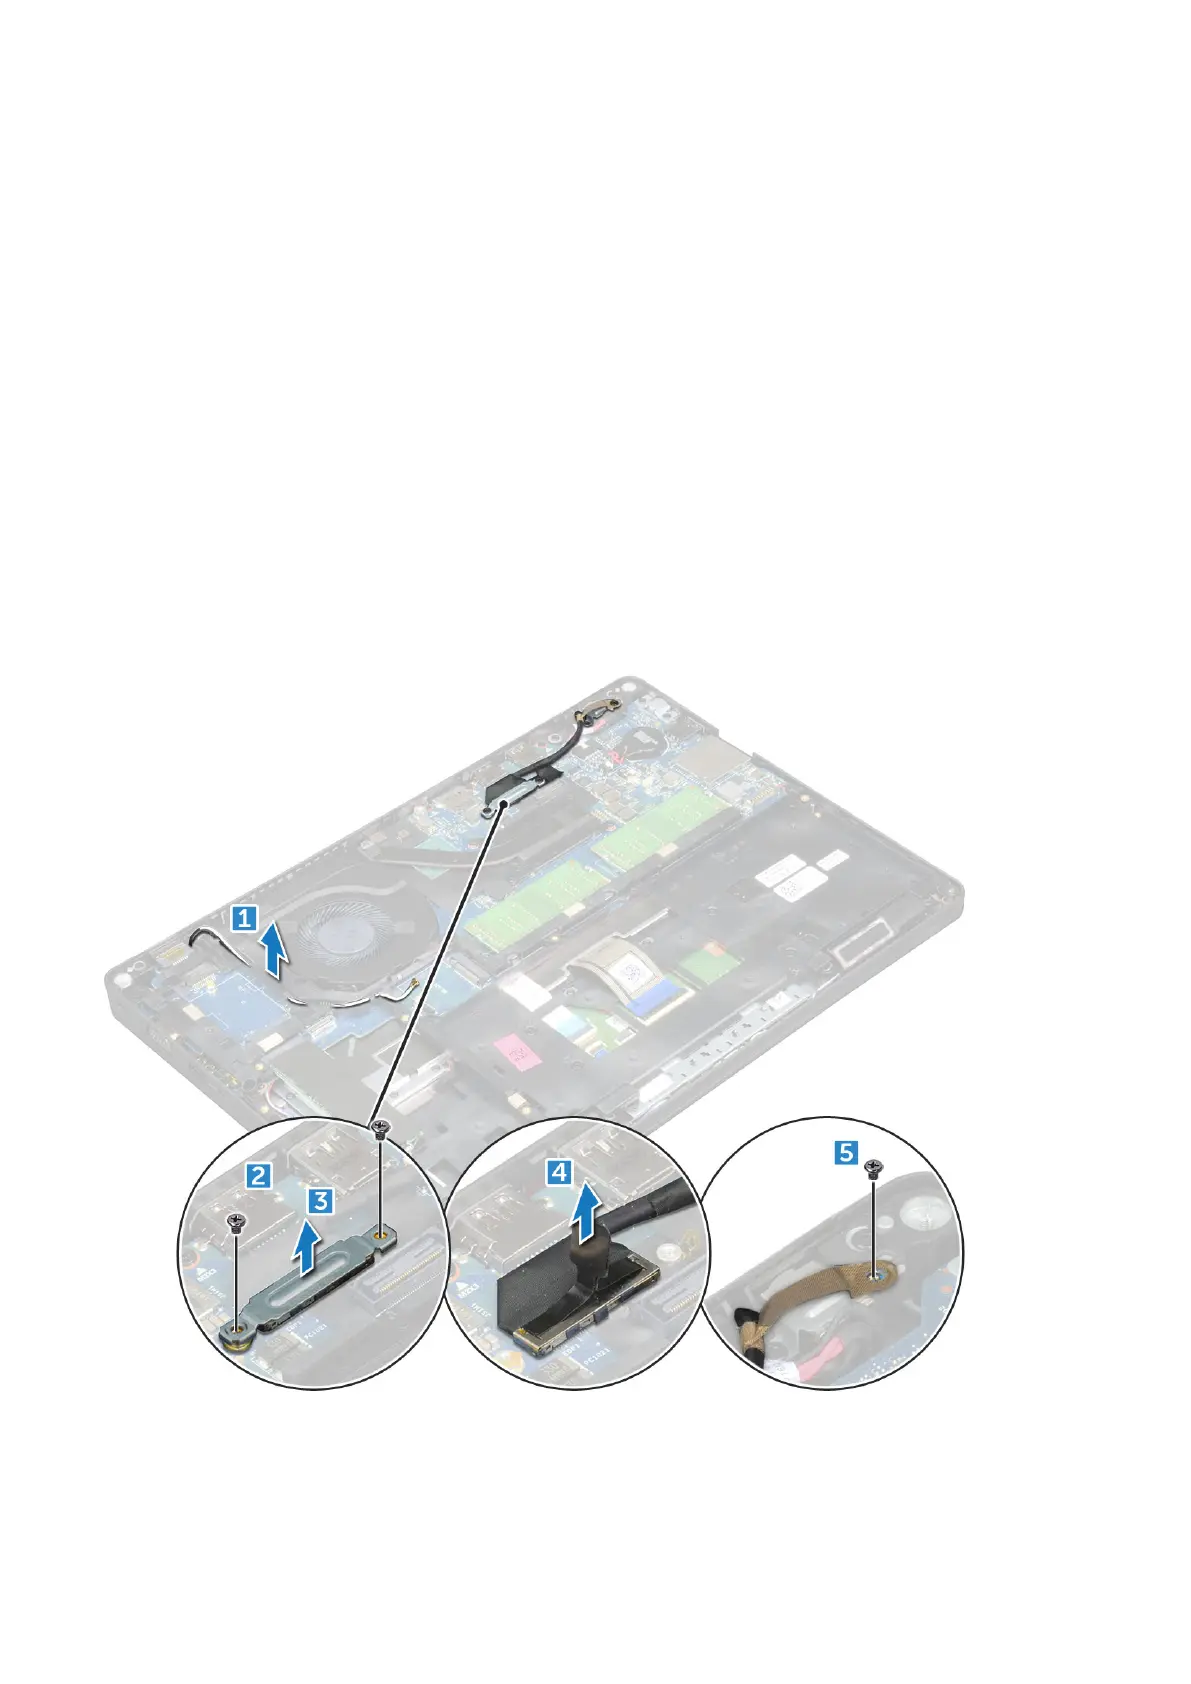
3. To disconnect the display cable:
a. Release the WLAN and WWAN cables from the routing channels [1].
b. Remove the M2*5 screw that secures the display cable bracket to the computer [2].
c. Remove the display cable bracket that secures the display cable [3].
d. Disconnect the display cable from the connector on the system board [4].
e. Remove the screw to release the display cable from the computer [5].
4. To release the display assembly:
a. Remove the M2*5 screws that secure the display assembly to the computer [1].
b. Release the WLAN cable, WWAN cable and display cable through the routing channels [2] [3].
44
Removing and installing components
 Loading...