5. Follow the procedure in After working inside your computer.
Display panel
Removing display panel
Steps
1. Follow the procedure in Before working inside your computer.
2. Remove the:
a. base cover
b. battery
c. WWAN card (optional)
d. WLAN card
e. display hinge cover
f. display assembly
g. display bezel
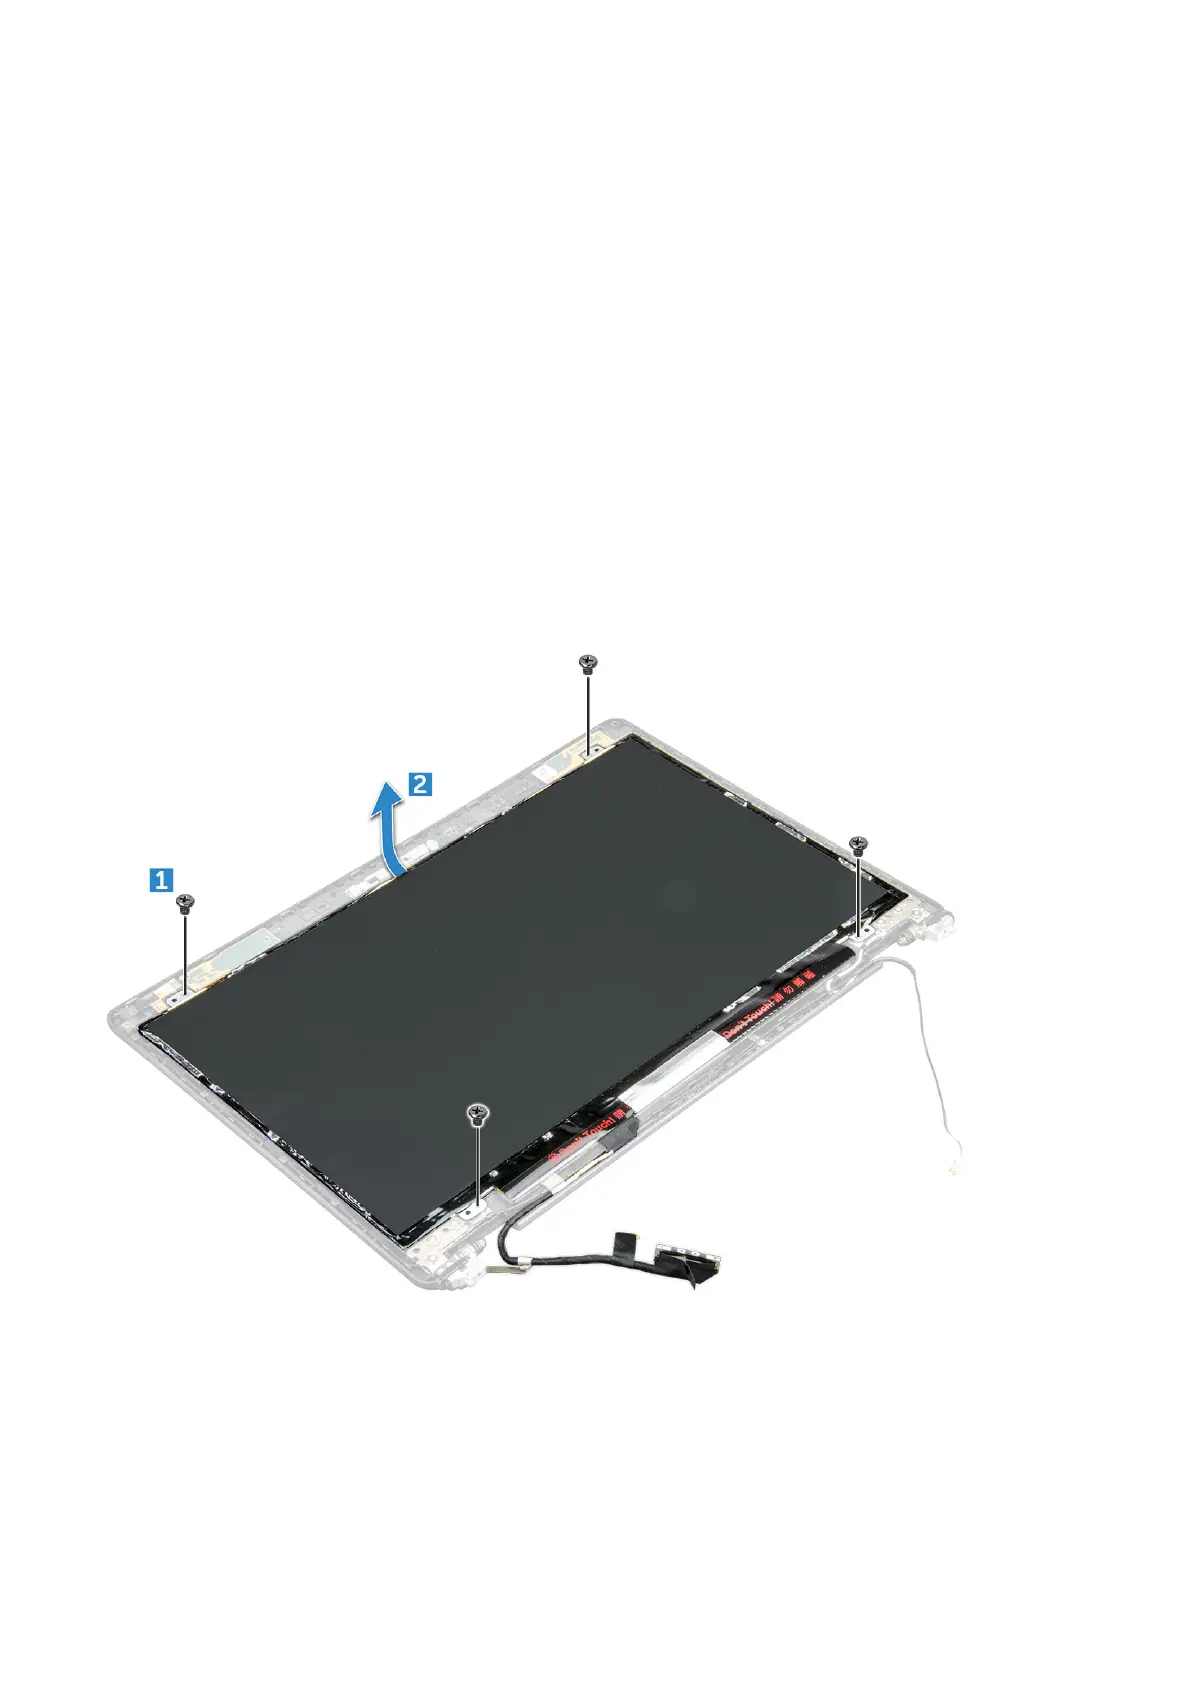
3. Remove the M2*3 screws that secure the display panel to the display assembly [1] and lift to turn over the display panel to
access the eDP cable [2].
4. To remove the display panel:
a. Peel the adhesive tape [1].
b. Lift the blue tape that secures the eDP cable [2].
c. Lift the latch and disconnect the eDP cable from the connector on the display panel [3] [4].
Removing and installing components
51
 Loading...