7 Select Conrm and click YES to complete the dedicated hot spare disk assignment.
Cryptographic erase
WARNING: Performing a cryptograph erase, causes permanent loss of data.
NOTE: Cryptographic erase is only supported on NVMe PCIe SSDs and ISE-capable SATA drives.
1 Enter the Dell PERC S140 Conguration Utility. See Entering the DELL PERC S140 Conguration Utility.
2 Click Physical Disk Management → Select Physical Disk Operations.
3 Select the Interface Type.
The options are SATA and NVMe.
4 Select the physical disk from the drop-down menu.
5 Click Cryptographic Erase.
6 Click Yes to start the cryptographic erase.
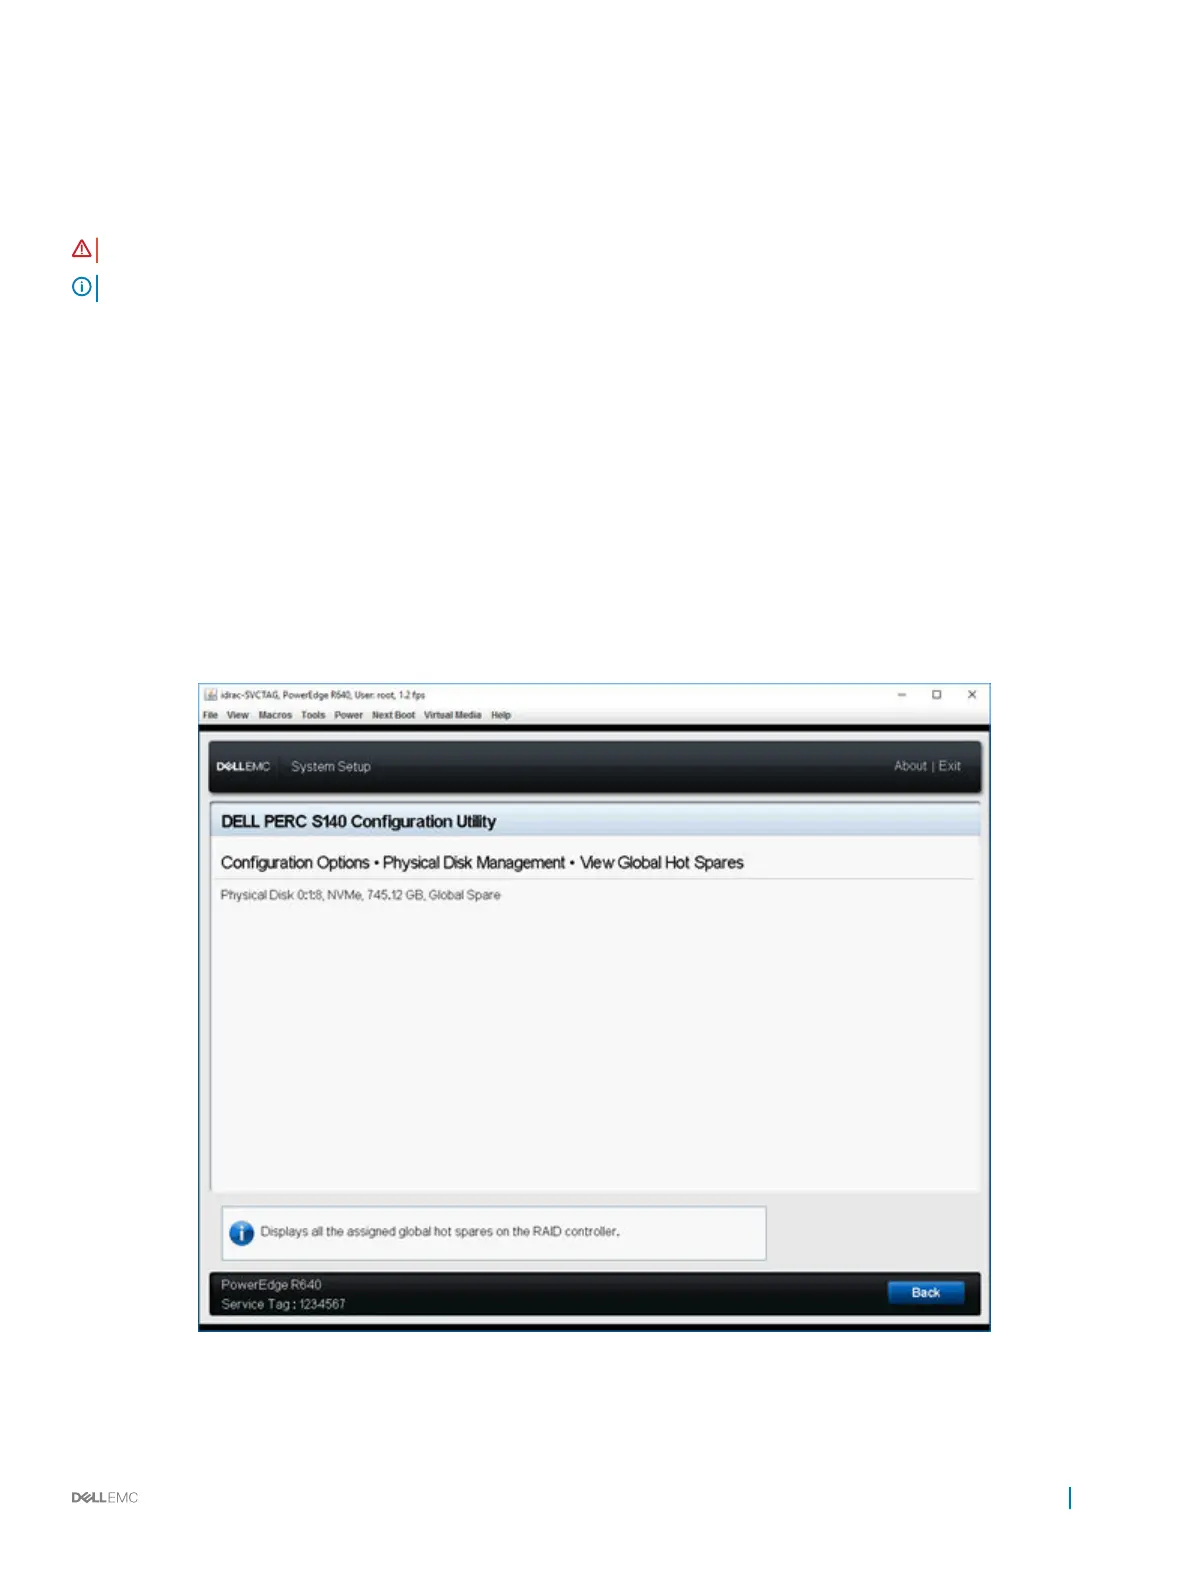
Viewing global hot spares
The View Global Hot Spares screen displays the physical disk assigned as global hot spare.
In the System Setup Main Menu, click Device Settings > Dell PERC S140 Conguration Utility > Physical Disk Management > View
Global Hot Spares.
Figure 7. View Global Hot Spares
UEFI RAID
conguration utility 39
 Loading...