Steps
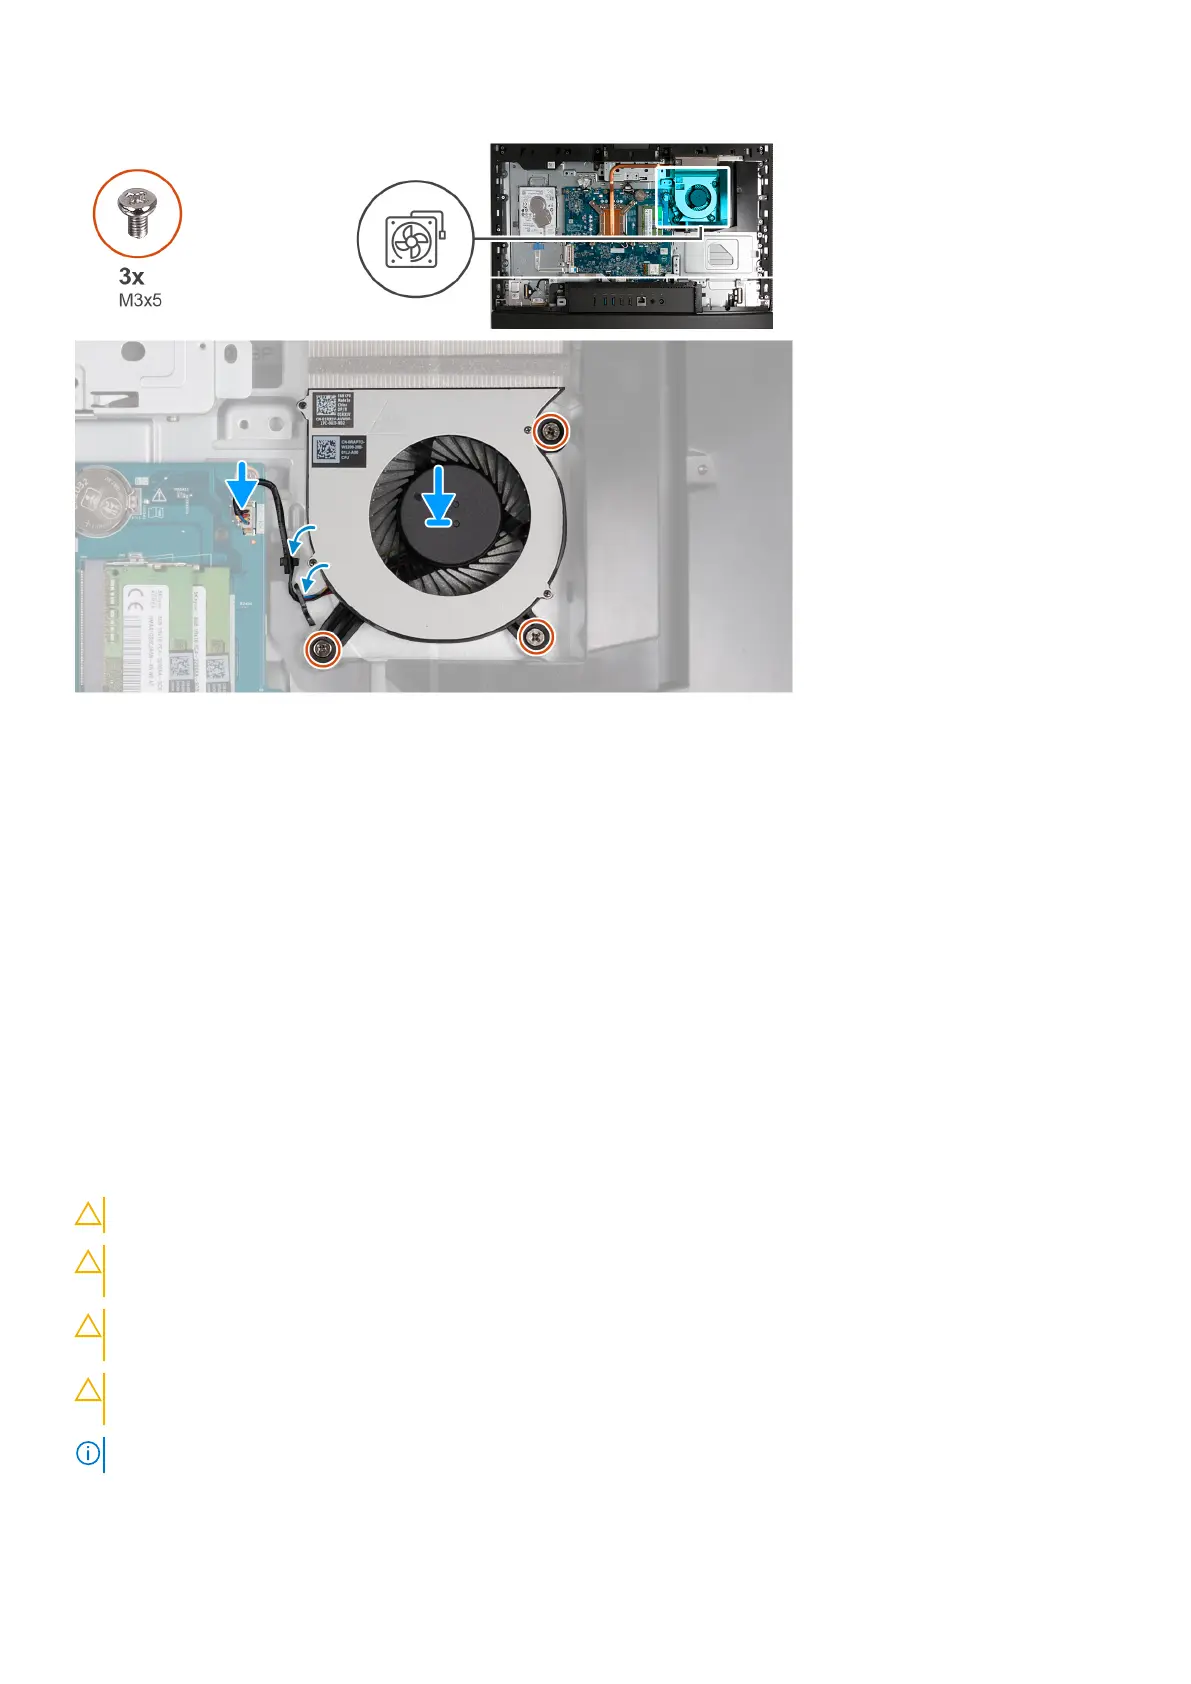
1. Place the fan on the display-assembly base.
2. Align the screw holes on the fan with the screw holes on the display-assembly base.
3. Replace the three screws (M3x5) that secure the fan to the display-assembly base.
4. Connect the fan cable (FAN CPU) to the system board.
Next steps
1. Install the system-board shield.
2. Install the back cover.
3. Install the stand.
4. Follow the procedure in After working inside your computer.
Removing and installing Field Replaceable Units
(FRUs)
The replaceable components in this chapter are Field Replaceable Units (FRUs).
CAUTION: The information in this section is intended for authorized service technicians only.
CAUTION: To avoid any potential damage to the component or loss of data, ensure that an authorized service
technician replaces the Field Replaceable Units (FRUs).
CAUTION: Dell Technologies recommends that this set of repairs, if needed, to be conducted by trained
technical repair specialists.
CAUTION: As a reminder, your warranty does not cover damages that may occur during the courses of FRU
repairs that are not authorized by Dell Technologies.
NOTE: The images in this document may differ from your computer depending on the configuration you ordered.
Removal and installation procedures for Energy Efficient processors 131
 Loading...