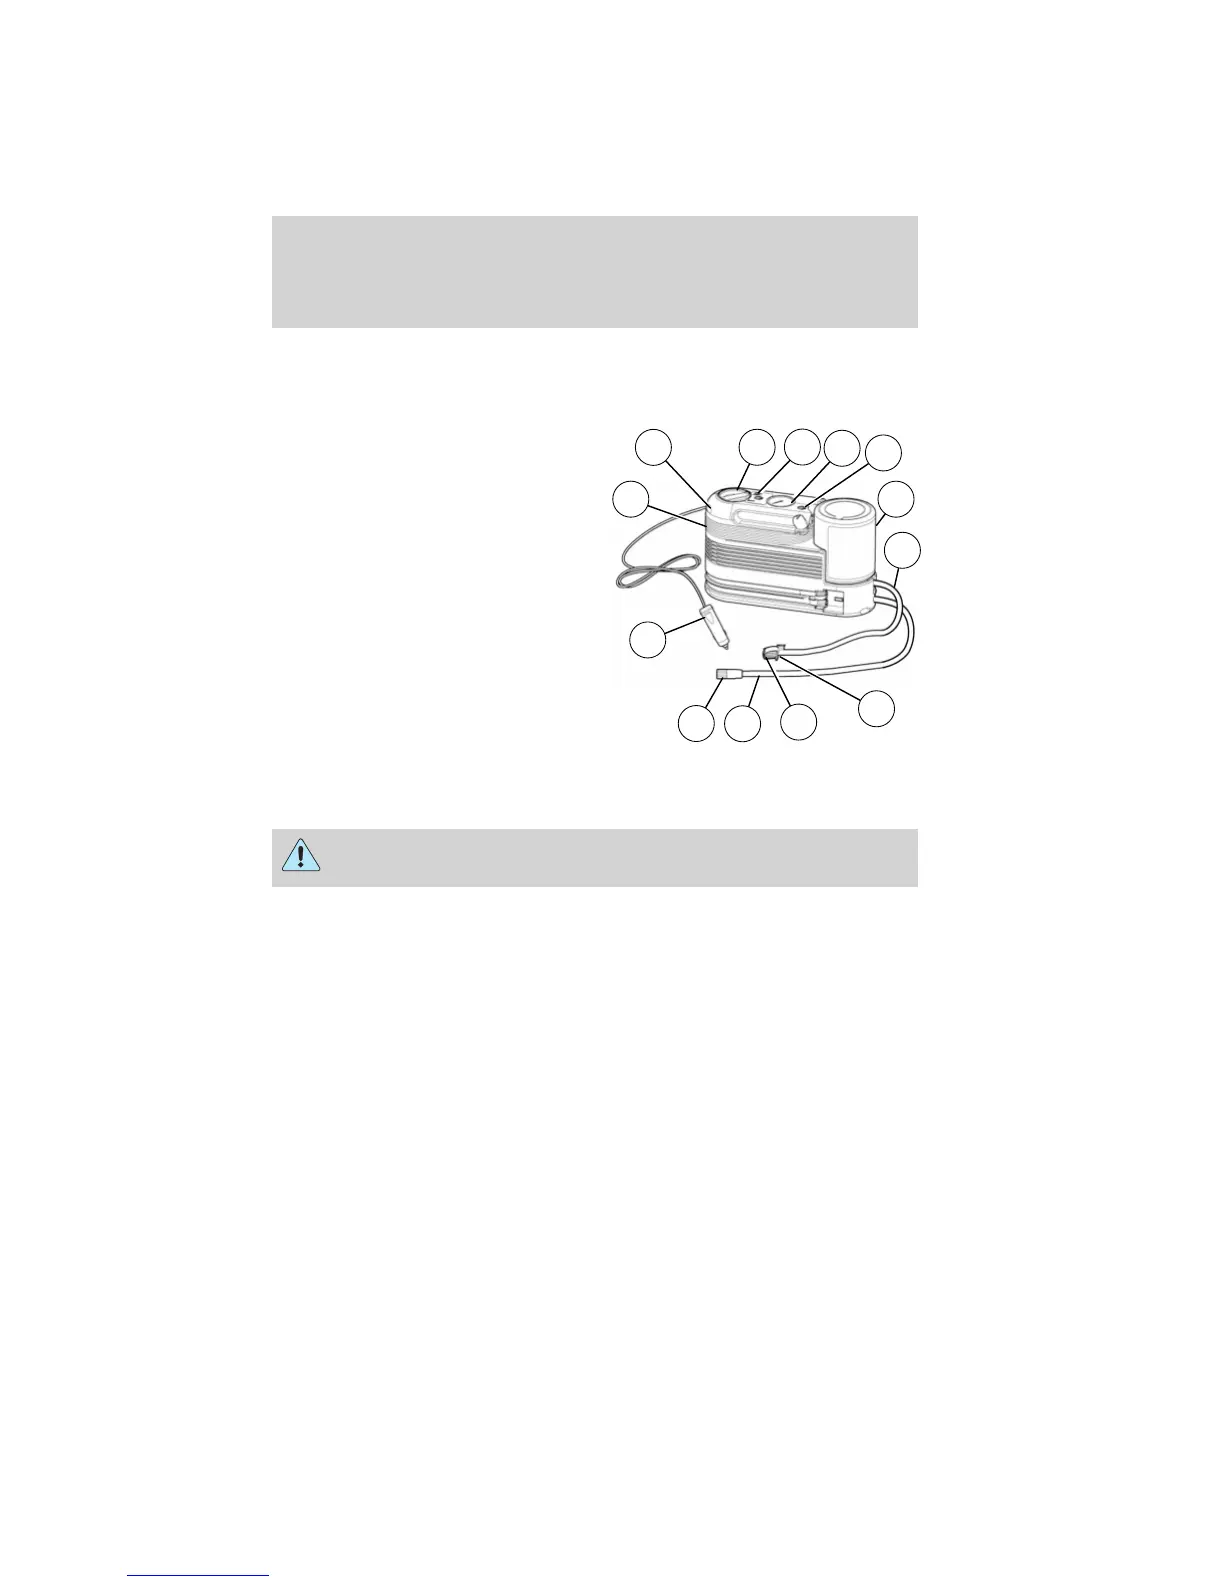
1. Air compressor (inside)
2. Diverter knob
3. On/Off button
4. Air pressure gauge
5. Deflation button
6. Sealant bottle/canister
7. Sealant filling clear tube
8. Sealant tube — tire valve
connector
9. Yellow cap tool
10. Air compressor hose
11. Air hose — tire valve connector
12. Accessory power plug
13. Casing/housing
General information
WARNING: Failure to follow these guidelines could result in an
increased risk of loss of vehicle control, injury or death.
Do not attempt to repair punctures larger than
1
⁄
4
inch (6.4 mm) or
damage to the tire’s sidewall. The tire may not completely seal.
Note: Do not use the temporary mobility kit if a tire has become
severely damaged by driving the vehicle with a tire that has insufficient
air pressure. Only punctured areas located within the tire tread can be
sealed with the temporary mobility kit.
Loss of air pressure may adversely affect tire performance. For this
reason:
• Do not drive the vehicle above 50 mph (80 km/h).
• Do not drive further than 120 miles (200 km). Drive only to the
closest Ford Motor Company authorized dealer or tire repair shop to
have your tire inspected.
• Drive carefully and avoid abrupt steering maneuvers.
• Periodically monitor tire inflation pressure in the affected tire; if the
tire is losing pressure, have the vehicle towed.
1
2
4
5
6
7
12
11
10
8
3
9
13
Roadside Emergencies
345
2011 Explorer (exp)
Owners Guide, 3rd Printing
USA (fus)

 Loading...