30 1 Printer Environment Settings
1.2 Connecting a cable
Connect the printer to your computer using an interface cable appropriate for your
connection method.
An interface cable is not included with the printer. You must purchase it separately.
USB Connection
When using a USB connection, set the Driver CD Kit CD-ROM on your computer before
connecting the cable. Refer to the Manual (HTML document) in the Driver CD Kit CD-ROM
for details on how to install the print driver.
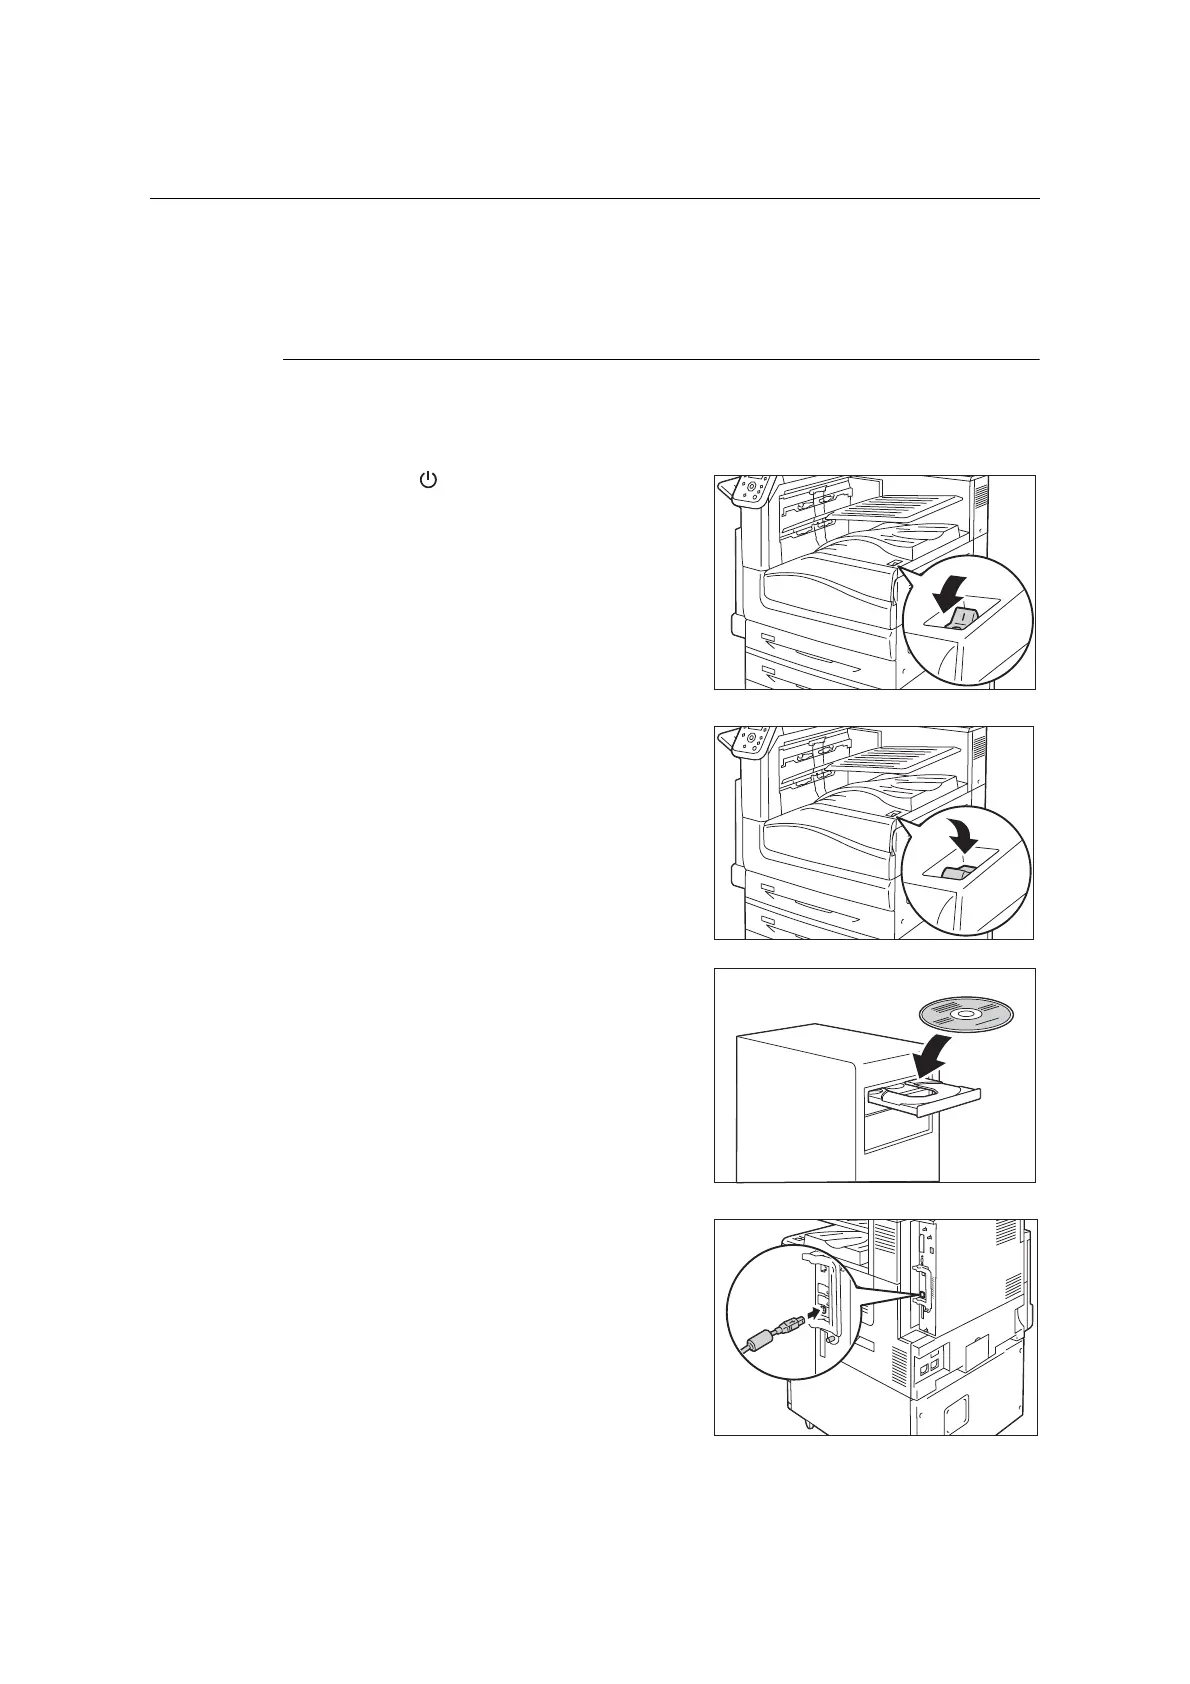
1. Press the < > side of the printer’s power
switch to turn off the power.
2. Press the < | > side of the printer’s power
switch to turn on the power.
3. Set the Driver CD Kit CD-ROM on your
computer.
4. Plug the USB cable into the interface
connector on the printer.
5. Plug the other end of the USB cable into
your computer.
The [Found New Hardware Wizard] dialog
box is displayed.
6. In the Windows update screen, select [It
isn’t connected], and then click [Next].