EasyManua.ls Logo

GE NX-10 User Manual

GE NX-10
38 pages
To Next Page IconTo Next Page
To Previous Page IconTo Previous Page
Page #12 background image
NX-10 User Manual 12
Arming and disarming using a master keypad
2. The current status of the partitions set in the system is displayed.
9 Partition is disarmed. Partition is part armed. Partition is fully
armed.
3. Press a partition number to include it in the set of partitions that you
want to arm (or disarm). Press 0 to include all partitions.
4. Included partitions are marked with ‘?’ In this case, partitions 1 and 4
are included in the set.
Press to am away or to arm stay the set of partitions.
Press to arm in night mode. The keypad starts to blip and the sys-
tem begins to arm.
When the exit time expires, the selected partitions are armed and the
keypad sounds continuously for two seconds.
Select partitions and press during the exit time to stop arming
the selected partitions and silence the keypad.
Note: When you open the door to enter the secured partition, the entry delay
starts, Type Code to Disarm message displays, and the keypad sounds
continuously. It stops when you disarm the selected partitions.
1. Unblank the keypad, if necessary, by pressing the NO key, and then
enter your user code at the system prompt.
\ \
A master keypad allows you to arm one or more partitions. Arm Away key arms your entire system (except bypassed zones). Arm Stay key
part arms your system (except interior and bypassed zones) when you want to allow people to remain inside. For more information on
bypassing zones, see page 17.
System Ready
Type Code to Arm
1 2 3 4
9
9
9
1 2 3 4
?
9 ?
1 2 3 4
9
1 2 3 4
9
9
9
9
........
........
........
........
........
........
........
........

Other manuals for GE NX-10

Question and Answer IconNeed help?

Do you have a question about the GE NX-10 and is the answer not in the manual?

GE NX-10 Specifications

General IconGeneral
BrandGE
ModelNX-10
CategorySecurity System
LanguageEnglish

Summary

Menu Map Overview

LCD Keypad Interface

Keypad Key Functions

Arming and Disarming Keys

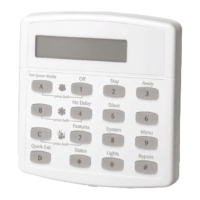
Keys for Arm Away, Arm Stay, Disarm, and Night Mode operations.

System Control Keys

Keys for Bypass Zone and Chime mode control.

Special Function Keys

Programmable keys F1, F2, F8 for installer-defined functions.

Navigation and Input Keys

Keys for menu scrolling, selection, confirmation, and data input/editing.

LCD Icons Explained

System Status Icons

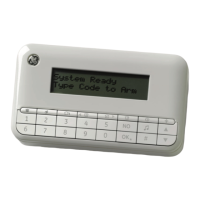
Icons for Power, Bypass, Armed Status, Away, Stay/Night Mode.

Alarm and Event Icons

Icons for Fire, Alarm, Trouble, Service, Ready to Arm.

Mode Indicators

Icon for Chime mode, Low Battery indicator.

Navigating the NX-10 Menus

Quick User Menu Access

Access limited menu options without a user code.

Changing User Interface Language

Modify keypad display language via menu options.

User Menu Operations

Perform keypad functions using your user code.

Menu Navigation

Move through menu options and lists of entries.

Exiting Menu System

Safely exit the menu system using specific key presses.

Preparing Your System for Arming

Arming and Disarming with a Single-Partition Keypad

Disarming Your System

Enter secured partition, delay starts, sounds continuously.

Arming and Disarming with a Master Keypad

Disarming After an Alarm Event

Resetting Fire Detectors

Using Life Safety Functions

Fire Alarm Function

Activates pulsed siren, keypad beep, and reports to central station.

Medical Alert Function

Sends a report to the central station.

Personal Attack Alarm

Activates continuous siren, rapid keypad beep, and reports.

Viewing Zone Status

Bypassing Zones

Changing User Code and Name

Modifying Another User's Code and Name

Configuring User Rights

Selecting User Functions

Assign user rights for functions like Authority, Control Outputs.

Selecting Partitions for User Access

Assign partitions a user can access, manage user permissions.

Setting System Time and Date

Adjusting Keypad Settings

Changing User Interface Language

Modify the keypad's display language.

Adjusting Keypad Sounder Volume

Control the loudness of the keypad sounder.

Adjusting the LCD Display

Reading the Event Log

Changing Phone Numbers for Reports

Setting Up Light Control

Activating Light Control System

Up/Downloading System Data

Making an Up/Download Call

Initiate a call to the installer's computer for data transfer.

Answering an Up/Download Call

Allow the control panel to receive data from the installer's computer.

Testing System Functionality

Adding and Deleting Proximity Cards

Service Messages and Troubleshooting

Panel Over-Current Fault

Excessive current drawn from an output.

Panel Siren Fault

Connection to the control panel's siren is broken.

Panel Box Tamper

Interference with the control panel casing.

Panel Line Fault

Phone line connected to the control panel is not working.

Panel Fail to Communicate

Control panel failed to send message to central station.

Glossary of Terms

Battery Replacement Procedures

Backlight Battery Replacement

Procedure for replacing the wireless keypad backlighting batteries.

Operating Battery Replacement

Procedure for master user to replace operating batteries.

Related product manuals