5-8 Patient Data Module 2030047-001A
Maintenance
In a device that is powered by an AC power source (“floating”), the battery self-
discharges to less than 90% of its full charge capacity after approximately two
weeks. The battery is then recharged to 100% resulting in a 95% average state of
charge. Storing the battery at a high state of charge also reduces the life of the
battery. GE recommends that you remove the battery and store it near the Patient
Data Module until it is needed.
Charge the battery
The battery can be charged by one of two methods:
Inside a Patient Data Module that is connected to a powered host.
Outside the Patient Data Module using a Cadex Smart2+ Battery Charger.
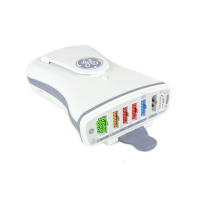
Charge with a Cadex Smart2+ battery charger
1. Insert the battery into the battery charger. The RUN LED lights.
2. Leave the battery in the charger until the READY LED lights
NOTE
If the FAIL LED lights, remove the battery from the battery charger and
reinsert it. This corrects any battery charger time out errors. If the FAIL
LED still lights, replace the battery.
Charge inside the Patient Data Module
The battery charges whenever the Patient Data Module is connected to an AC
powered host.
Condition the battery
Remove or replace the battery
1. Open the battery door at the rear of the Patient Data Module.
2. Remove the battery.
3. Insert a new battery with the connection pins inserted first and facing down.
4. Close the battery door.
5. Connect Patient Data Module to a host patient monitor and confirm that the
battery LED lights green and the battery icon displays in the lower corner of the
patient monitor.
 Loading...