Diagnostic Repair Manual 27
Section 3 Troubleshooting Flowcharts
Introduction
The most important step in troubleshooting is identifying
the actual problem. The next step is to determine the
applicable flow chart to use to help diagnose the
problem.
For each flow chart, start at the top and use the indicated
test to verify whether or not a component or control item
is working properly. At the end of each test follow the
GOOD or BAD arrows and perform the next test.
Use the flow charts in conjunction with the detailed
instructions in section 4. Test numbers used in the flow
charts correspond to the numbered tests in section 4. For
best results, perform all tests in the exact sequence
shown in the flow charts.
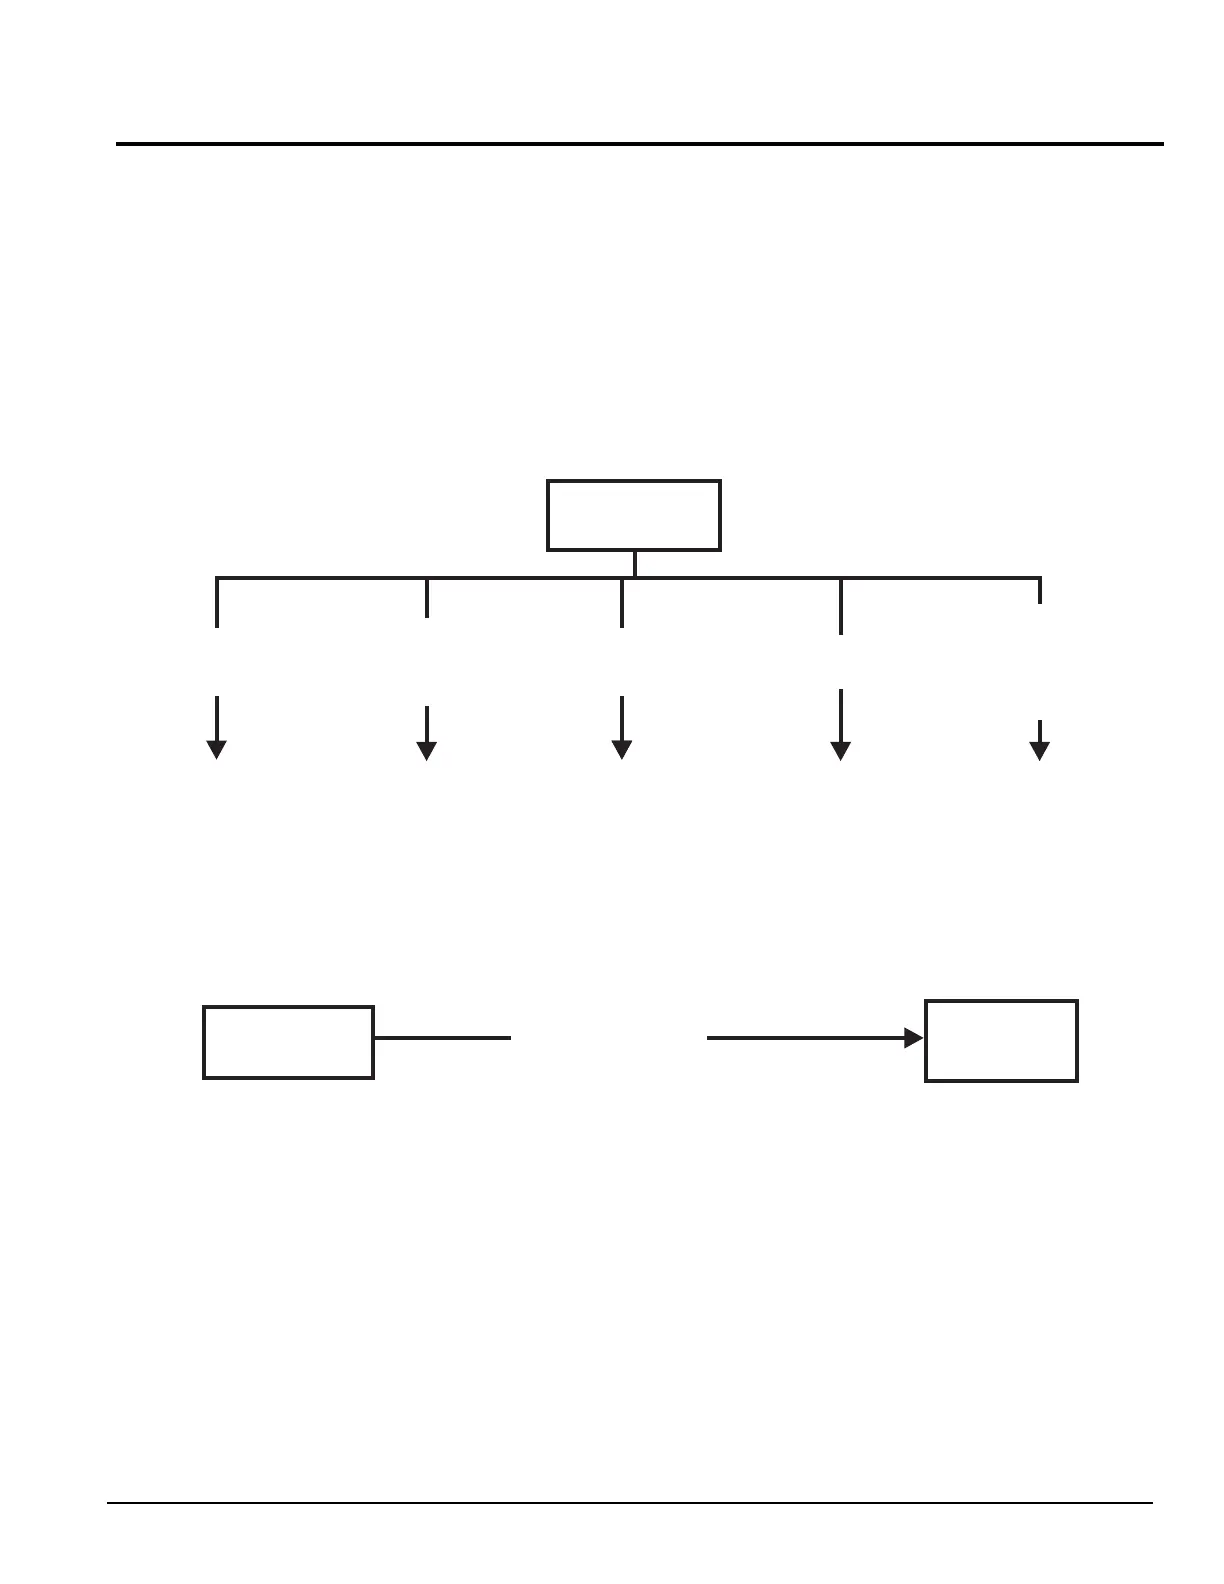
If Problem Involves AC Output
Problem 1 – Voltage and Frequency Are Both High or Low
GO TO PROBLEM 1
(BELOW)
GO TO PROBLEM 2 GO TO PROBLEM 2 GO TO PROBLEM 3GO TO VOLTAGE
REGULATOR
ADJUSTMENT,
PAGE 11
TEST 1 - CHECK NO
LOAD VOLTAGE &
FREQUENCY
VOLTAGE &
FREQUENCY BOTH
HIGH OR LOW
FREQUENCY GOOD -
ZERO OR RESIDUAL
VOLTAGE
ZERO VOLTAGE AND
ZERO FREQUENCY
FREQUENCY GOOD -
VOLTAGE HIGH
OR
VOLTAGE LOW
NO-LOAD VOLTAGE &
FREQUENCY GOOD -
VOLTAGE/FREQUENCY
FALLS OFF UNDER LOAD
TEST 5 - CHECK
STEPPER MOTOR
CONTROL
GO TO VOLTAGE
REGULATOR
ADJUSTMENT,
PAGE 11
FREQUENCY IS GOOD,
BUT NO-LOAD
VOLTAGE IS HIGH
OR VOLTAGE
IS LOW
 Loading...