User Manual of Digital Video Recorder
156
11.2 Configuring Privacy Mask
Purpose:
Privacy mask enables you to cover certain areas on the live video to prevent certain spots in the surveillance area
from being live viewed and recorded.
Steps:
1. Enter the Privacy Mask Settings interface.
Menu > Camera > Privacy Mask
2. Select the camera to set privacy mask.
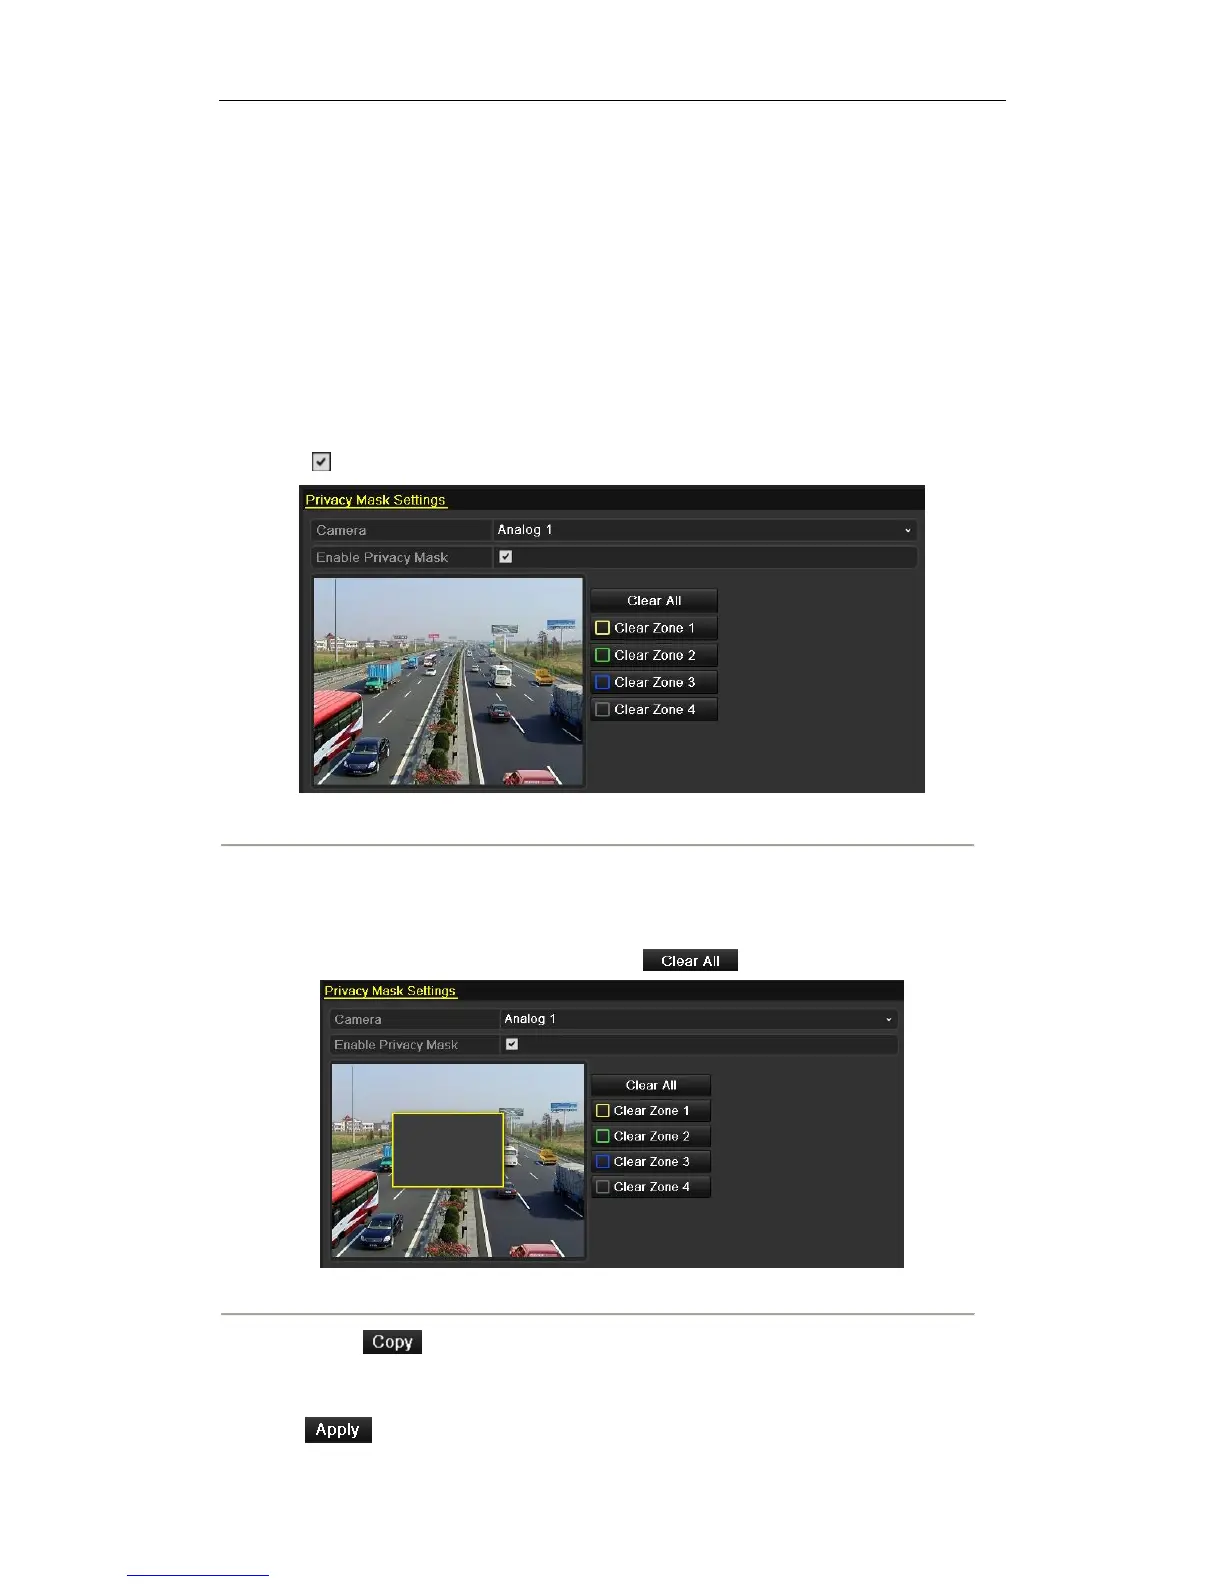
3. Check checkbox to enable privacy mask.
Figure 11. 3 Privacy Mask Settings Interface
4. Use the mouse to draw a zone on the window. The zones will be marked with different frame colors.
Note: Up to 4 privacy mask zones can be configured, and the size of each area can be adjusted.
5. The configured privacy mask zones on the window can be cleared by clicking the corresponding Clear
Zone1-4 icons on the right side of the window, or click to clear all zones.
Figure 11. 4 Set Privacy Mask Area
6. You can click to copy the privacy mask settings of the current camera to other cameras. Please
refer to step 7 of Chapter 11.1 Configuring OSD Settings.
Note: Copying the privacy mask settings to network cameras is not available.
7. Click to save the settings.
 Loading...


