8
II.
INSPECTION AND ADJUSTMENT
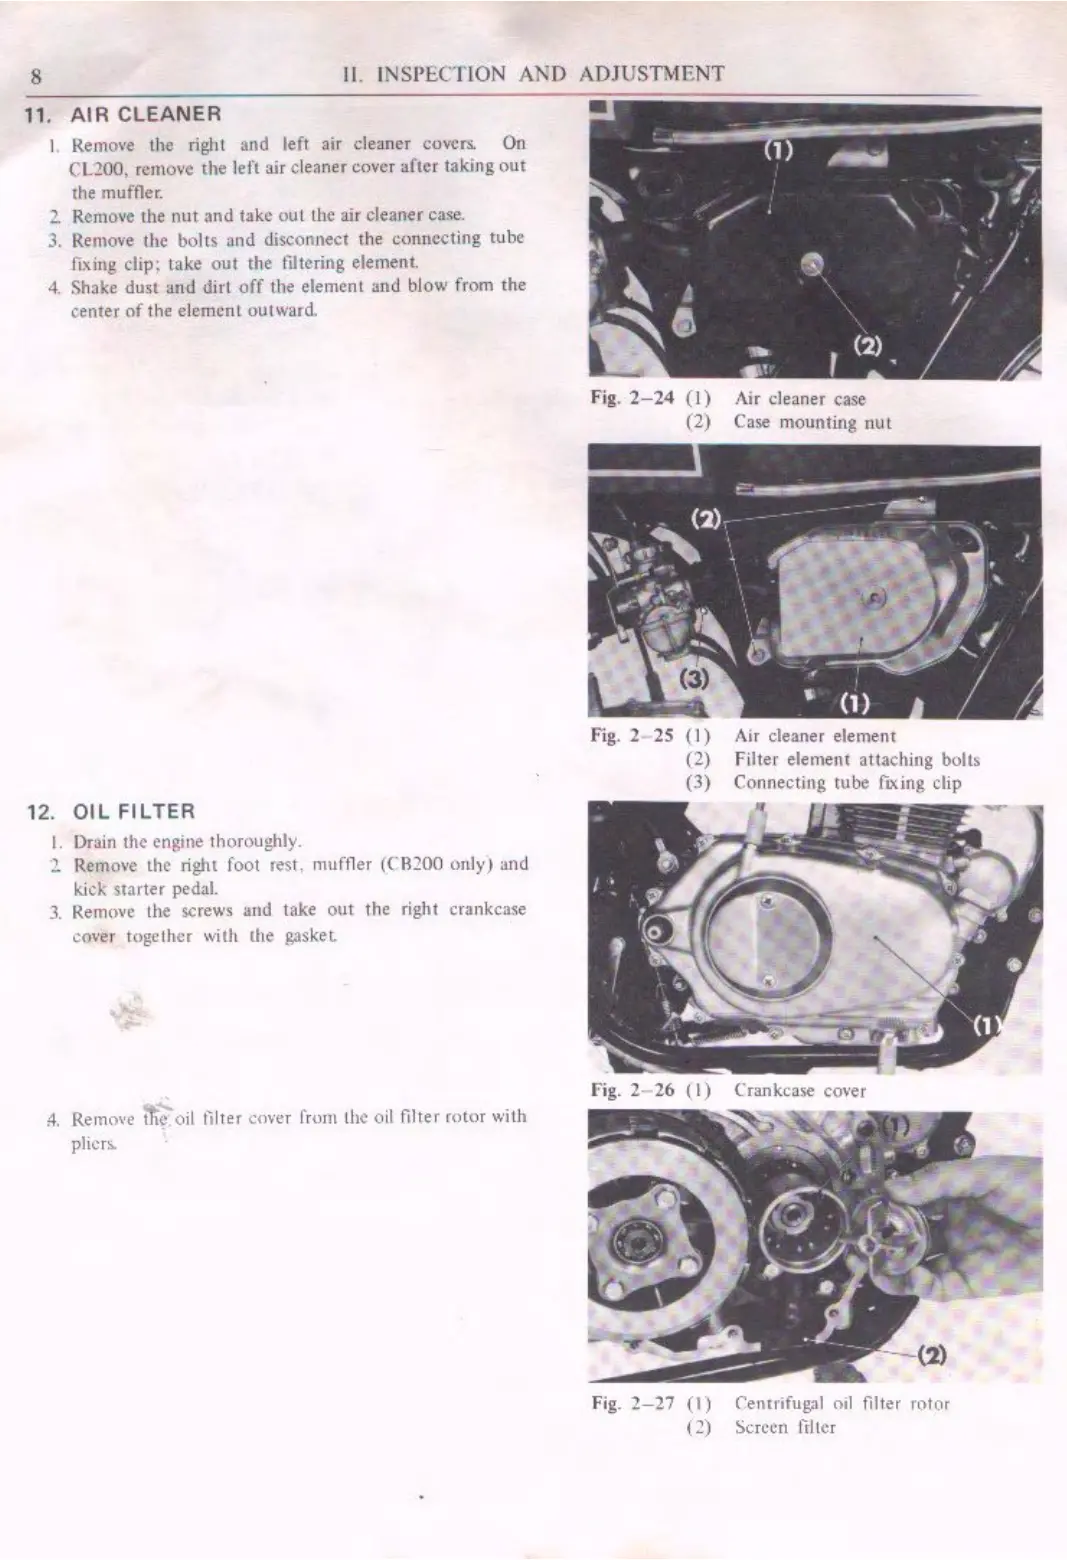
11. AIR CLEANER
I. Remove the right and left air cleaner covers. On
CL200, remove the left air cleaner cover after taking
out
the muffler.
2 Remove the
nut
and
take out the air cleaner case.
3.
Remove the bolts and disconnec, the connecting tu be
fixing clip: take
out
the filtering element.
4. Shake dust and dirt
off
the element and blow from the
cemer
of
the element outward.
12.
OIL
FILTER
I.
Drain the engine thoroughly.
l Remove the right foot rest, muffler
((R200
only) and
kick siarter pedal.
3. Remove the screws and take
out
the right crankcase
co
ver together with the gasket.
:4.
Remm
•e
fit~
oil filter cover from the o
il
filter rotor with
pliers.
1)
~
--
-
•
·,
:,,.
/
r'
'
'·
Fig.
2-24
(I)
(2)
-
Fig
. 2- 2S
(I)
(2)
(3)
~
-
.
,~
,
(2) .
Air
cJeaner
case
Case mounting
nut
Air cleaner element
'
,
Filter element atlaching bolls
Connecting tube f,xing clip
fig.
2-
26
(I)
Crankcase cover
Fig.
2-27
(1)
(2)
remrifugal oil filter rotor
Screen frller
~-
,
I
...
/
~ -
 Loading...