4
II. INSPECTION ANO ADJUSTMENT
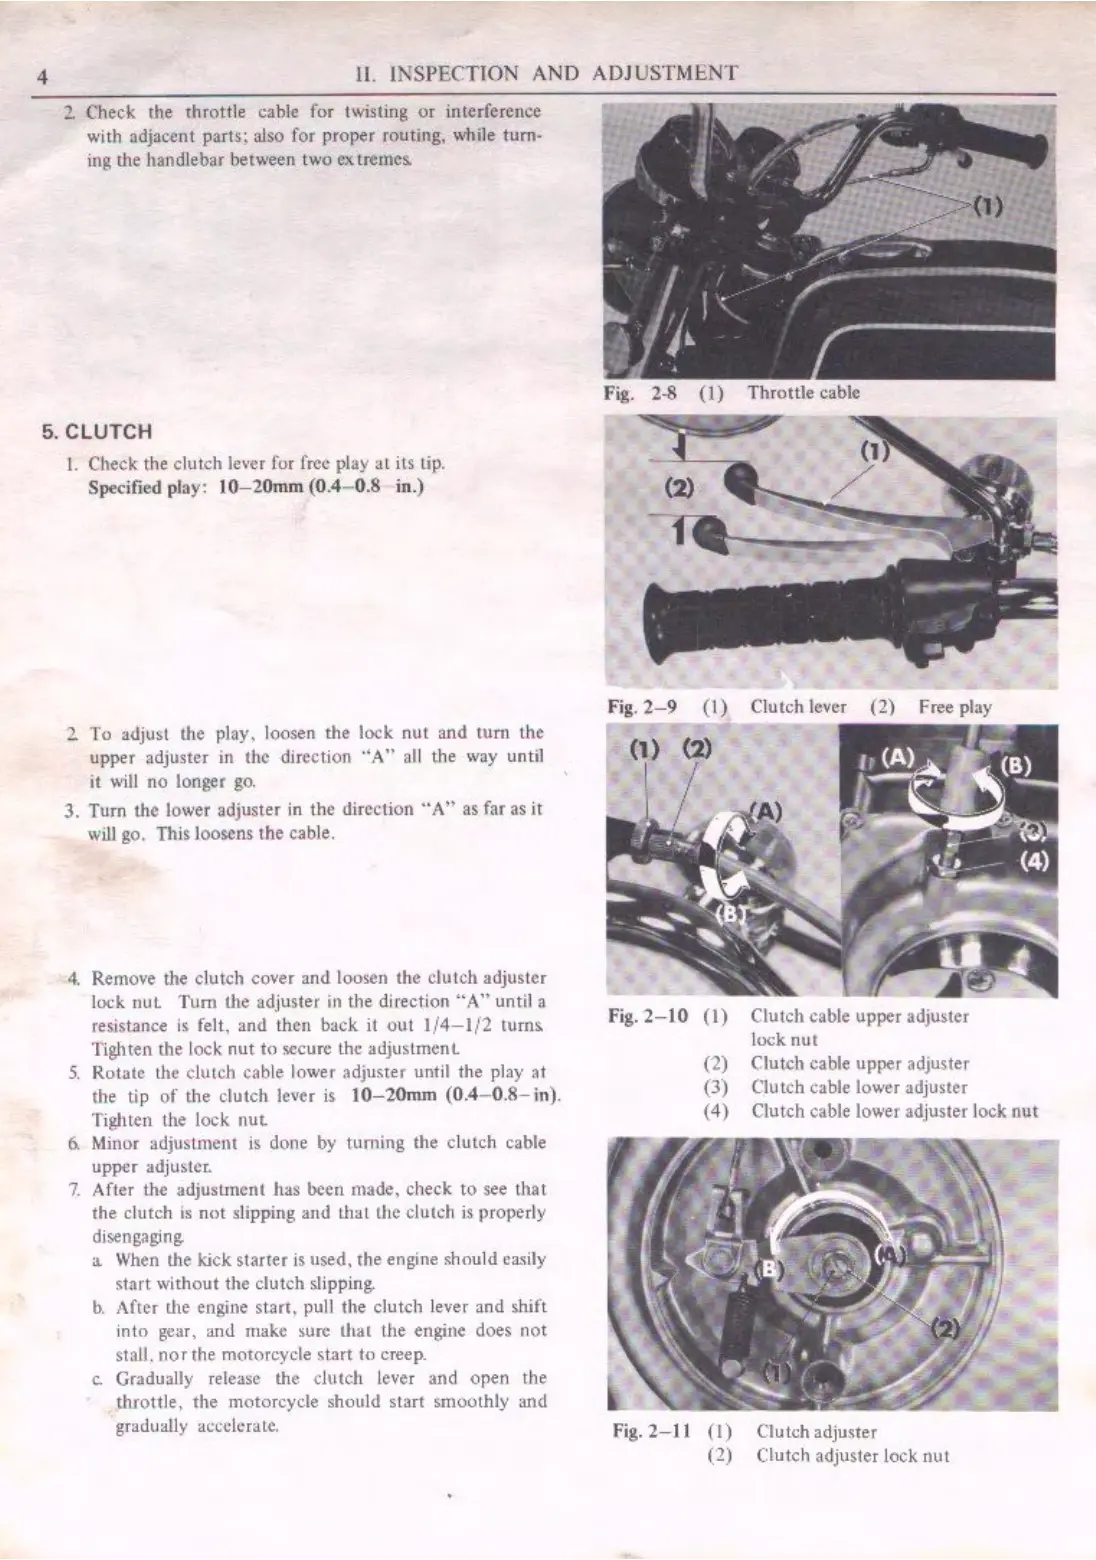
2 Check the throttle cable for twisting
or
interference
with adjacent parts; also for proper routing, while turn-
ing the handlebar between two extremes
5.
CLUTCH
I.
Check the clutch lever
for
free play al its lip.
Specified play:
10-20mm
(0.4- 0.8 in.)
2 To adjust the play. loosen the lock nut and turn the
upper adjuster in the direction ·'A•·
all
the way until
ii
will
no longer
go.
3. Turn the lower
ad
juster
in
the direction
..
A"
as
far
as it
will
go. This loosens the cable.
4.
Remove the clutch cover and loosen the clutch adjuster
lock
nuL
Tum
the adjuster in the direct.ion
"A"
until a
resistance
is
felt, and then back it out
lj4-l/2
turns
Tighten the lock
nut
to secure the adjustment
S.
Rotate the clutch cab
le
lower adjuster until the play
•t
the tip
of
the clutch lever
is
J0-20mm (0.4- 0.8-
in).
Tighten the lock nu~
6.
Minor adjustmem
is
done by turning the clutch cable
upper adjuster.
7.
After the adjustment has
bce11
made, check to see that
the clutch
is
not
slipping and that the clutch
is
properly
disengaging
a
When
the kick starter
is
used, rhe engine should easily
start without
t.he
clutch slipping,
b.
After the engine
stan.
pull the clutch lever and shift
into gear. and make
sure
that
the
engine does not
stall.
northe
motorcycle start to creep.
c.
Gradually release the clutch lever and open the
throttle, the motorcycle should start smoothly
,utd
gradually accelerate.
Fig. 2-8
(I)
Throttle cable
Fig.
2-9
(I)
Clutch lever
(2)
Free play
(1) (2)
I /
I
Fig.
2-10
(I)
(2)
(3)
(4)
Fig.
2-11
(I)
(2)
Clutch cable upper adjuster
lock nut
Clutch cable upper adjuster
Clutch cable lower adjuster
Clutch cable lower adjuster lock
nut
Clutch adjuster
Clutch adjuster lock nut
 Loading...