IV.
FRAME
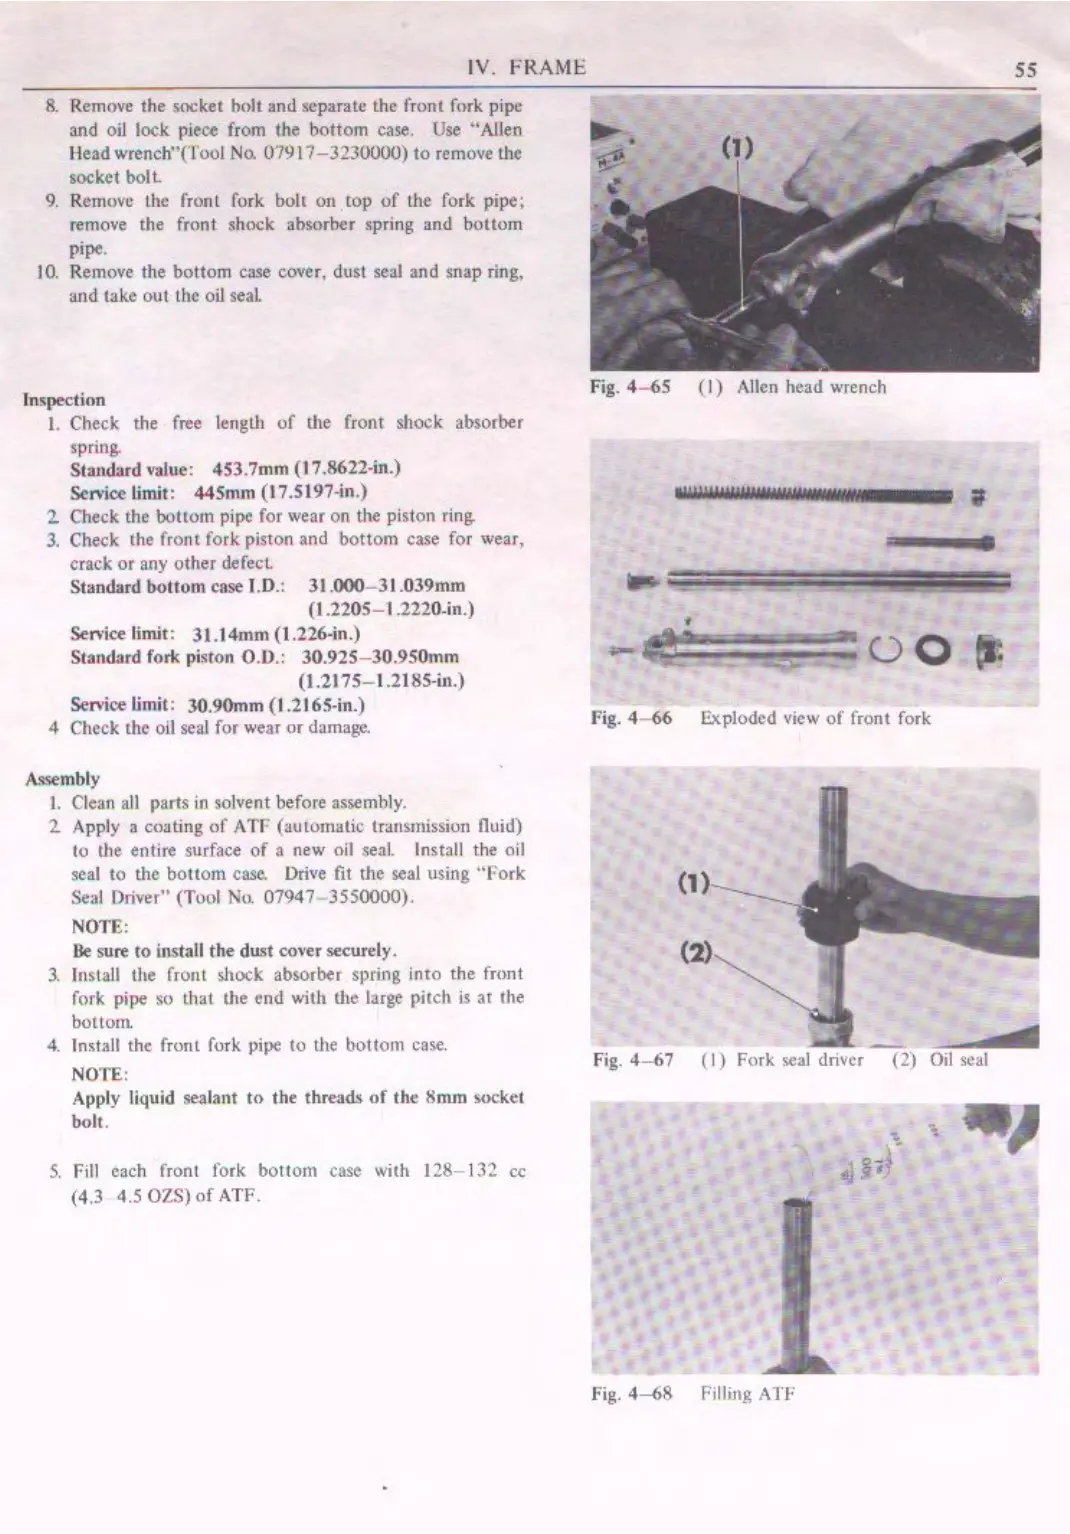
8. Remove the socket boll and separate
the
front fork pipe
and
oil lock piece from the
bottom
case. Use "Allen
Head wrench"(Tool
No.
07917-3230000)
to
remove the
socket
boll
9. Remove the front fork bolt
on
top
of
the fork pipe:
remove the front shock absorber spring and bottom
pipe.
JO.
Remove the
bottom
case cover, dust seal and snap ring,
and take
ou
t the oil sea
l.
ln~pection
I.
Check the free length
of
the front shock absorber
spring.
Standard
V11lue:
453.7mm (17.R622-in.)
Service limit:
445mm
(17.5197-in
.)
2.
Check the
bollom
pipe for wear
on
the piston ring.
3.
Check the front fork piston and
bottom
case for wear,
cra
ck
or any other defecL
Standard
bottom case
T.D.:
31.000
-3
1.039mm
(I
.220S- 1.2220.in.)
Sen
·i
ce
limit: 31.14mm (1.226-in.)
Standard
fork pi<ton O.D.:
30.92S-30.950mm
(l
.217S-l.218S-i.Jt.)
Service
limit: 30.90mm (1.216S-in.)
4 Check the oil seal
for
wear
or
damage.
Assembly
I.
Clean
all
parts
in
solvent before assembly.
2 Apply a coating
<lf
ATF (automatic transmission fluid)
to the entire surface
of
a new oil seal. Install the oil
seal
to
the
bottom
case. Drive fit
th
e seal using
"fork
Seal Driver" (Tool
No.
07947-
3550000).
NOTE:
Be
sure
to
iostall
the
dust
cover securely.
3.
Install the front shock absorber spring inro the front
fork pipe so
lhat
the e
nd
with the lar
ge
pitch
is
at
the
bouom.
4.
Install the fron( fork pipe
co
the bottom case.
NOTE:
Apply liquid sealant
to
the threads
of
the
8mm
socket
bolt.
5.
Fill each front fork
bottom
case
wich
128- 132 cc
(4.3 4.5
02S)
of
ATF.
55
Fig.
4-65
(I)
Allen head wrench
,,,,,.,,,.,,,,,,,,,,,ifiit
I ?ii I
-
Fig. 4-
66
Exploded view
of
front fork
(1)
(2)
Fig.
4-67
(I)
Fork seal driver
Oil
seal
Fig.
4-68
filling AT!'

 Loading...