Taking Care of the Unexpected 169
If You Have a Flat Tire
Refer to Important Safety Precautions on page 33.
We recommend wheel removal be done only by
your dealer or another qualified mechanic. Do not
attempt to remove the wheel on your own. Wheel
removal requires mechanical skill and professional
tools.
Removal
1. Place your motorcycle on an optional
workstand or equivalent support with the rear
wheel off the ground.
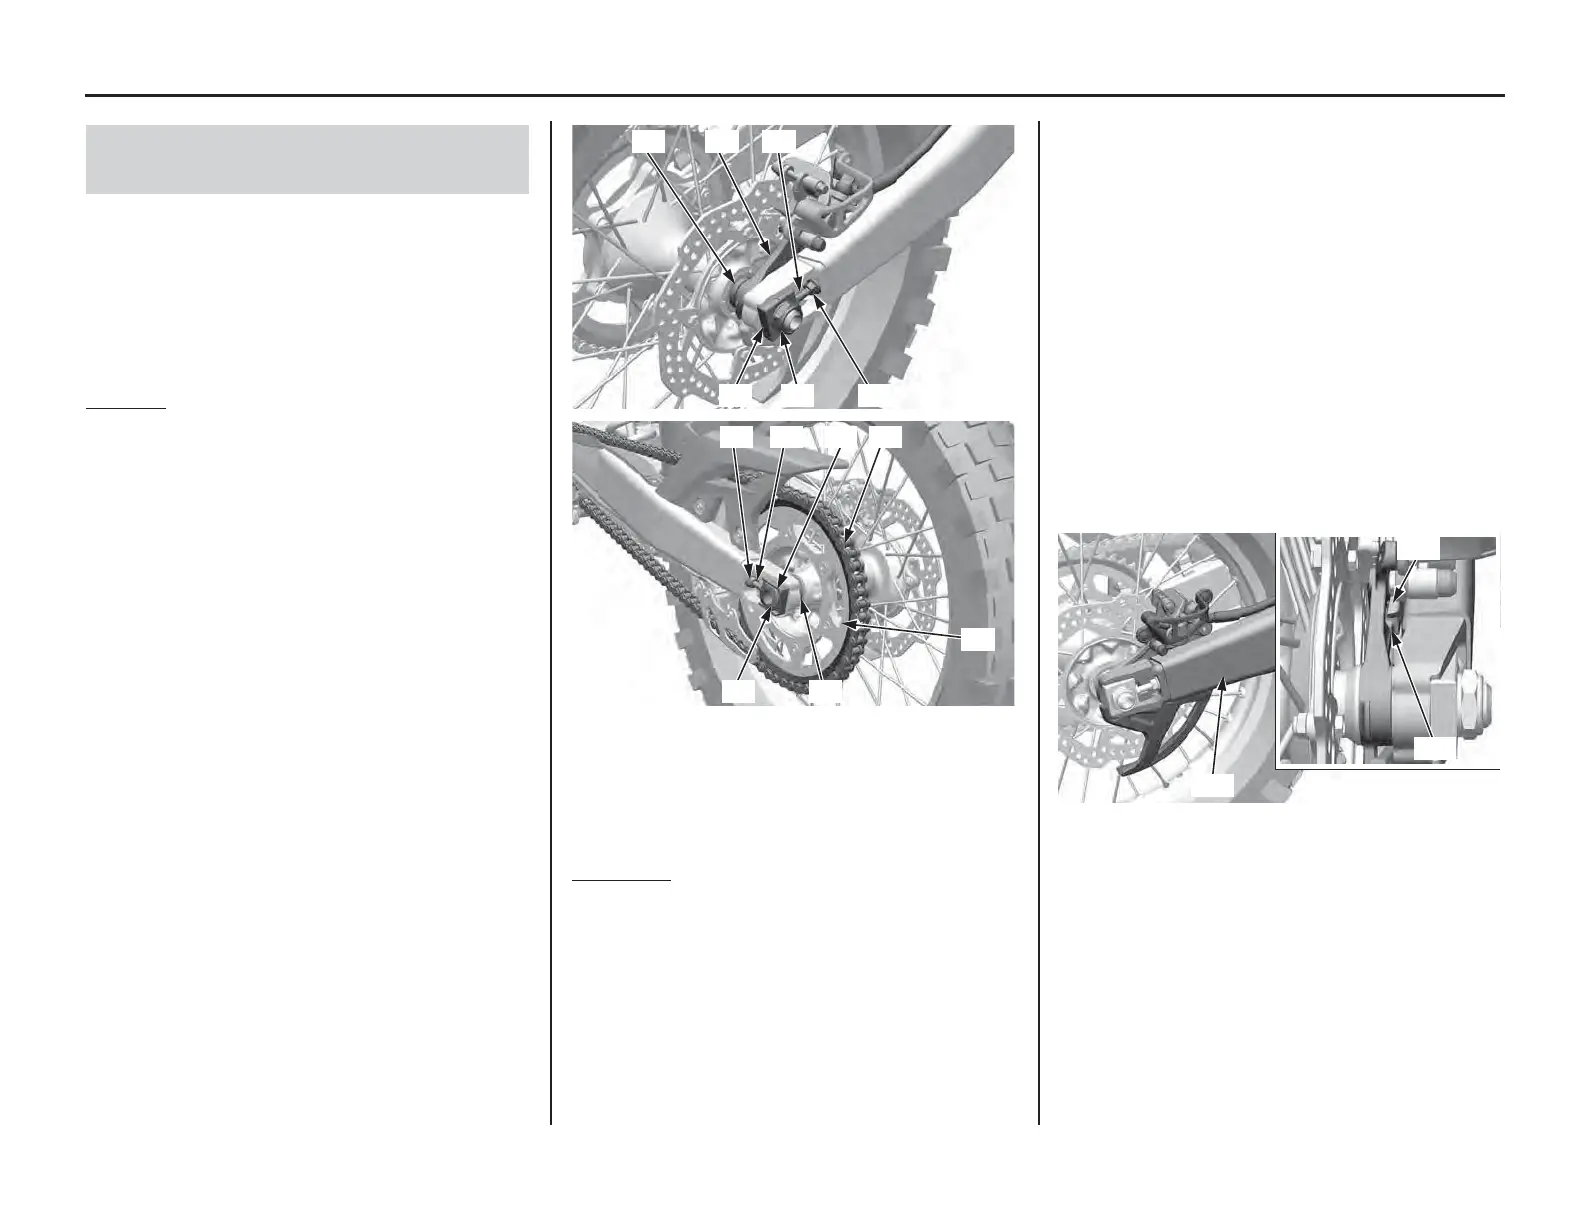
2. Loosen the rear axle nut (1) and lock nuts (2) ,
and turn the adjusting bolts (3) so the rear
wheel can be moved all the way forward for
maximum drive chain slack.
3. Remove the rear axle nut.
4. Remove the drive chain (4) from the driven
sprocket (5) by pushing the rear wheel
forward.
5. Remove the rear axle shaft (6) and adjusting
plates (7).
6. Remove the brake caliper bracket (8), rear
wheel and side collars (9).
• Support the brake caliper assembly so that it
doesn't hang from the brake hose. Do not
twist the brake hose.
• Avoid getting grease, oil, or dirt on the disc
or pad surfaces.
• Do not push the brake pedal while the wheel
is removed.
Installation
1. Install the side collars and position the wheel
and rear brake bracket.
• While installing the wheel, carefully fit the
brake disc between the brake pads to avoid
damaging the pads.
• Avoid getting grease, oil, or dirt on the disc
or pad surfaces. Any contamination can
cause poor brake performance or rapid pad
wear after reassembly.
2. Make sure that the lug (10) on the caliper
bracket is positioned in the slot (11) on the
swingarm (12).
3. Insert the rear axle shaft from the left side,
through the left swingarm, wheel hub and
caliper bracket.
4. Install the drive chain by pushing the rear
wheel forward.
5. Install the rear axle nut and adjust the drive
chain slack. Refer to drive chain adjustment
(page 131).
6. Tighten the rear axle nut to the specified
torque:
94 lbf·ft (128 N·m, 13.1 kgf·m)
Failure to provide adequate disc-to-rear brake
bracket clearance may damage the brake discs
and impair braking efficiency.
7. After installing the wheel, apply the brakes
several times, then recheck both discs for
caliper holder to disc clearance. Do not operate
the motorcycle without adequate clearance.
If a torque wrench is not used for installation,
see your dealer as soon as possible to verify
proper assembly. Improper assembly may lead
to loss of braking capability.
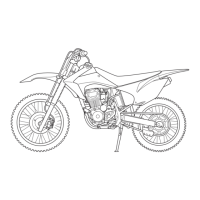
Emergency Rear Wheel Removal/
Installation
(1) rear axle nut (6) rear axle shaft
(2) lock nuts (7) adjusting plates
(3) adjusting bolts (8) brake caliper bracket
(4) drive chain (9) side collars
(5) driven sprocket
(2)(1)(7)
(3)(9) (8)
(10) lug (12) swingarm
(11) slot
 Loading...