11-13
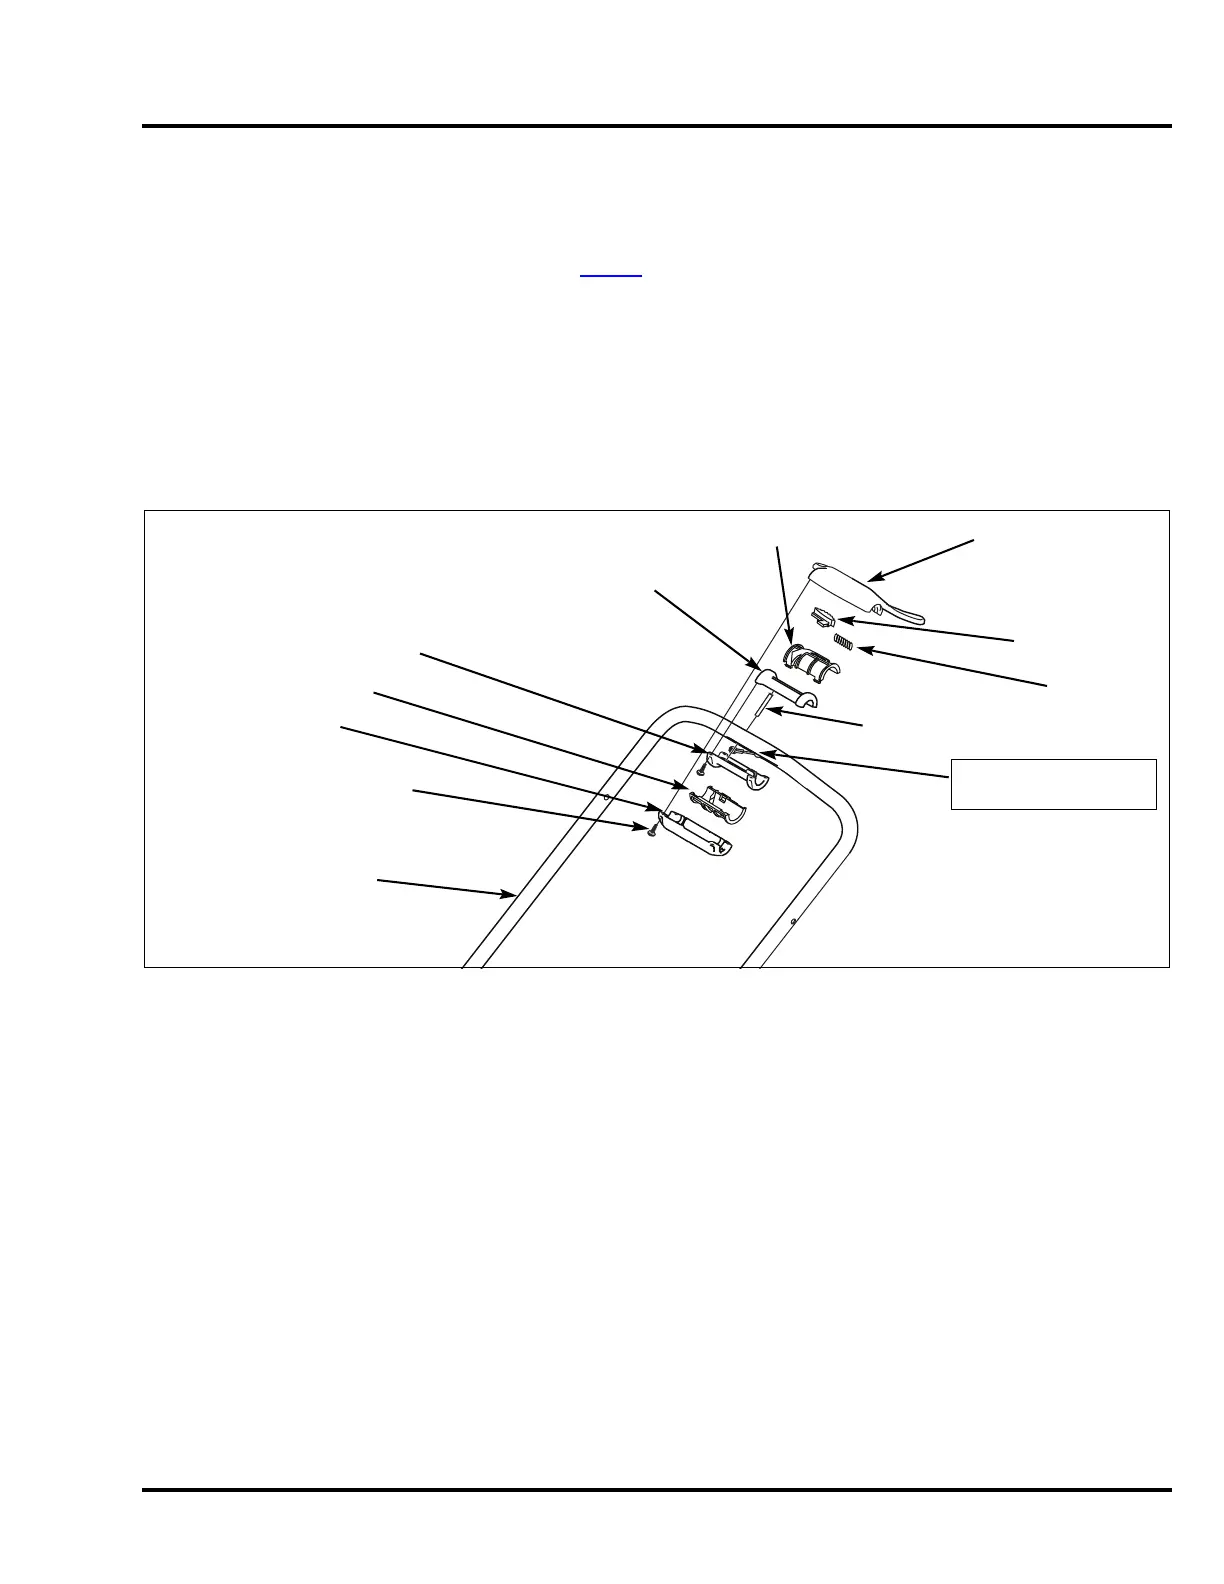
HRN216 HANDLEBAR/ CABLES/CONTROLS
2. SMART DRIVE CONTROL
REMOVAL
1. Fully loosen the Smart Drive cable adjuster (P. 3-10).
2. Remove the four 4 mm self-tapping screws and the upper and lower clutch grips.
3. Carefully remove the multi-position adjuster and spring.
4. Unsnap and remove the upper and lower bracket covers.
5. Remove the 5 x 37 mm roller pin, the four 4 mm self-tapping screws, and the upper and lower grip brackets
SMART DRIVE CABLE
REMOVAL/
INSTALLATION: P. 11 -1 6
SPRING
LOWER CLUTCH GRIP
MULTI-POSITION
ADJUSTER
UPPER GRIP BRACKET
5 x 37 mm
ROLLER PIN
4 mm SELF-TAPPING SCREW (8)
UPPER BRACKET COVER
UPPER CLUTCH GRIP
HANDLEBAR
LOWER BRACKET COVER
LOWER GRIP BRACKET
(the flywheel brake lever and cable
are shown removed for clarity.)

 Loading...