3-4
MAINTENANCE HRN216
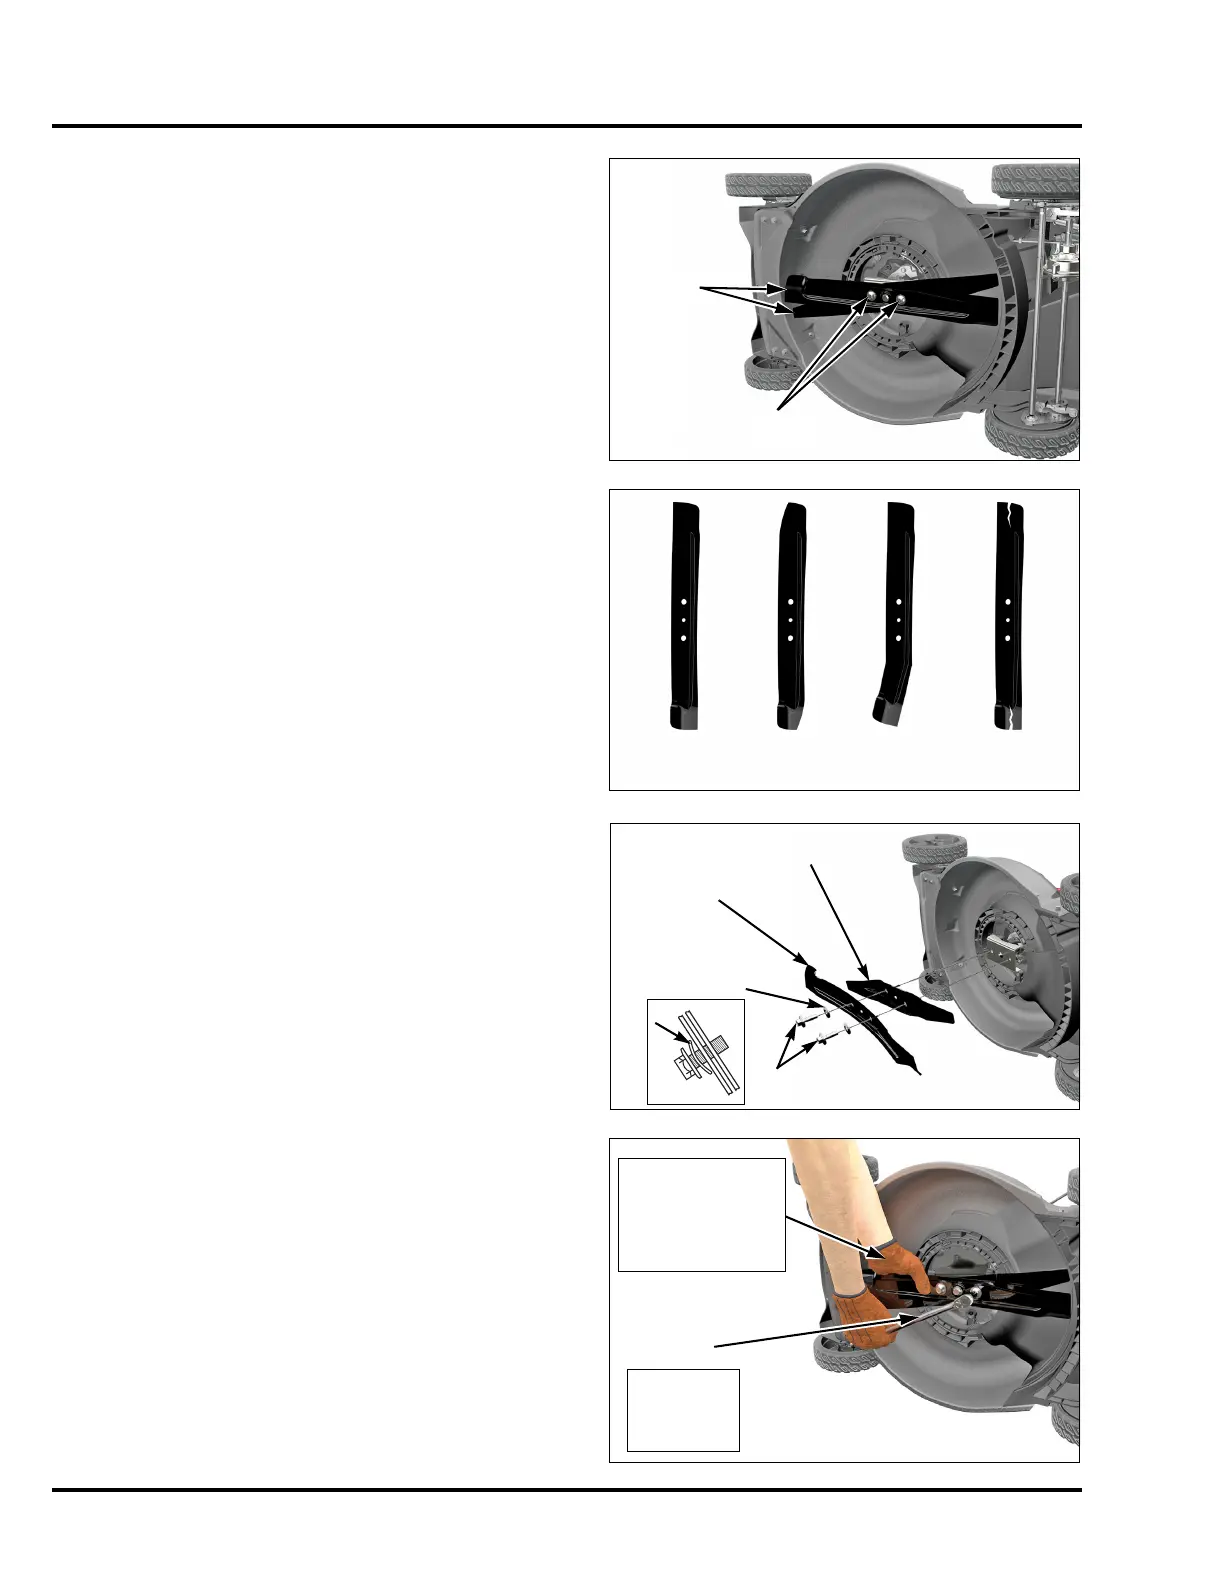
5. BLADES
INSPECTION
1. Turn the fuel valve to the OFF position. This will reduce
the possibility of fuel leakage when the mower is tilted.
2. Disconnect the spark plug cap.
3. Tilt the mower on its right side, so the carburetor is up.
4. Inspect the blades for damage, cracks, and excessive
wear, rust, or corrosion.
5. Dull blades can be sharpened, but blades that are
worn out, bent, cracked, or otherwise damaged must be
replaced.
REMOVAL/INSTALLATION
1. Turn the fuel valve to the OFF position, disconnect the
spark plug, and tilt the mower on its right side.
2. Remove the blade bolts and special washers from the
blade holder (PKA/VKA/VLA) or Roto-Stop
®
(VYA)
assembly. Use a pair of thick leather gloves to hold the
blades with your hand to prevent the blades from turning
when removing the bolt.
3. Clean dirt and grass from around the blade mounting area.
4. Install the blades using the two blade bolts and special
washers, as shown.
Install the special washers with the concave side toward
the blades and the convex side toward the head of the
bolts.
The blade bolts are specially designed for this application
and must not be replaced with other bolts.
5. Tighten the blade bolts to the torque specification below.
Use a pair of thick leather gloves to hold the blades with
your hand to prevent the blades from turning when
tightening the bolts.
TORQUE: 54 N•m (40 ft-lb)
NORMAL
EXCESSIVELY
WORN
BENT
CRACKED
UPPER BLADE
LOWER
BLADE
SPECIAL
WASHER (2)
BLADE BOLTS (2)
TORQUE
WRENCH
TORQUE:
54 N•m
(40 ft-lb)
Wear thick leather
gloves to hold the
blades with your
hand to prevent the
blades from turning.
 Loading...