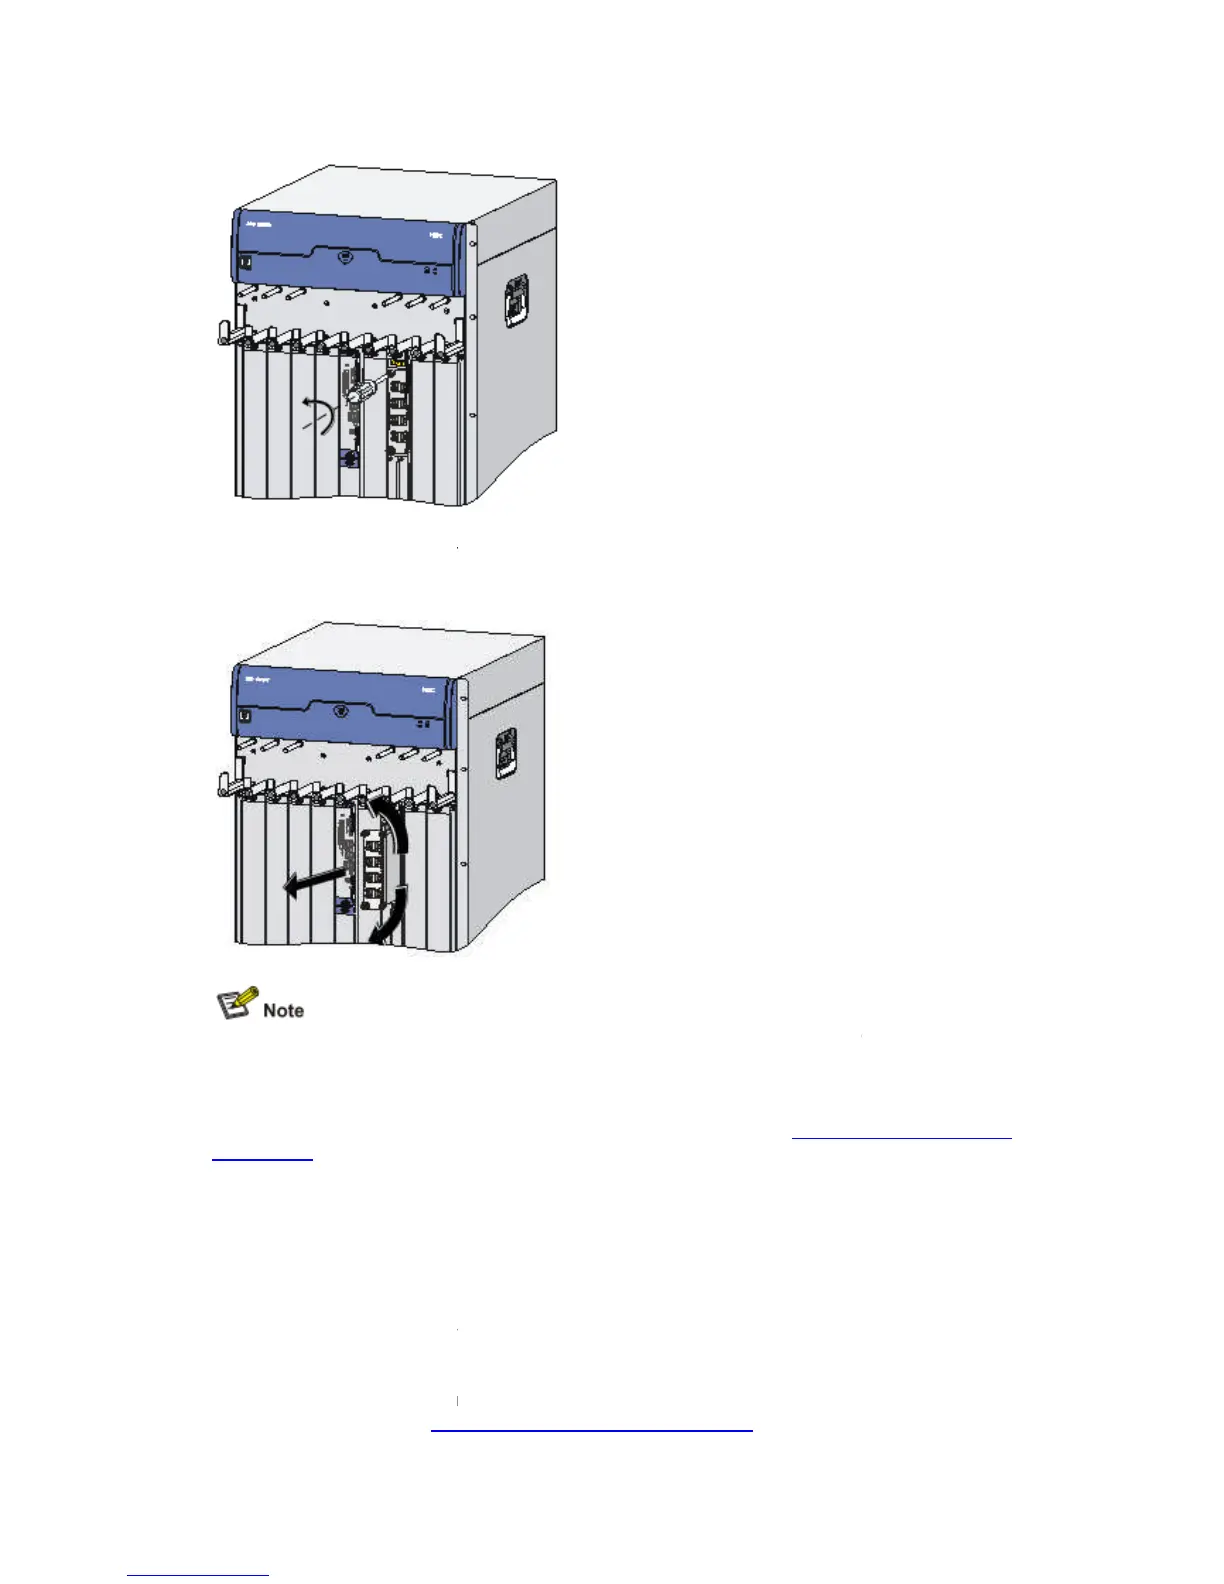
Loosen the captive screws
Pull the two ejector levers at both ends of the HIM outward to release the HIM, and then pull
the HIM out along the slide rails.
Before pulling a HIM out of a slot, loosen all the two captive screws.
HIM may be seriously deformed.
To protect the removed HIM, place it in an antistatic bag.
If you do not install a new HIM in the same slot, install two HIM blank panels to prevent dust
assis. For how to install a blank panel, refer to “
Blank Panel” on page 4-38.
Installing and Removing a MIM
Follow these steps to install a MIM:
Face the front panel of the router.
Locate the slot where you will install the MIM.
Remove the blank panel from the position where you will install the MIM. For how to remove
the blank panels, refer to “
Installing and Removing a Blank Panel
Loosen the captive screws
Pull the two ejector levers at both ends of the HIM outward to release the HIM, and then pull
the HIM out along the slide rails.
Before pulling a HIM out of a slot, loosen all the two captive screws.
Otherwise, the panel of the
HIM may be seriously deformed.
To protect the removed HIM, place it in an antistatic bag.
If you do not install a new HIM in the same slot, install two HIM blank panels to prevent dust
assis. For how to install a blank panel, refer to “
Installing and Removing a
Installing and Removing a MIM
Follow these steps to install a MIM:
Face the front panel of the router.
Locate the slot where you will install the MIM.
Remove the blank panel from the position where you will install the MIM. For how to remove
Installing and Removing a Blank Panel
Pull the two ejector levers at both ends of the HIM outward to release the HIM, and then pull
Otherwise, the panel of the
If you do not install a new HIM in the same slot, install two HIM blank panels to prevent dust
Installing and Removing a
Remove the blank panel from the position where you will install the MIM. For how to remove
 Loading...