 Loading...
Do you have a question about the HP ZBook 15u G5 and is the answer not in the manual?
| Form factor | Clamshell |
|---|---|
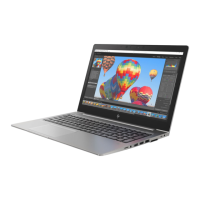
| Product type | Mobile workstation |
| Product color | Gray |
| Country of origin | China |
| Panel type | UWVA |
| Touchscreen | - |
| LED backlight | Yes |
| Display diagonal | 15.6 \ |
| Native aspect ratio | 16:9 |
| Memory slots | 2x SO-DIMM |
| Memory clock speed | 2400 MHz |
| Memory form factor | SO-DIMM |
| Internal memory type | DDR4-SDRAM |
| Maximum internal memory | 32 GB |
| SSD capacity | The Solid State Drive's storage capacity in Gigabytes. |
| Storage media | SSD |
| Total storage capacity | 512 GB |
| Compatible memory cards | SD, SDHC, SDXC |
| Number of SSDs installed | 1 |
| Number of built-in speakers | 2 |
| HP segment | Business |
| HP speaker type | HP Dual Speakers |
| Front camera HD type | HD |
| HDMI version | 1.4 |
| USB 2.0 ports quantity | USB 2.0 ports have a data transmission speed of 480 Mbps, and are backwards compatible with USB 1.1 ports. You can connect all kinds of peripheral devices to them. |
| USB 3.2 Gen 2 (3.1 Gen 2) Type-C ports quantity | 0 |
| Wi-Fi standards | 802.11a, Wi-Fi 5 (802.11ac), 802.11b, 802.11g, Wi-Fi 4 (802.11n) |
| Top Wi-Fi standard | Wi-Fi 5 (802.11ac) |
| Ethernet LAN data rates | 10, 100, 1000 Mbit/s |
| Pointing device | Touchpad |
| AC adapter power | - W |
| On-board graphics card ID | 0x5917 |
| On-board graphics card model | Intel® UHD Graphics 620 |
| On-board graphics card family | Intel® UHD Graphics |
| On-board graphics card OpenGL version | 4.4 |
| On-board graphics card base frequency | 300 MHz |
| On-board graphics card DirectX version | 12.0 |
| On-board graphics card dynamic frequency (max) | 1150 MHz |
| Battery capacity | 56 Wh |
| Number of battery cells | 3 |
| Bus type | OPI |
| Stepping | Y0 |
| Tjunction | 100 °C |
| Processor cache | 8 MB |
| Processor cores | 4 |
| System bus rate | 4 GT/s |
| Processor family | Intel® Core™ i7 |
| Processor socket | BGA 1356 |
| Processor threads | 8 |
| Processor codename | Kaby Lake R |
| Configurable TDP-up | 25 W |
| Processor frequency | 1.9 GHz |
| Configurable TDP-down | 10 W |
| Processor lithography | 14 nm |
| Processor manufacturer | Intel |
| PCI Express slots version | 3.0 |
| Processor boost frequency | 4.2 GHz |
| Processor operating modes | 64-bit |
| PCI Express configurations | 1x2+2x1, 1x4, 2x2, 4x1 |
| Thermal Design Power (TDP) | 15 W |
| Configurable TDP-up frequency | 2.1 GHz |
| Configurable TDP-down frequency | 0.8 GHz |
| Maximum number of PCI Express lanes | 12 |
| Processor code | SR3L8 |
| Processor ARK ID | 124968 |
| Processor package size | 42 x 24 mm |
| Supported instruction sets | AVX 2.0, SSE4.1, SSE4.2 |
| Intel Identity Protection Technology version | 1.00 |
| Depth | 251 mm |
|---|---|
| Width | 370.8 mm |
| Height | 18.6 mm |
| Weight | 1770 g |