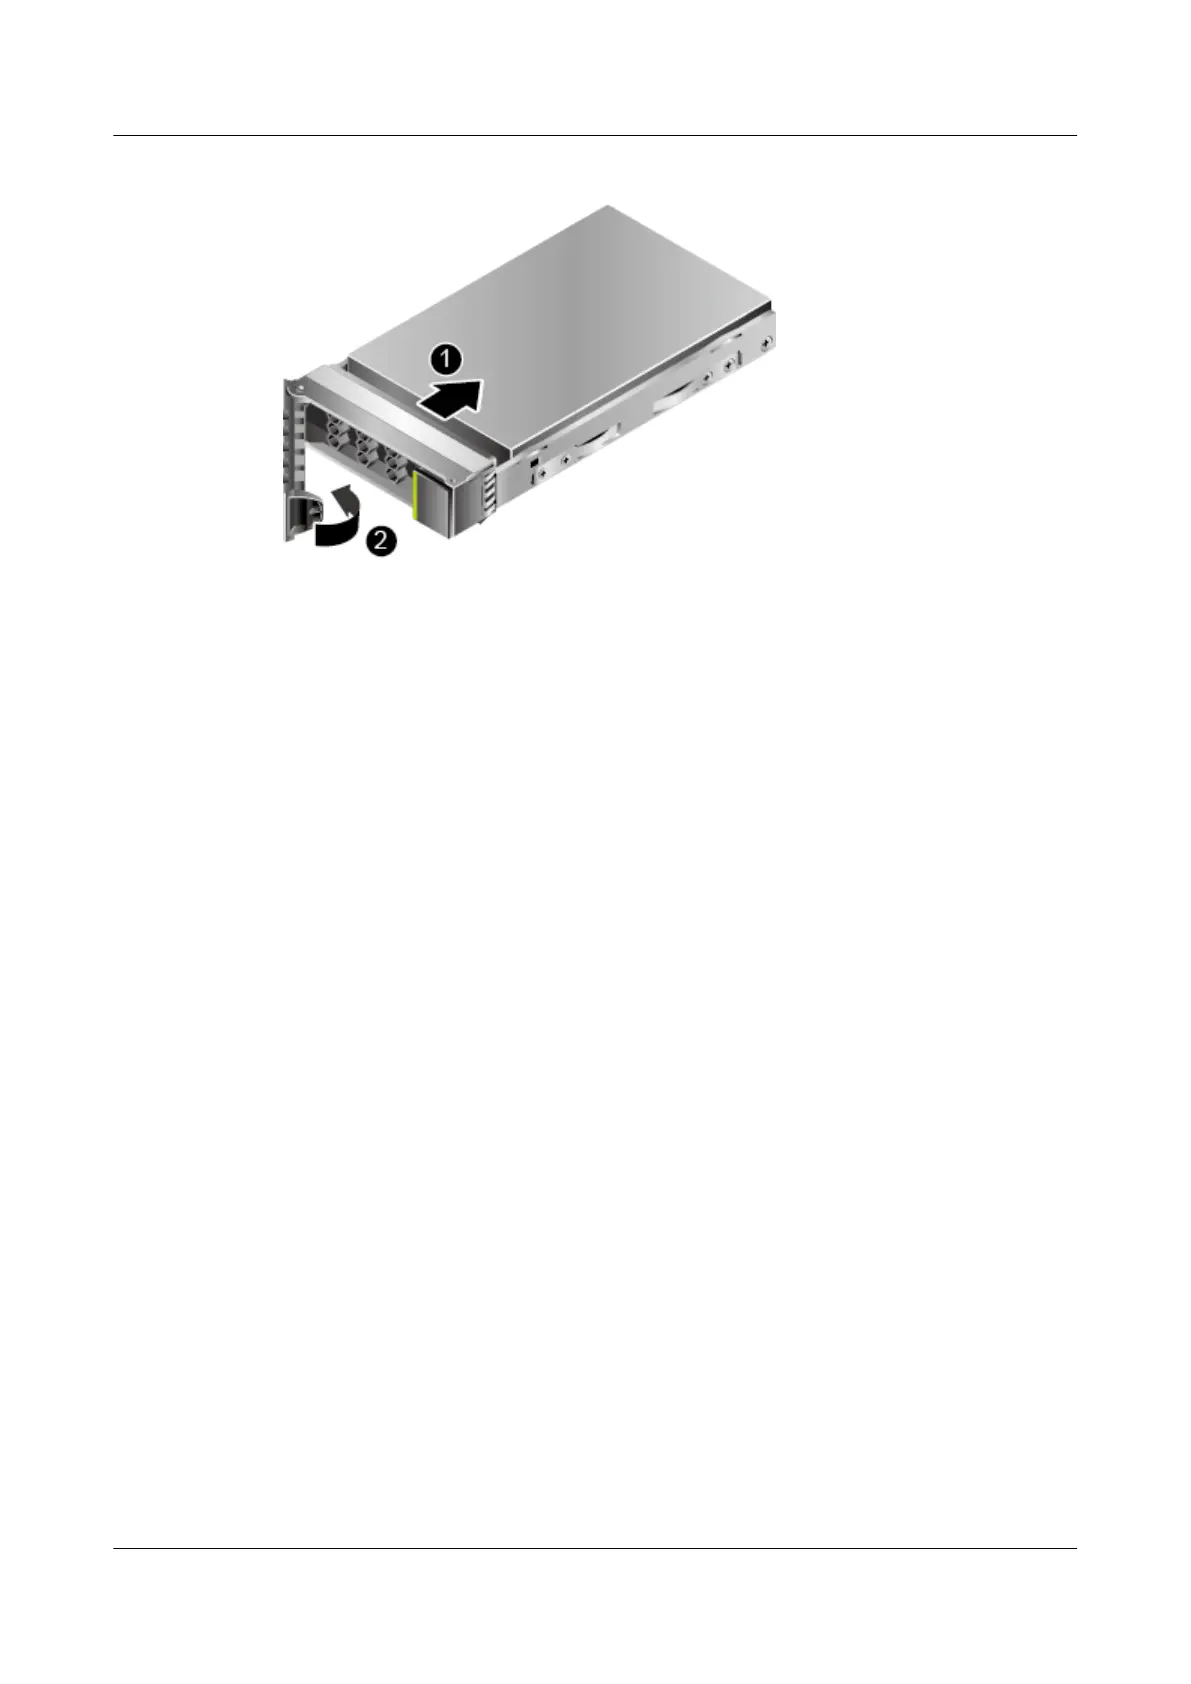
Figure 5-18 Installing a drive
Step 6 Ensure that the ejector lever is fastened to the chassis beam, and then close it to
completely insert the drive into the chassis. See (2) in Figure 5-18.
Step 7 If the server is equipped with a front bezel, install the bezel after installing the
front drives. For details, see 5.5 (Optional) Front Bezel.
Step 8 After the drive is installed, if you need to restore the data on the new drive, see
Troubleshooting > Hard Drive Fault for the corresponding RAID controller card in
the
TaiShan Server RAID Controller Card User Guide
.
Step 9 Log in to the iBMC WebUI, and check whether the new component is normal. For
details, see the
TaiShan Rack Server iBMC User Guide
.
----End
5.7 PSU
5.7.1 AC PSU
Removing an AC PSU
Step 1 Wear an ESD wrist strap. For details, see 5.2 ESD Protection.
Step 2 Determine the rack number and chassis number of the server to be removed, and
label its panel to prevent misoperations.
Step 3 (Optional) Power
o the server. For details, see 5.4.2 Powering O the Server.
TaiShan 200 Server
Maintenance and Service Guide (Model 2280) 5 Removal and Installation
Issue 04 (2020-01-16) Copyright © Huawei Technologies Co., Ltd. 91
 Loading...