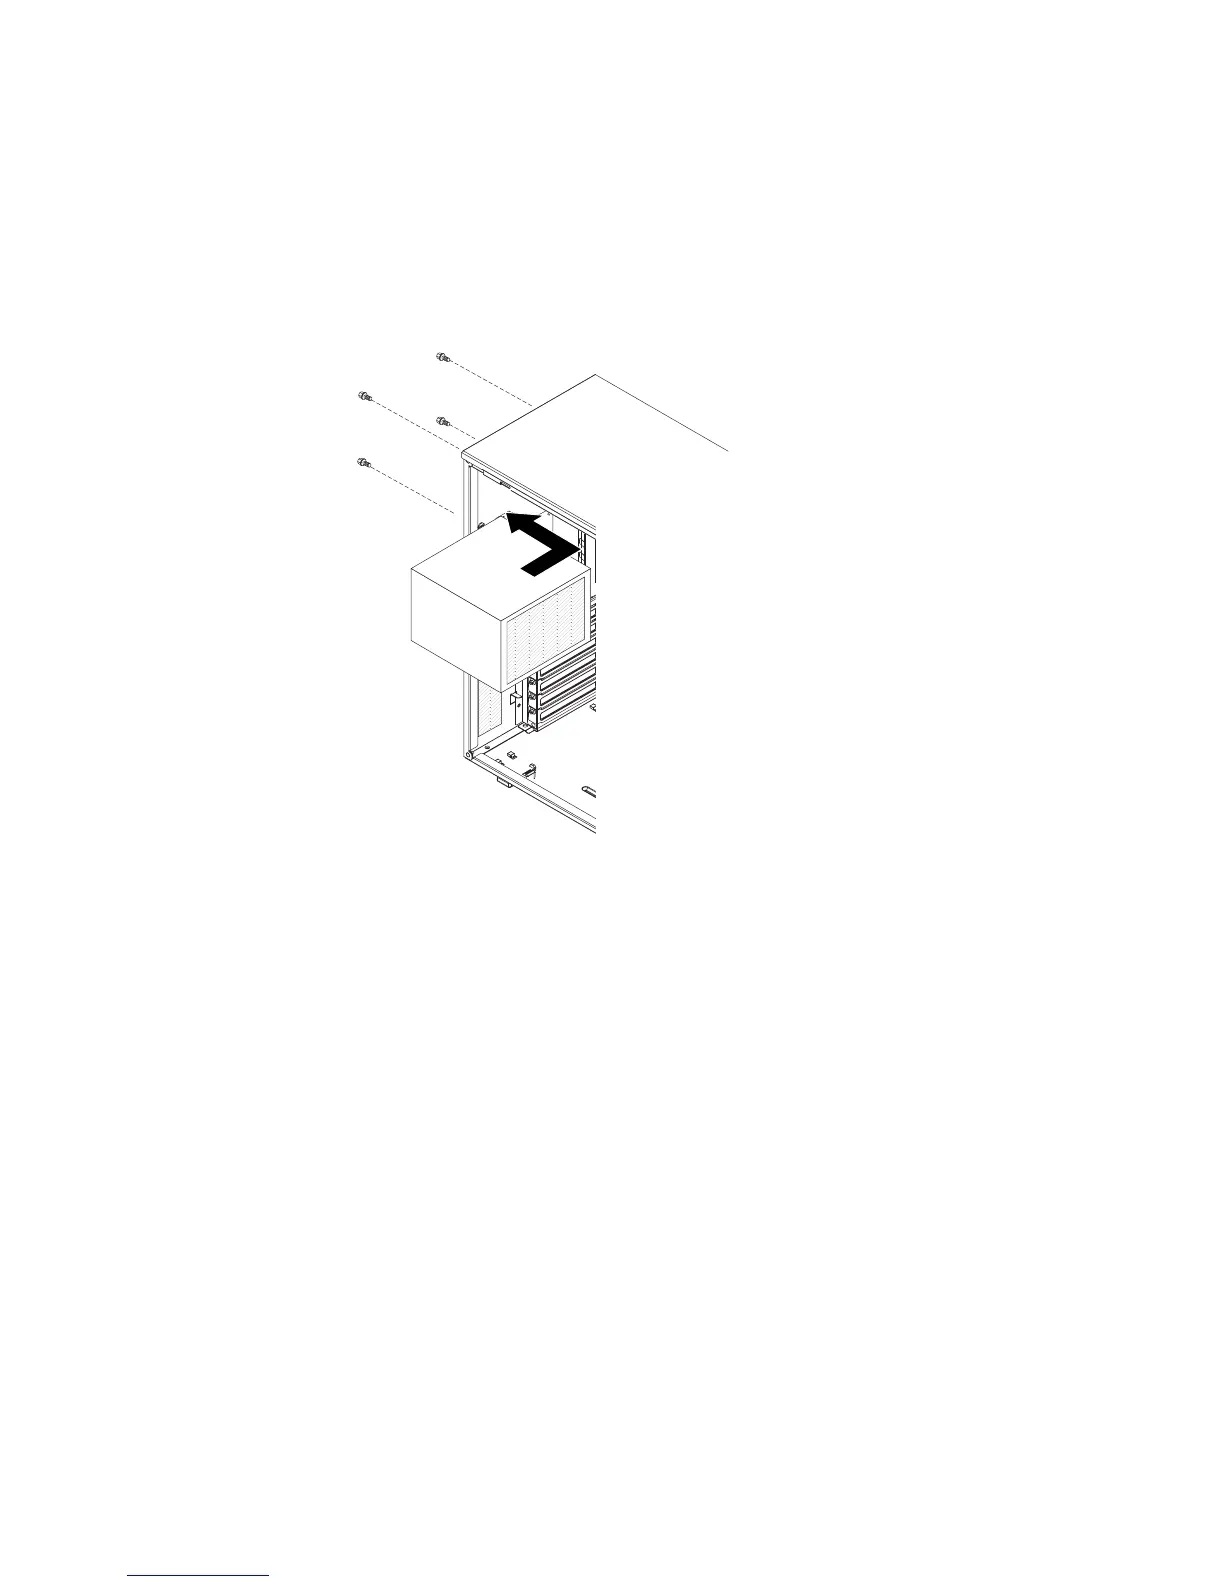
Installing a non-hot-swap power supply
This procedure applies only to server models that have a non-hot-swap power
supply. See “Installing a hot-swap power supply” on page 167 for information about
the installation of a hot-swap power supply.
To install a non-hot-swap power supply, complete the following steps:
1. Position the power supply in the chassis so that the screw holes in the power
supply are aligned with the corresponding holes in the rear of the chassis.
2. Install the four screws that secure the power supply to the chassis.
3. Connect the cables from the power supply to the system board and all internal
components (see “System-board internal connectors” on page 16 for the
locations of the internal connectors).
4. Install the side cover (see “Installing the side cover” on page 146).
5. Lock the side cover if you unlocked it during removal.
6. Reconnect the external cables and power cords; then, turn on the attached
devices and turn on the server.
208 System x3200 M3 Types 7327 and 7328: Problem Determination and Service Guide
 Loading...